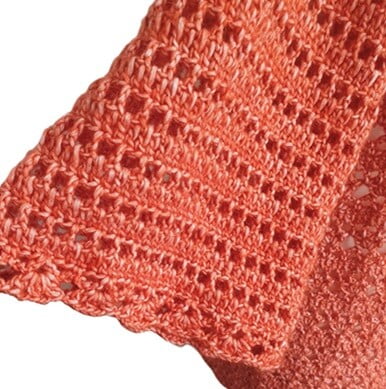
My crochet summer cardigan is the perfect addition to your wardrobe for those warm-weather days when you need a light layer of elegance. The lacy pattern features a seamless construction and I’ve offered options for both the length of the cardigan and the sleeves.
Available in sizes S through to 5X, the free pattern below is written in UK crochet terms and US crochet terms.
If you prefer to work from a PDF, you can upgrade in my Etsy and Ravelry shops.

Enjoy my crochet patterns and blog posts?
Add Jera’s Jamboree as a preferred source on Google, Just click below and tick the box to add me.
Jump to: Sizing | Materials | Free Pattern UK | Free Pattern US
Why you’ll Love Crocheting this Summer Cardigan
Skill Level
Easy

Sizing
Sizes are based on the guidance from the Craft Yarn Council.
Yarn amounts are approximate.
| To Fit (inches) | Actual Width (inches) | Actual Length (inches) | Amount of Yarn (yards) |
| 32 – 34 | 36 | 27 | 945 |
| 36 – 38 | 40 | 27.5 | 1052 |
| 40 – 42 | 44 | 28 | 1162 |
| 44 – 46 | 48 | 28.5 | 1275 |
| 48 – 50 | 52 | 29 | 1392 |
| 52 – 54 | 56 | 29.5 | 1412 |
| 56 – 58 | 60 | 30 | 1635 |
| 60 – 62 | 64 | 30.5 | 1762 |
Note: If you amend this pattern you will need more or less yarn that stated.
Jera’s Jamboree receives payments for affiliate advertising. This is at no extra cost to you. As an Amazon Associate I earn from qualifying purchases. Please see my disclosure policy for more information.
Supplies and Materials
- 4mm / G/6 Crochet Hook
- Yarnsmiths Pebble Haze DK; 945, (1052, 1162, 1275, 1392, 1412, 1635, 1762) yds
- Stitch Markers
- Scissors
- Yarn Needle
Yarn Choices
I had my eye on Yarnsmiths Pebble Haze DK, drawn to the cotton/acrylic blend and imagining that it would be lovely and soft to work with and to wear (and it is!), so when my sons clubbed together and bought me a Wool Warehouse voucher for Mother’s Day, Pebble Haze went straight into my basket.
There are 20 gorgeous shades available (inspired by beaches, pebbles and stones) and I chose Wulfenite for this summer cardigan.
Be aware that Pebble Haze is a blown yarn, where instead of spinning, the fibres are air blown into a tube. The shades vary in each ball and between balls of the same colour. I bought more than I needed for this project and had 4 balls that didn’t match (however those 4 balls match each other and I’ll be able to use on other projects).
I’ve also used the Aran weight of this yarn in my Fireside Plaid blanket. Both weights have excellent stitch definition and are smooth to work with.
If you substitute the yarn, using the stitch gauge converter tool will help you adjust your stitches.
| Yarn Weight | DK |
| Ball Weight | 50g |
| Length | 145 metres / 158 yds |
| Blend | 33% acrylic / 67% cotton |
| CARE INSTRUCTIONS |
| Washing 30 – Mild |
| Do Not Bleach |
| Iron – Low / 110 |
| PCE Dry Clean – Gentle |
| Tumble Dry – Low / 60 |
Gauge
17 stitches and 9 rows on a 4mm hook = 10cm X 10cm
How the Summer Cardigan Pattern is Worked
My seamless summer cardigan is worked in an open crochet stitch pattern:
- from the length to the underarm the stitch pattern is lacy and worked in a 4-row repeat. This part of the pattern is flexible allowing you to change the length – more pattern repeats will make the cardigan longer; less repeats will make it shorter. (This stitch looks quite different worked in several bright colours as in my Maisie poncho).

- from the armholes to the neck, I’ve used two rows of UK treble/US double crochet and one row of chain 1, treble/double.

- the three-quarter sleeves are worked in one row of treble/double and one row of chain 1, treble/double. I’ve designed the stitch pattern for the sleeves to give you options. If you prefer bracelet length sleeves you can easily repeat the two rows or continue until the sleeve reaches your preferred length. Equally, leaving off the sleeves will change the design to short-sleeve. The final row of the sleeves uses two rows from the lacy pattern to give a decorative edging and ties the design as a whole together.
There is no ribbed hem, cuffs or edging in my cardigan pattern. The hem of the cardigan is the first row of the lower panel, I’ve already mentioned the sleeves above and the stitches for the fronts are so neat that no edging is needed. However, if you prefer, you can crochet a row of double/single crochet around the fronts and neck.

- From the hem to underarm, the cardigan is crocheted in one piece, worked flat and turned to work in rows.
- The piece is then divided from the armholes to work the
- right front, back and left front of the cardigan separately. The design continues to work flat and is turned to work in rows.
- Next, the shoulders are seamed. The left front and right front are sewn to the back piece to create the shoulder seams.
- The sleeves are worked directly into the armhole, worked in rounds, joined with a slip stitch and turned.

Stitches and Abbreviations
I’ve used the stitches and abbreviations below in this summer cardigan pattern.
If you need help with working these stitches, follow the instructions in the stitch library.
| UK Crochet Terms | US Crochet Terms |
| Double Crochet (dc) | Single Crochet (sc) |
| Treble Crochet (tr) | Double Crochet (dc) |
| Double Treble Crochet (dtr) | Treble Crochet (tr) |
| 2 Treble Crochet Cluster (2trCl) | 2 Double Crochet Cluster (2dcCl) |
| V-Stitch (V-st): [1tr, ch2, 1tr] into same space/stitch | V-Stitch (V-st) [1dc, ch2, 1dc] into same space/stitch |
- Chain = ch
- Chain Space – ch-sp
- Each = ea
- Skip = sk
- Repeat = rep
- Right Side = RS
- Slip Stitch – sl st
- Stitch/es = st/s
- Stitch Marker = st marker
- Wrong Side = WS
Cardigan Pattern Notes
- Pattern instructions, stitches and abbreviations are written in both UK and US crochet terms
- The lower piece stitch pattern is worked in multiples of 6 plus 3. Add on 3 chains for your starting chain
- Size instructions are written starting with the smallest size like this S, (M, L, XL, 2X, 3X, 4X, 5X)
- Chain three counts as a stitch
- Chain four counts as a stitch
- Row 41 chain spaces count as a stitch
- Pattern repeats are noted with an asterisk *
- A sequence of stitches are noted within brackets [ ]
- When you’ve finished working Row 2 (the first time and for the repeats), check before moving on to the next row. It’s easy to work the wrong stitch in the sequence and it will save you frustration!
- Row 3 ends at the last cluster of the row, do not work the chain 1
- Remember to turn at the end of a round for the sleeves
- To alter the length, work less rows in the lower panel for a shorter cardigan and more rows for longer. You’ll need to work in the four-row repeat of the lacy pattern, ending with row 4
- To alter the sleeve to bracelet length, continue repeating the two rows ending on round 2. Keep in mind that the lacy edging for the cuff measures 1” / 2.54 cm
- To alter the cardigan to short sleeve/sleeveless, simply omit the sleeves (see image below)
- Weave in ends as you go
- If you make any alterations to my written pattern, you will need more or less yarn than stated


Purchase the easy-to-read print-friendly PDF (ad free)
Included in the crochet cardigan pattern is:
- how the pattern is worked
- pattern notes
- clear written instructions
Testimonials
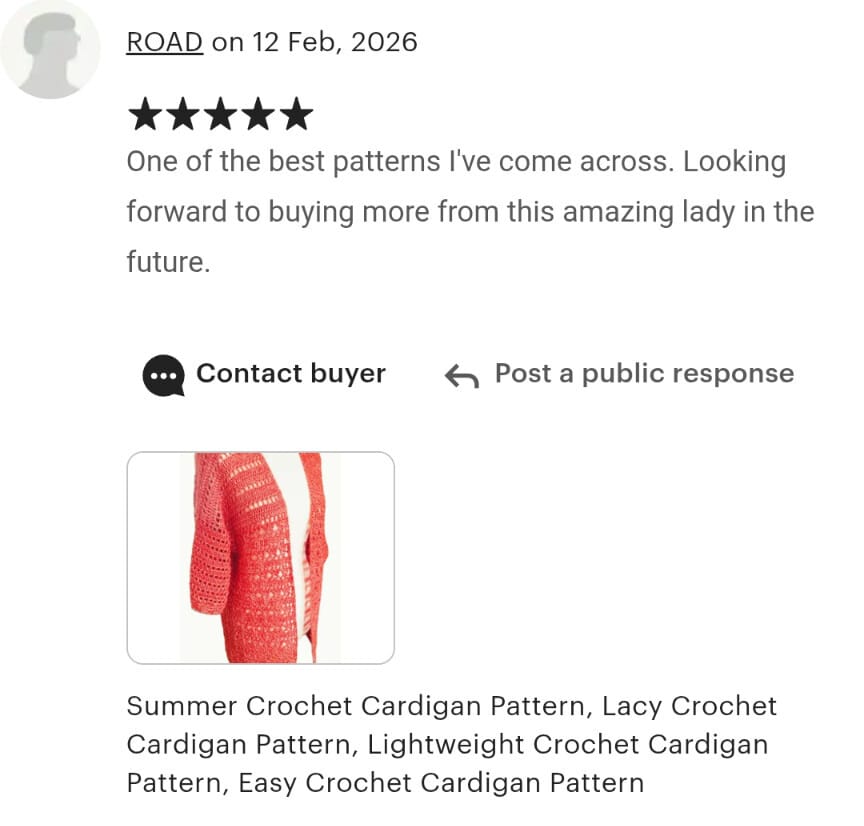
12th Feb 2026 5 star Etsy review: “One of the best patterns I’ve come across. Looking forward to buying more from this amazing lady in the future.”

Five-star customer review from Etsy 11 Jun 2025 “The pattern is adorable and the instructions are straightforward and user-friendly.”
Instructions Summer Cardigan Pattern UK Crochet Terms
Lower Panel
Ch 162 (180, 198, 216, 234, 252, 264, 282)
Row 1 (RS): Starting in the 5th ch from hook, tr in each st across, ch3, turn (159, 177, 195, 213, 231, 249, 261, 279 tr)
Row 2: tr in next st, *[ch 2, miss 2 sts, V-st in next st, ch 2, miss 2 sts, dc in next st], * rep across, tr in last st, ch4, turn
Row 3: dtr in next st, working in the V-st ch2-sps, *[2trCl, ch 2] twice, 2trCl], ch 1; * rep across ending at 2trCl, dtr in each of the last 2 sts, ch3, turn
Row 4: tr in next st, ch 1, working in the ch-sps only [tr, ch 1] in each ch2-sp and ch1-sp across, tr in each last two sts, ch3, turn
Row 5: tr in each st and sp across
Rows 2-5 form stitch pattern
Rep rows 2 – 5 for a total of 40 rows (ending on row 4)
Adjusting Length: if you prefer a cropped or longer cardigan, the amount of row 2 – 5 repeats is where you’ll need to adjust. The number of rows above is the cardigan’s length from the armhole to the hem. Measure underarm to the hem and work rows 2 – 5 (ending on a row 4) to the length you want. This will not affect the front of the cardigan.
Divide for Fronts and Back
Right Front
Row 41: tr in next 35, (39, 44, 45, 50, 54, 56, 61) sts and sps, count 4, (4, 4, 7, 7, 7, 11, 11) sts, place a st marker in the next st, ch3, turn leaving rem sts unworked (36, 40, 45, 46, 51, 55, 57, 62 tr)
Row 42: rep row 5
Row 43: tr in next st, *ch 1, sk1 st, tr in next st, *rep to last 2 sts, tr in last 2 sts, ch3, turn
Row 44: rep row 5
Row 45 to 56, (57, 58, 59, 61, 62, 63, 64) rep rows 42 to 44
S, M, XL, 3X, 4X ONLY
Fasten off leaving a long tail for sewing the shoulder seam
L, 2X, 5X ONLY
Next row rep row 42
Fasten off leaving a long tail for sewing the shoulder seam.
Back
Rejoin yarn at st marker
Row 41: ch3, rep row 5 for 78, (88, 96, 106, 114, 124, 124, 132) sts and sps, count 4, (4, 4, 7, 7, 7, 11, 11) sts, place a st marker in the next st, ch3, turn leaving rem sts unworked (79, 89, 97, 107, 115, 125, 125, 133 tr)
Row 42: rep row 5
Row 43: tr in next st, *ch 1, sk1 st, tr in next st, *rep to last 2 sts, tr in last 2 sts, ch3, turn
Row 44: rep row 5
Row 45 to 56, (57, 58, 59, 61, 62, 63, 64) rep rows 42 to 44
S, M, XL, 3X, 4X ONLY
Fasten off
L, 2X, 5X ONLY
Next row rep row 42
Fasten off
Left Front
Rejoin yarn at st marker, ch3
Row 41: tr in ea st and sp to end (36, 40, 45, 46, 51, 55, 57, 62 tr)
Row 42: rep row 5
Row 43: tr in next st, *ch 1, sk1 st, tr in next st, *rep to last 2 sts, tr in last 2 sts, ch3, turn
Row 44: rep row 5
Row 45 to 56, (57, 58, 59, 61, 62, 63, 64) rep rows 42 to 44
S, M, XL, 3X, 4X ONLY
Fasten off leaving a long tail for sewing the seam
L, 2X, 5X ONLY
Next row rep row 42
Fasten off leaving a long tail for sewing the seam
Assembly
Working on the WS, lay cardigan out flat. Fold fronts of cardigan over and line up with the back. Sew shoulder seams.
Sleeves
Working on the WS, rejoin yarn underarm, pick up an even number of sts in Round 1
Round 1: ch3, *tr in next st, ch1, sk 1 st, * rep evenly around, join with a sl st, ch3, turn
Round 2: tr in ea st and ch-sp around, join with a sl st, ch3, turn
Rep rounds 1 and 2 for a total of 18 rounds
Adjusting Length: if you prefer bracelet length sleeve or longer three-quarter sleeves, the amount of round 1 and 2 repeats is where you’ll need to adjust. The number of rounds above is the cardigan’s sleeve three-quarter length from the armhole to the cuff. Measure your preferred arm length and work rounds ending on a round 2 to the length you want. The decorative cuff (rounds 19 and 20 below) measures 1” / 2.54 cm.
Round 19: rep row 2 from lower panel ending round ch2, sk 2, Vst in next st, tr in last st
Round 20: rep row 3 from lower panel
Fasten off
Rep on the other side.
Congratulations! Your cardigan is finished.

Instructions Summer Cardigan Pattern US Crochet Terms
Lower Panel
Ch 162 (180, 198, 216, 234, 252, 264, 282)
Row 1 (RS): Starting in the 5th ch from hook, dc in each st across, ch3, turn (159, 177, 195, 213, 231, 249, 261, 279 dc)
Row 2: dc in next st, *[ch 2, miss 2 sts, V-st in next st, ch 2, miss 2 sts, sc in next st], * rep across, dc in last st, ch4, turn
Row 3: tr in next st, working in the V-st ch2-sps, *[2dcCl, ch 2] twice, 2dcCl], ch 1; * rep across ending at 2dcCl, tr in each of the last 2 sts, ch3, turn
Row 4: dc in next st, ch 1, working in the ch-sps only [dc, ch 1] in each ch2-sp and ch1-sp across, dc in each last two sts, ch3, turn
Row 5: dc in each st and sp across
Rows 2-5 form stitch pattern
Rep rows 2 – 5 for a total of 40 rows (ending on row 4)
Adjusting Length: if you prefer a cropped or longer cardigan, the amount of row 2 – 5 repeats is where you’ll need to adjust. The number of rows above is the cardigan’s length from the armhole to the hem. Measure underarm to the hem and work rows 2 – 5 (ending on a row 4) to the length you want. This will not affect the front of the cardigan.
Divide for Fronts and Back
Right Front
Row 41: dc in next 35, (39, 44, 45, 50, 54, 56, 61) sts and sps, count 4, (4, 4, 7, 7, 7, 11, 11) sts, place a st marker in the next st, ch3, turn leaving rem sts unworked (36, 40, 45, 46, 51, 55, 57, 62 dc)
Row 42: rep row 5
Row 43: dc in next st, *ch 1, sk1 st, dc in next st, *rep to last 2 sts, dc in last 2 sts, ch3, turn
Row 44: rep row 5
Row 45 to 56, (57, 58, 59, 61, 62, 63, 64) rep rows 42 to 44
S, M, XL, 3X, 4X ONLY
Fasten off leaving a long tail for sewing the shoulder seam
L, 2X, 5X ONLY
Next row rep row 42
Fasten off leaving a long tail for sewing the shoulder seam.
Back
Rejoin yarn at st marker
Row 41: ch3, rep row 5 for 78, (88, 96, 106, 114, 124, 124, 132) sts and sps, count 4, (4, 4, 7, 7, 7, 11, 11) sts, place a st marker in the next st, ch3, turn leaving rem sts unworked (79, 89, 97, 107, 115, 125, 125, 133 dc)
Row 42: rep row 5
Row 43: dc in next st, *ch 1, sk1 st, dc in next st, *rep to last 2 sts, dc in last 2 sts, ch3, turn
Row 44: rep row 5
Row 45 to 56, (57, 58, 59, 61, 62, 63, 64) rep rows 42 to 44
S, M, XL, 3X, 4X ONLY
Fasten off
L, 2X, 5X ONLY
Next row rep row 42
Fasten off
Left Front
Rejoin yarn at st marker, ch3
Row 41: dc in ea st and sp to end (36, 40, 45, 46, 51, 55, 57, 62 dc)
Row 42: rep row 5
Row 43: dc in next st, *ch 1, sk1 st, dc in next st, *rep to last 2 sts, dc in last 2 sts, ch3, turn
Row 44: rep row 5
Row 45 to 56, (57, 58, 59, 61, 62, 63, 64) rep rows 42 to 44
S, M, XL, 3X, 4X ONLY
Fasten off leaving a long tail for sewing the seam
L, 2X, 5X ONLY
Next row rep row 42
Fasten off leaving a long tail for sewing the seam
Assembly
Working on the WS, lay cardigan out flat. Fold fronts of cardigan over and line up with the back. Sew shoulder seams.
Sleeves
Working on the WS, rejoin yarn underarm, pick up an even number of sts in Round 1
Round 1: ch3, *dc in next st, ch1, sk 1 st, * rep evenly around, join with a sl st, ch3, turn
Round 2: dc in ea st and ch-sp around, join with a sl st, ch3, turn
Rep rounds 1 and 2 for a total of 18 rounds
Adjusting Length: if you prefer bracelet length sleeve or longer three-quarter sleeves, the amount of round 1 and 2 repeats is where you’ll need to adjust. The number of rounds above is the cardigan’s sleeve three-quarter length from the armhole to the cuff. Measure your preferred arm length and work rounds ending on a round 2 to the length you want. The decorative cuff (rounds 19 and 20 below) measures 1” / 2.54 cm.
Round 19: rep row 2 from lower panel ending round ch2, sk 2, Vst in next st, dc in last st
Round 20: rep row 3 from lower panel
Fasten off
Rep on the other side.
Congratulations! Your cardigan is finished.
Related Summer Crochet Patterns
- Whispering Rose Crochet Summer Top
- 20+ Crochet Summer Tops
- 13 Crochet Tank Top Patterns
- Beach Bloom Crochet Beach Cover Up
- 15+ Free Crochet Cover Up Patterns
- Easy Crochet Tank Top
- Easy Crochet Summer Top
- Easy Lacy Scarf
- Easy Lightweight and Lacy Shawl
- Lightweight and Lacy Free Scarf Patterns
- Boho/Festival Free Patterns
- Granny Square Bucket Hat
- Easy Bucket Hat
- 20 Free Bucket Hat Patterns
- Crochet Flowers
- 17+ Easy Crochet Wedding Patterns
Copyright Notice
The pattern and photographs of this design are the property of Sharon Goodwin at Jera’s Jamboree. This pattern and design are subject to copyright and are for personal, non-commercial use only. You may not share, resell, alter or redistribute this pattern in part or in whole. You may, however, sell any finished items you make. If you would like to include this pattern in a roundup, you may take one photo and link back to this pattern.