I’ve designed this crochet blanket pattern to help you create a beautiful and cozy accessory that will add a touch of handmade elegance to any room.
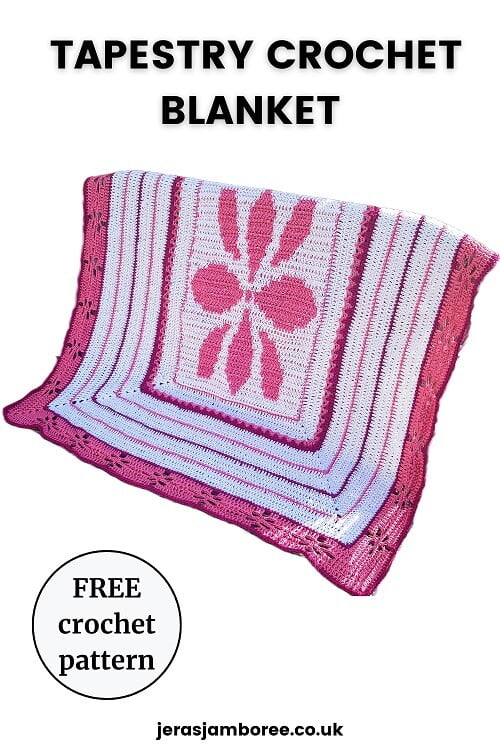
My blanket features a tapestry motif of an orchid in the centre with an optional flower border which gives the blanket visual appeal.
It’s a versatile design that can be customized to match your personal colour preferences.
I’ve used basic crochet stitches but because of the tapestry and colour changes, I’ve rated the skill level intermediate. If you’re a confident beginner looking for a challenge, this project will suit you too.
Jera’s Jamboree receives payments for affiliate advertising. This is at no extra cost to you. As an Amazon Associate I earn from qualifying purchases. Please see my disclosure policy for more information.
Worked in rounds, each round builds upon the previous one, creating a rhythmic pattern that is enjoyable to crochet. With its meditative qualities, this project can be a great way to relax and unwind while producing a beautiful keepsake that you’ll cherish for years to come.
In this pattern, I have provided you with step-by-step instructions, clear stitch explanations, and helpful tips to guide you through the process. Read the pattern notes carefully and the instructions in full, grab your favorite crochet hook, select your cotton yarn, and start your crocheting adventure!

The perfect size for a lap blanket, this pattern for a crochet blanket could also be used as a baby blanket.
Worked in 100% cotton which combines durability with washability and making it suitable for year-round use.
Its nature-themed design makes it an ideal addition to any nursery décor inspired by the wonders of the outdoors.

Design Inspiration
I enjoy working with the tapestry crochet technique and wanted to design a blanket that brought the color of summer into my home.
Having crocheted flowers recently, a flower was the first thing that came to mind. When I started designing the tapestry motif, I didn’t have a specific flower in mind but just went with an arrangement of petals which just happened to look like an orchid!

How the pattern is worked
This free pattern for a crochet blanket is worked in rounds and rows using basic crochet stitches and incorporates two techniques:
- Two-directional flat tapestry crochet
- Filet Crochet
The orchid central motif is worked first using two-directional flat tapestry crochet (worked in rows) in Yarn A and B. The motif is available in written instructions and a tapestry chart which you can download as a PDF.

You can make this central panel bigger by adding to the foundation chain which will give you extra stitches at either side of the panel. You’ll need to work out how many extra stitches to work in Yarn A before starting the flower. You will need to increase rows before and after you work the flower itself.
The rest of the pattern is worked in rounds.
Once the orchid has been crocheted, yarn B is joined and a round of double (US single crochet) crochet is worked.
Yarn A is then joined and 3 rounds of treble crochet (US double crochet) is worked.
The next round is worked in V-Stitch using Yarn B.
This is followed by Yarn C working a treble (US double) cluster in the chain space of the V-Stitch from the previous round.
The rest of the blanket is then completed by repetitions of 3 treble crochet rounds (US double crochet) in Yarn A and a round of double crochet (US single crochet) in alternating Yarns B and C.

You can increase the size of the blanket by working more of the above repetitions.
To finish the blanket, an optional flower border using filet crochet is crocheted in Yarn B. The flower border is 5 rounds.
The final round of half treble crochet (US half double) is worked in Yarn C.
Related Tapestry Crochet Patterns
If you enjoy working the tapestry technique, you might like these patterns:
- Heart and Stripes Tote Bag
- Day at the Beach Blanket
- Peek-a-Boo Blanket
- Orchid Blaze Blanket
- Dog Sweater
- Owl Hot Water Bottle Cover
- Crochet/Pillow Cover
- 20 Free Tapestry Crochet Patterns
Yarn
DROPS Muskat is made from 100% Egyptian mercerized cotton.
Spun from multiple thin strands making it extremely strong and durable, this yarn has a gentle shine and great shape stability. Perfect for wearables as well as blankets!
I’ve enjoyed working with this yarn and glad I over ordered. I still have 600g left – I just need to design a fitting project for this fabulous yarn.
- Content: 100% Cotton
- Yarn Group: DK
- Weight/length: 50 g = approx 100 m
- Care: Machine wash on gentle cycle 40°C / Dry Flat
- Made in: EU
- Raw material origin: Egypt
This yarn has an Oeko-Tex® certification (certificate number 951032), Standard 100, Class I. This means that it has been tested and found completely free from harmful chemicals and that it is safe for human use. Class I is the highest level, and it means the yarn is suitable for baby articles (ages 0-3)
Pattern Notes
- Chain 1 does not count as a stitch
- Chain 3 counts as a stitch
- Yarn A = color 18 (white)
- Yarn B = color 29 (pink)
- Yarn C = color 39 (deep pink)
- Colour changes while working the tapestry crochet technique are made on the last pull through of the stitch before the colour change takes place.
- The unworked yarn is carried along the back of the worked stitches.
- Colour changes while working in rounds are joined with a slip stitch.
- The orchid tapestry motif instructions follow the format of the yarn colour followed by the stitch and how many times you need to work that stitch. For example:
UK Terminology: A tr X 7, B tr X 6, A tr X 6 = Yarn A treble in the next 7 stitches, Yarn B treble in the next 6 stitches, Yarn A treble in the next 6 stitches
US Terminology: A dc X 7, B dc X 6, A dc X 6 = Yarn A double in the next 7 stitches, Yarn B double in the next 6 stitches, Yarn A double in the next 6 stitches
- Sew in ends as you go
- The optional floral border in rounds is tricky. Once you’ve crocheted the first round, use the chain spaces to help you determine where to place the stitches
- If you choose not to use the floral border, crochet to round 22 and skip to round 28
Level
Intermediate
Materials
- 600g DROPS Muscat in the following: 300g #18; 200g #29; 100g #39
- 4mm crochet hook
- Scissors
- Tapestry needle (for sewing in ends)
Crochet Stitches
US Terminology
- single crochet (sc)
- half double crochet (hdc)
- double crochet (dc)
- V-stitch (V-st): double crochet, 2 chains, double crochet in the same stitch
- Double Cluster (dc-cl): 3 double crochet in chain space from previous round
UK Terminology
- double crochet (dc)
- half treble crochet (htr)
- treble crochet (tr)
- V-stitch (V-st): treble crochet, 2ch, treble crochet in the same stitch
- Treble Cluster (tr-cl): 3tr in chain space from previous round
Abbreviations
- Ch = chain
- St/s = stitch/es
- Sl st = slip stitch
- Sp/s = space/s
- Sk = skip
- Rep = repeat
- RS = right side
Measurements
80.5cm / 32” wide X 96.5cm length

Testimonials

Photo of finished blanket from a customer. “Lovely design” Julie Curtis. Source: Twitter
Related Crochet Blanket Patterns
If you enjoy working with a combination of stitches and techniques, you might like:
- Candyfloss Horizon blanket
- Tangerine Dreams blanket
- Seaside Dreams blanket
- Noughts and Crosses blanket
- Galana filet blanket
- Snowberry baby blanket
- Winter Nights blanket
- Tunisian Crochet blanket patterns
- Baby blanket patterns
- Lap Blanket Patterns
Easy patterns with colour changes include:
A relaxing crochet project is my Princess of Diamonds lap blanket. A continuous granny square with a difference!
Looking for a one colour, one-row repeat pattern or baby shower gift? The Tranquil Moments baby afghan is perfect for meeting those needs.
Wanting to design your own blanket or looking for an easy blanket crochet pattern? These simple blankets and instructions to create your own are just what you need.
Short on time? These baby blanket kits or modern blanket kits could be just what you need.
Make your project really stand out with these free crochet border and edging patterns.
Orchid Blaze Blanket Instructions UK Crochet Terms
Orchid tapestry motif panel
If you prefer working from a chart, click here to download the free tapestry chart PDF
With 4mm crochet hook and Yarn A, ch 48
Tapestry crochet written instructions
Row 1: tr in 3rd ch from hook, tr across, turn (46 sts)
Row 2: ch3, A tr x 21, B tr x 2, A tr x 22, turn
Row 3: ch3, A tr x 7, B tr x 5, A tr x 8, B tr x 4, A tr x 8, B tr x 5, A tr x 8, turn
Row 4: ch3, A tr x 7, B tr x 6, A tr x 6, B tr x 6, A tr x 6, B tr x 6, A tr x 8, turn
Row 5: ch3, A tr x 7, B tr x 6, A tr x 5, B tr x 8, A tr x 5, B tr x 6, A tr x 8, turn
Row 6: ch3, A tr x 7, B tr x 7, A tr x 4, B tr x 8, A tr x 4, B tr x 7, A tr x 8, turn
Row 7: rep row 6
Row 8: ch3, A tr x 8, B tr x 7, A tr x 3, B tr x 8, A tr x 3, B tr x 7, A tr x 9, turn
Row 9: ch3, A tr x 9, B tr x 6, A tr x 3, B tr x 8, A tr x 3, B tr x 6, A tr x 10, turn
Row 10: ch3, A tr x 10, B tr x 5, A tr x 4, B tr x 6, A tr x 4, B tr x 5, A tr x 11, turn
Row 11: ch3, A tr x 11, B tr x 5, A tr x 3, B tr x 6, A tr x 3, B tr x 5, A tr x 12, turn
Row 12: ch3, A tr x 14, B tr x 3, A tr x 3, B tr x 4, A tr x 3, B tr x 3, A tr x 15, turn
Row 13: ch3, A tr x 20, B tr x 4, A tr x 21, turn
Row 14: ch3, A tr x 6, B tr x 7, A tr x 8, B tr x 2, A tr x 8, B tr x 7, A tr x 7, turn
Row 15: ch3, A tr x 3, B tr x 13, A tr x 5, B tr x 2, A tr x 5, B tr x 13, A tr x 4, turn
Row 16: ch3, A tr x 2, B tr x 16, A tr x 8, B tr x 16, A tr x 3, turn
Row 17: ch3, A tr x 1, B tr x 19, A tr x 1, B tr x 2, A tr x 1, B tr x 19, A tr x 2, turn
Row 18: rep row 17
Row 19: rep row 16
Row 20: rep row 15
Row 21: rep row 14
Row 22: rep row 13
Row 23: rep row 12
Row 24: rep row 11
Row 25: rep row 10
Row 26: rep row 9
Row 27: rep row 8
Row 28: rep row 7
Row 29: rep row 6
Row 30: rep row 5
Row 31: rep row 4
Row 32: rep row 3
Row 33: rep row 2
Row 34: rep row 1
On the last pull through of the last stitch of row 34, change colour to Yarn B.
Fasten off Yarn A.
The pattern continues in rounds and is worked on the RS.
Round 1: ch1, dc in base of ch1, dc across the width, * on the final st, [1dc, 3ch, 1dc] for the corner sp, continue working a dc evenly on the long edge, * rep around, sl st to ch1 at start of round, fasten off.
Round 2: join Yarn A to any corner sp, ch3, [1tr, 2ch, 2tr] in corner sp, * tr across to corner sp, [2tr, 2ch, 2tr] in corner sp, *rep around, sl st to top of ch3 at start of round
Round 3: sl st to corner sp, ch3, [1tr, 2ch, 2tr] in corner sp, *tr across to corner sp, [2tr, 2ch, 2tr] in corner sp, *rep around, sl st to top of ch 3 at start of round
Round 4: rep round 3
Round 5: Join Yarn B, sl st to corner sp, ch3, [1tr, 2ch, 2tr] in corner sp, *sk 2 sts, V-stitch to corner sp, [2tr, 2ch, 2tr] in corner sp, * rep around, sl st to top of ch3 at start of round, fasten off
Round 6: join Yarn C in any corner sp, ch3, [1tr, 2ch, 2tr] in corner sp, *tr-cl in each 2ch-sp from prev round, [2tr, 2ch, 2tr] in corner sp, *rep around, sl st to top of ch3 at start of round, fasten off
Round 7: join Yarn A in any corner sp, rep round 3
Round 8 and 9: rep round 3, fasten off
Round 10: join Yarn B in any corner sp, rep round 1, fasten off
Round 11: join Yarn A in any corner sp, rep round 3
Round 12 and 13: rep round 3, fasten off
Round 14: join Yarn C in any corner sp, rep round 1, fasten off
Round 15: join Yarn A in any corner sp, rep round 3
Round 16 and 17: rep round 3, fasten off
Round 18: join Yarn B in any corner sp, rep round 1, fasten off
Round 19: join Yarn A in any corner sp, rep round 3
Round 20 and 21: rep round 3, fasten off
Round 22: join Yarn C in any corner sp, rep round 1, fasten off
Flower Border
Tip: use the ch sps from the previous row to help you place your dc.
Round 23: join Yarn B in any corner sp, ch3, [tr, 2ch, 2tr] in corner sp, **[tr in next 7 sts, ch3, sk 2 sts, tr in next 8 sts] *rep to corner sp, [2tr, 2ch, 2tr] in corner sp ** rep around, join with sl st to top of ch3 from prev round
Round 24: sl st to corner sp, ch3, [tr, 2ch, 2tr] in corner sp, **[tr in next 4 sts, ch4, sk 3 sts, dc in ch3 sp from prev round, ch4, sk 3 sts, tr in next 5 sts], * rep to corner sp, [2tr, 2ch, 2tr] in corner sp, ** rep around, join with a sl st to top of ch3 from prev round
Round 25: sl st to corner sp, ch3, [tr 2ch, 2tr] in corner sp, ** [tr in next st, ch5, sk 3 sts, dc in ch4 sp from prev round, ch5, sk 3 sts] to corner sp, [2tr, ch2, 2tr] in corner sp, ** rep around, join with a sl st to top of ch3 from prev round
Round 26: sl st to corner sp, ch3 [tr, 2ch, 2tr] in corner sp, ** [tr in next st, 3 tr in next ch5-sp from prev round, ch4, sk next st, dc in next st, ch4, sk next st, 3 tr in ch5-sp from prev round, tr in next 2 sts] to corner sp, [2tr, 2ch, 2tr} in corner sp, ** rep around, join with a sl st to top of ch3 from prev round
Round 27: sl st to corner sp, ch3, [tr, 2ch, 2tr] in corner sp, ** [tr in next 4 sts, 3 tr in ch4-sp from prev round, ch2, sk next st, 3 tr in ch4-sp from prev round, tr in next 5 sts], ** rep around, join with a sl sto to top of ch3 from prev round. Fasten off.
Round 28: join Yarn C in any corner sp, ch2, [htr, 2ch, 2htr] in corner sp, * htr in each st from prev round, 2htr in ch-sps to corner sp, [2htr, 2ch, 2htr] in corner sp, * rep around, join with a sl st to top of ch2 from prev round.
Fasten off.
Orchid Blaze Blanket Instructions US Crochet Terms
Orchid tapestry motif panel
If you prefer working from a chart, click here to download the free tapestry chart PDF
With 4mm crochet hook and Yarn A, ch 48
Tapestry crochet written instructions
Row 1: dc in 3rd ch from hook, dc across, turn (46 sts)
Row 2: ch3, A dc x 21, B dc x 2, A dc x 22, turn
Row 3: ch3, A dc x 7, B dc x 5, A dc x 8, B dc x 4, A dc x 8, B dc x 5, A dc x 8, turn
Row 4: ch3, A dc x 7, B dc x 6, A dc x 6, B dc x 6, A dc x 6, B dc x 6, A dc x 8, turn
Row 5: ch3, A dc x 7, B dc x 6, A dc x 5, B dc x 8, A dc x 5, B dc x 6, A dc x 8, turn
Row 6: ch3, A dc x 7, B dc x 7, A dc x 4, B dc x 8, A dc x 4, B dc x 7, A dc x 8, turn
Row 7: rep row 6
Row 8: ch3, A dc x 8, B dc x 7, A dc x 3, B dc x 8, A dc x 3, B dc x 7, A dc x 9, turn
Row 9: ch3, A dc x 9, B dc x 6, A dc x 3, B dc x 8, A dc x 3, B dc x 6, A dc x 10, turn
Row 10: ch3, A dc x 10, B dc x 5, A dc x 4, B dc x 6, A dc x 4, B dc x 5, A dc x 11, turn
Row 11: ch3, A dc x 11, B dc x 5, A dc x 3, B dc x 6, A dc x 3, B dc x 5, A dc x 12, turn
Row 12: ch3, A dc x 14, B dc x 3, A dc x 3, B dc x 4, A dc x 3, B dc x 3, A dc x 15, turn
Row 13: ch3, A dc x 20, B dc x 4, A dc x 21, turn
Row 14: ch3, A dc x 6, B dc x 7, A dc x 8, B dc x 2, A dc x 8, B dc x 7, A dc x 7, turn
Row 15: ch3, A dc x 3, B dc x 13, A dc x 5, B dc x 2, A dc x 5, B dc x 13, A dc x 4, turn
Row 16: ch3, A dc x 2, B dc x 16, A dc x 8, B dc x 16, A dc x 3, turn
Row 17: ch3, A dc x 1, B dc x 19, A dc x 1, B dc x 2, A dc x 1, B dc x 19, A dc x 2, turn
Row 18: rep row 17
Row 19: rep row 16
Row 20: rep row 15
Row 21: rep row 14
Row 22: rep row 13
Row 23: rep row 12
Row 24: rep row 11
Row 25: rep row 10
Row 26: rep row 9
Row 27: rep row 8
Row 28: rep row 7
Row 29: rep row 6
Row 30: rep row 5
Row 31: rep row 4
Row 32: rep row 3
Row 33: rep row 2
Row 34: rep row 1
On the last pull through of the last stitch of row 34, change color to Yarn B.
Fasten off Yarn A.
The pattern continues in rounds and is worked on the RS.
Round 1: ch1, sc in base of ch1, sc across the width, * on the final st, [1sc, 3ch, 1sc] for the corner sp, continue working a sc evenly on the long edge, * rep around, sl st to ch1 at start of round, fasten off.
Round 2: join Yarn A to any corner sp, ch3, [1dc, 2ch, 2dc] in corner sp, * dc across to corner sp, [2dc, 2ch, 2dc] in corner sp, *rep around, sl st to top of ch3 at start of round
Round 3: sl st to corner sp, ch3, [1dc, 2ch, 2dc] in corner sp, *dc across to corner sp, [2dc, 2ch, 2dc] in corner sp, *rep around, sl st to top of ch 3 at start of round
Round 4: rep round 3
Round 5: Join Yarn B, sl st to corner sp, ch3, [1dc, 2ch, 2dc] in corner sp, *sk 2 sts, V-stitch to corner sp, [2dc, 2ch, 2dc] in corner sp, * rep around, sl st to top of ch3 at start of round, fasten off
Round 6: join Yarn C in any corner sp, ch3, [1dc, 2ch, 2dc] in corner sp, *dc-cl in each 2ch-sp from prev round, [2dc, 2ch, 2dc] in corner sp, *rep around, sl st to top of ch3 at start of round, fasten off
Round 7: join Yarn A in any corner sp, rep round 3
Round 8 and 9: rep round 3, fasten off
Round 10: join Yarn B in any corner sp, rep round 1, fasten off
Round 11: join Yarn A in any corner sp, rep round 3
Round 12 and 13: rep round 3, fasten off
Round 14: join Yarn C in any corner sp, rep round 1, fasten off
Round 15: join Yarn A in any corner sp, rep round 3
Round 16 and 17: rep round 3, fasten off
Round 18: join Yarn B in any corner sp, rep round 1, fasten off
Round 19: join Yarn A in any corner sp, rep round 3
Round 20 and 21: rep round 3, fasten off
Round 22: join Yarn C in any corner sp, rep round 1, fasten off
Flower Border
Tip: use the ch sps from the previous row to help you place your st.
Round 23: join Yarn B in any corner sp, ch3, [dc, 2ch, 2dc] in corner sp, **[dc in next 7 sts, ch3, sk 2 sts, dc in next 8 sts] *rep to corner sp, [2dc, 2ch, 2dc] in corner sp ** rep around, join with sl st to top of ch3 from prev round
Round 24: sl st to corner sp, ch3, [dc, 2ch, 2dc] in corner sp, **[dc in next 4 sts, ch4, sk 3 sts, sc in ch3 sp from prev round, ch4, sk 3 sts, dc in next 5 sts], * rep to corner sp, [2dc, 2ch, 2dc] in corner sp, ** rep around, join with a sl st to top of ch3 from prev round
Round 25: sl st to corner sp, ch3, [dc, 2ch, 2dc] in corner sp, ** [dc in next st, ch5, sk 3 sts, sc in ch4 sp from prev round, ch5, sk 3 sts] to corner sp, [2dc, ch2, 2dc] in corner sp, ** rep around, join with a sl st to top of ch3 from prev round
Round 26: sl st to corner sp, ch3 [dc, 2ch, 2dc] in corner sp, ** [dc in next st, 3 dc in next ch5-sp from prev round, ch4, sk next st, sc in next st, ch4, sk next st, 3 dc in ch5-sp from prev round, dc in next 2 sts] to corner sp, [2dc, 2ch, 2dc} in corner sp, ** rep around, join with a sl st to top of ch3 from prev round
Round 27: sl st to corner sp, ch3, [dc, 2ch, 2dc] in corner sp, ** [dc in next 4 sts, 3 dc in ch4-sp from prev round, ch2, sk next st, 3 dc in ch4-sp from prev round, dc in next 5 sts], ** rep around, join with a sl st to top of ch3 from prev round. Fasten off.
Round 28: join Yarn C in any corner sp, ch2, [hdc, 2ch, 2hdc] in corner sp, * hdc in each st from prev round, 2hdc in ch-sps to corner sp, [2hdc, 2ch, 2hdc] in corner sp, * rep around, join with a sl st to top of ch2 from prev round.
Fasten off.
Happy crocheting!
Copyright Notice
The pattern and photographs of this design are the property of Sharon Goodwin at Jera’s Jamboree. This pattern and design are subject to copyright and are for personal, non-commercial use only. You may not share, resell, alter or redistribute this pattern in part or in whole. You may, however, sell any finished items you make. If you would like to include this pattern in a roundup, you may take one photo and link back to this pattern.
var pfBtVersion=’3′;(function(){var js,pf;pf=document.createElement(‘script’);pf.type=’text/javascript’;pf.src=’//cdn.printfriendly.com/printfriendly.js’;document.getElementsByTagName(‘head’)[0].appendChild(pf)})();