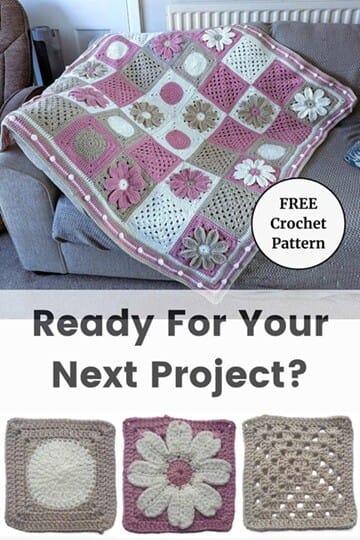
Learn how to crochet a granny square blanket with floral motifs, classic granny squares, circle in a square, and a beautiful cottage-inspired finish.
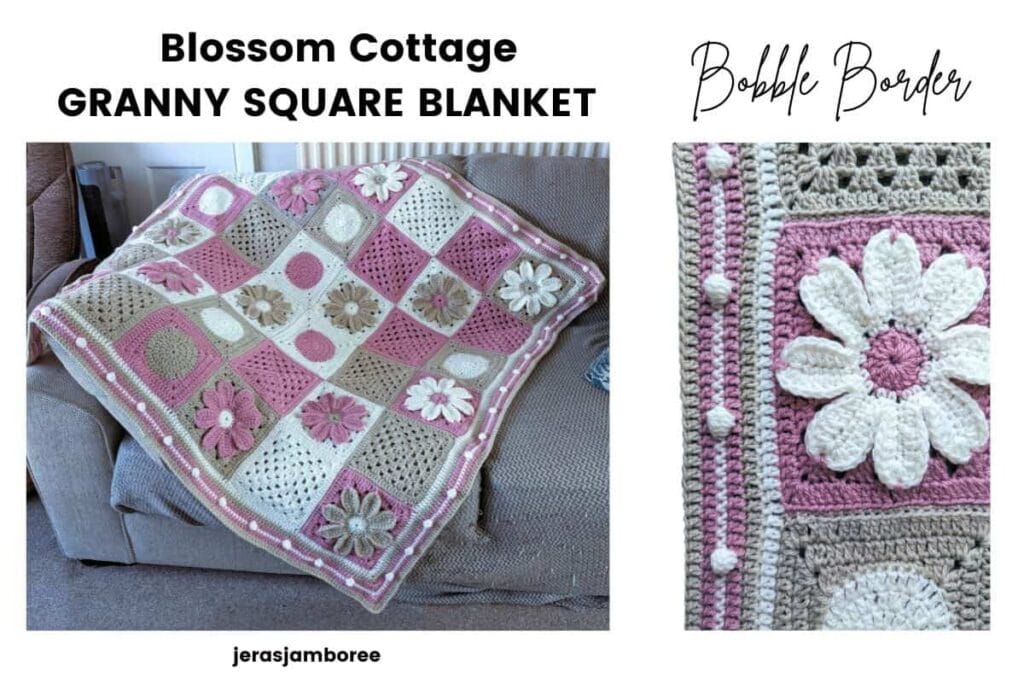
My Blossom Cottage Granny Square Blanket is a beautiful way to combine floral motifs with classic crochet textures. My pattern brings together three different square designs: floral granny squares, circle in a square motifs, and classic granny squares to create a richly textured and eye-catching finish.
Worked in three soft, complementary colours, my blanket has a gentle cottage garden feel with a modern vintage style. The mix of motifs keeps the project interesting while still being relaxing to work on, making it a satisfying blanket to crochet from start to finish.
With 36 squares joined together and finished with a simple yet striking bobble stitch border, Blossom Cottage is the perfect size for a lapghan or a cosy sofa throw.
The free pattern is available below, or you can purchase the ad-free PDF in my Etsy and Ravelry shops. The PDF includes step-by-step photos for each round of the flower square alongside the written instructions. Thank you so much for supporting my work.
Enjoy my crochet patterns and blog posts?
Add Jera’s Jamboree as a preferred source on Google, Just click below and tick the box to add me.

Jump to: Size | Materials | Blanket Pattern | Border
Skill Level
The classic granny square and circle in a square are beginner-friendly, while the flower granny square introduces a few additional techniques. Joining the squares and working the bobble stitch border are both straightforward.

Size
Each granny square measures approximately 7” x 7”
The blanket is made using 36 squares, arranged to create a finished size of approximately:
- 42” x 42” before the border
- 47” x 47” including the bobble stitch border
This makes the Blossom Cottage Blanket the perfect size for a lapghan or cosy sofa throw.
If you enjoy crocheting blankets of this size, you might also like the designs featured in my roundup of free lap blanket patterns.
Size is easily adjustable by adding or removing squares.
Jera’s Jamboree receives payments for affiliate advertising. This is at no extra cost to you. As an Amazon Associate I earn from qualifying purchases. Please see my disclosure policy for more information.
Materials
- Aran/Worsted weight (#4) yarn
Yarn A: approx. 777 yards
Yarn B: approx. 753 yards
Yarn C: approx. 770 yards
- 5mm crochet hook (for squares)
- 4mm crochet hook (for border)
- Scissors
- Yarn needle
I use Clover Amour crochet hooks.
Yarn Choices
I used Stylecraft Special Aran in Pale Rose (Yarn A), Cream (Yarn B), and Parchment (Yarn C). If you’re using the same yarn, you will need 4 balls of each colour.
This yarn is soft to work with, creates a smooth finish, and gives the blanket a lovely drape without feeling too heavy. It’s also easy to care for — machine washable at 30°C and suitable for tumble drying or ironing on a low setting — making it a practical choice for everyday use.
Stylecraft Special Aran comes in a wide range of colours, so you can easily customise your blanket to suit your style.
You can substitute with any aran weight yarn. Suitable alternatives include:
- James C Brett Baby Aran
- Yarnsmiths Create Aran
- YarnArt Finland
- Loops & Threads Impeccable
- Caron Simply Soft / Sweetie Cakes
- Paintbox Yarns Simply Aran
If you’d like to use DK weight #3 yarn, you can substitute, but this will affect the size of your squares and the finished blanket.
To test your yarn, crochet one square and check your measurements:
- Does your square measure close to 7” x 7”?
- If not, try adding an extra round or two to reach your desired size
This is a great way to customise the blanket while using yarn from your stash.
Colour Choices
You can use any colour combination you like to create your own version of my Blossom Cottage Blanket.
For a similar soft, cottage-inspired look, try:
- Floral Neutrals – cream, blush pink, soft beige
- Vintage Garden – dusty rose, sage green, warm ivory
- Modern Contrast – charcoal, cream, muted pink
- Bright Florals – coral, mustard, teal
At the start of each granny square pattern, I’ve included the colour placement used in my sample (for example: Yarn B centre, Yarn C petals, Yarn A outer).
In the written instructions, I’ve used “change colour” rather than referring to specific yarns. This makes it easy for you to substitute your own colours without needing to adjust my pattern.
Gauge
Each granny square measures approximately 7” x 7.”
Gauge is not critical for this project, but if yours is different, this will affect the final size of your blanket.
Stitches and Abbreviations
Stitches and how to work them are written out in full in the PDF.
Special Stitch (Border)
- Bobble Stitch (5-bob)
Instructions for the bobble stitch can be found in Part Two of my stitch library.
Basic Stitches Used
- single crochet (sc)
- half double crochet (hdc)
- double crochet (dc)
- slip stitch (sl st)
If you need a refresher on these stitches, you can find step-by-step instructions in Part One of my stitch library.
For my UK crocheters, the table below is a conversion of basic crochet stitches from US to UK.
| US Crochet Terms | UK Crochet Terms |
|---|---|
| single crochet (sc) | double crochet (dc) |
| half double crochet (hdc) | half treble crochet (htr) |
| double crochet (dc) | treble crochet (tr) |
| treble (tr) | double treble (dtr) |
| double treble (dtr) | triple treble (trtr) |
I have used these common abbreviations in the pattern:
- chain/s (ch/s)
- each (ea)
- space (sp)
- Right Side (RS)
- stitch/es (st/s)
- repeat (rep)
- Wrong Side (WS)
Design and Construction
I had always planned to design a blanket using the flower square from my Cosmo hot water bottle pattern. A blanket made entirely from those squares felt like it might be a little overwhelming, so I decided to balance my design by introducing a couple of additional motifs.
The classic granny square complements the outer rounds of the flower motif, while the circle in a square mirrors the shape of the flower centre. Together, they create a beautifully balanced look, with just the right amount of texture and variation.
Although the squares are different, they sit together naturally and give the blanket a soft, cottage-inspired patchwork feel.
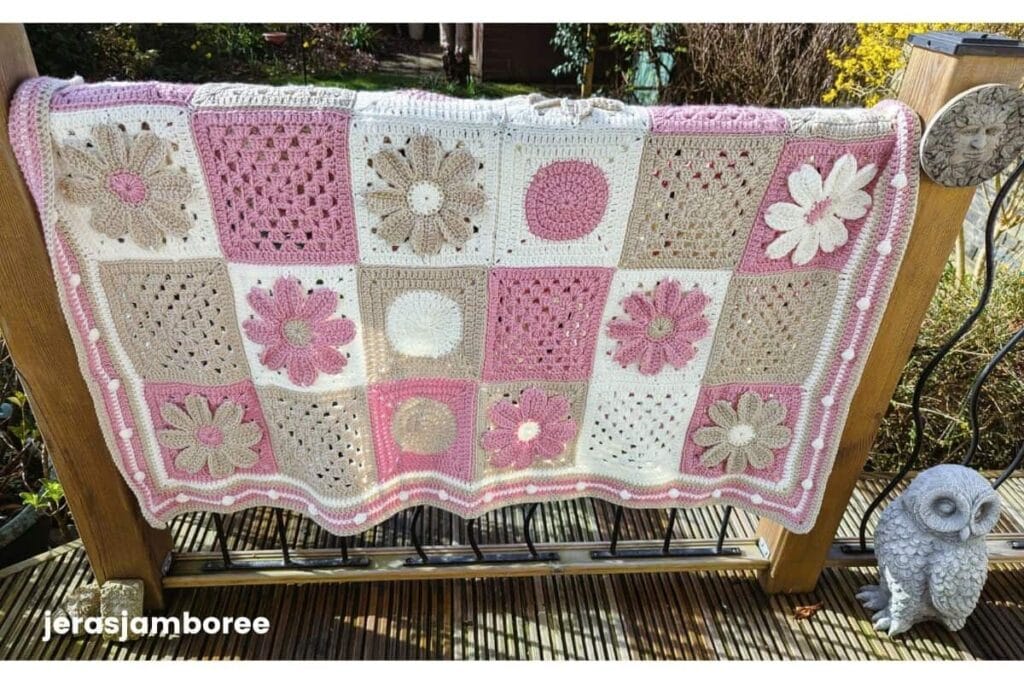
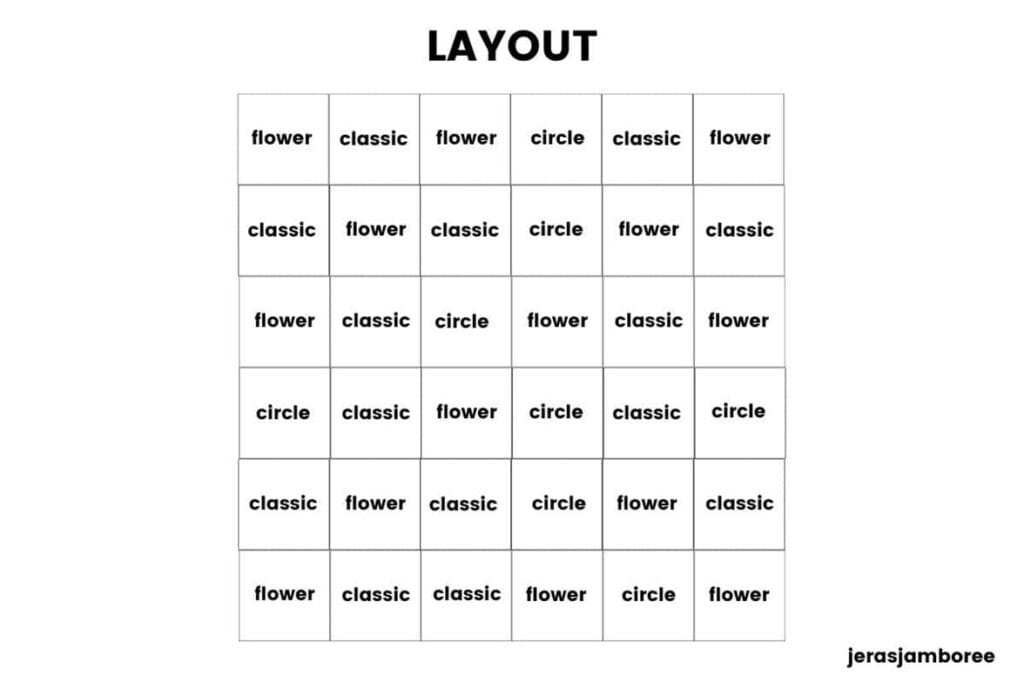
I’ll admit, the layout pushed me slightly out of my comfort zone (I usually prefer symmetry). But after experimenting with different arrangements, I found that a more random placement gave the blanket a more natural and relaxed look. If you tend to lean towards symmetry like I do, I’d definitely recommend trying this — it’s surprisingly freeing! I love how it turned out, it’s definitely my favourite.
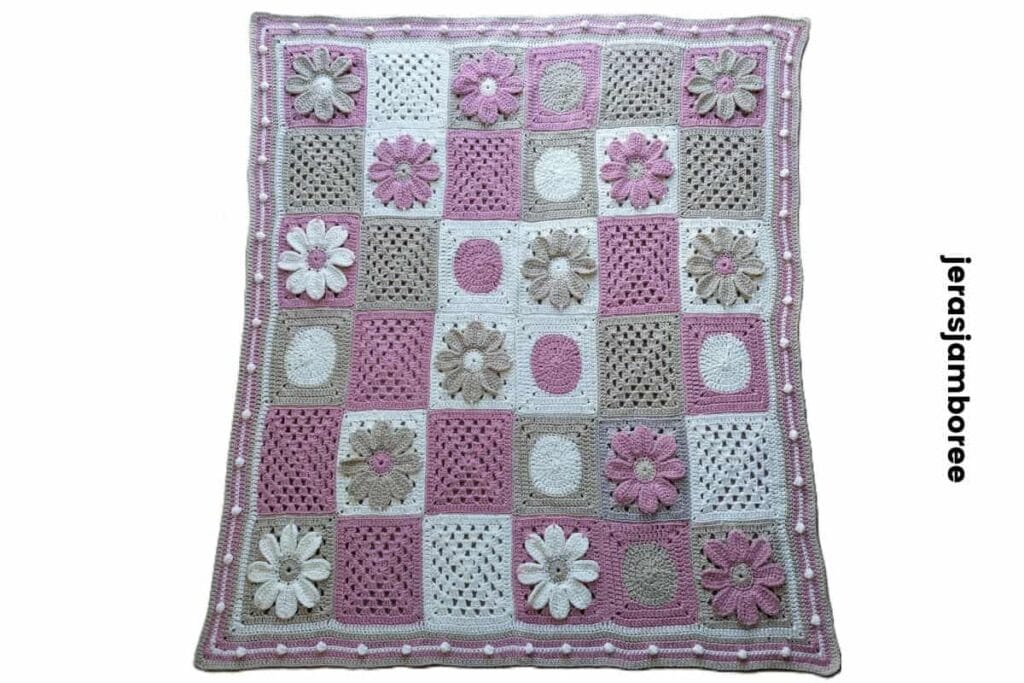
The Blossom Cottage Blanket is made up of 36 squares:
- 14 flower granny squares
- 8 circle in a square motifs
- 14 classic granny squares
Three colours are used throughout to tie the design together.
The diagram below shows the placement of the squares.
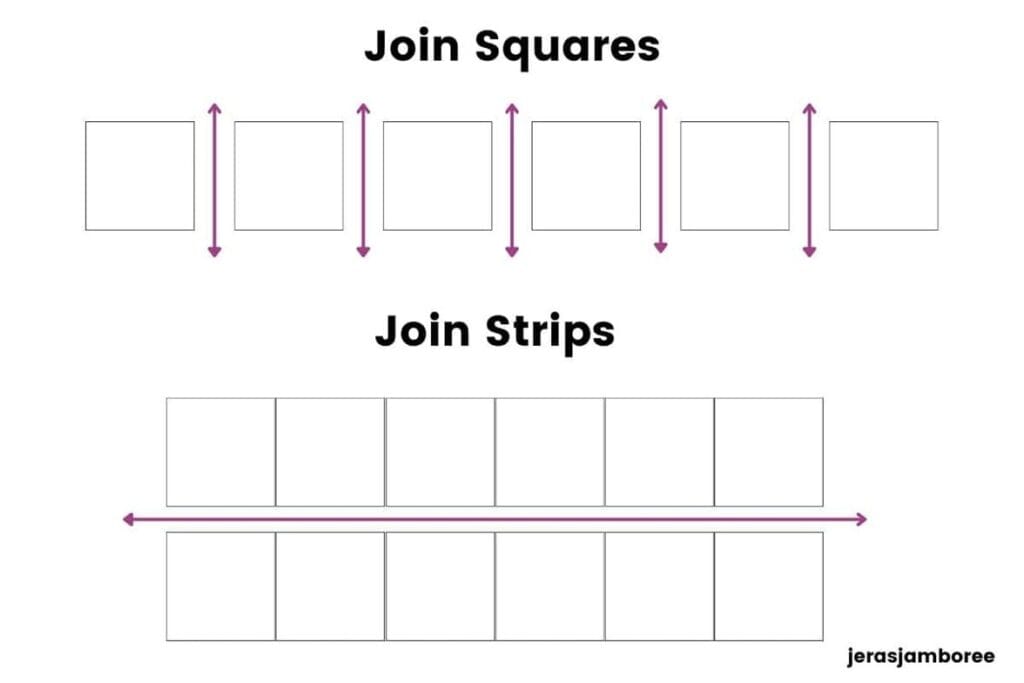
To join the squares, I used the mattress stitch, following the sequence shown in the image below. You can use any joining method you prefer.
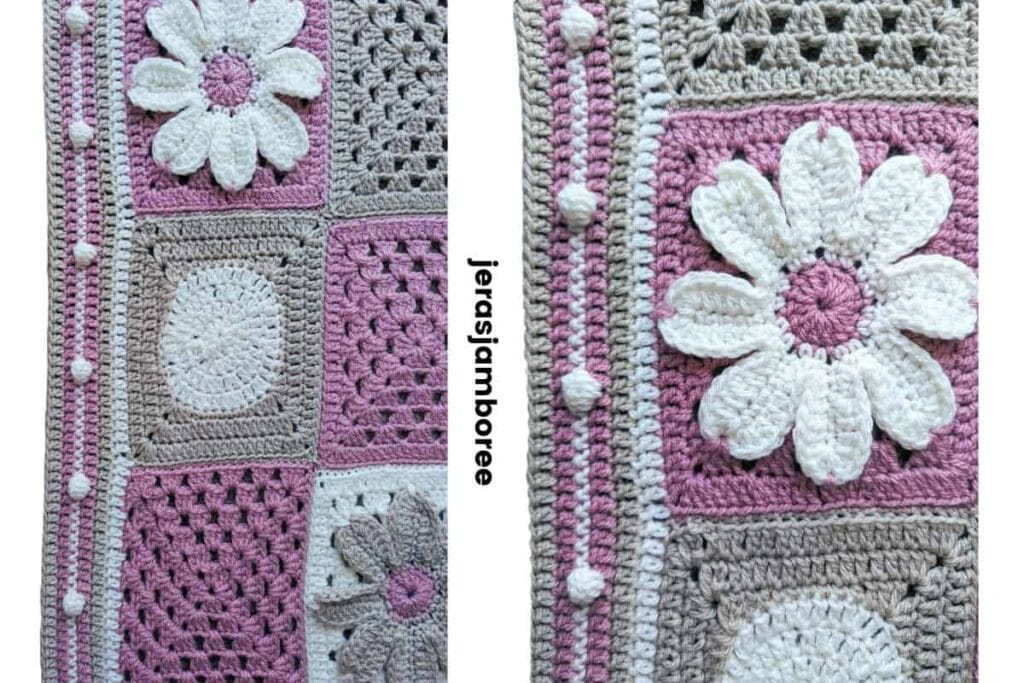
The border is worked in:
- 3 rounds of double crochet
- 1 round of bobble stitch
- 2 rounds of double crochet
This simple structure frames the blanket beautifully and adds a textured finish.
My Pattern Notes
- Pattern is written in English using US crochet terms
- Yarn A = Pale Rose, Yarn B = Cream, Yarn C = Parchment
- Chain 1 does not count as a stitch
- Chain 3 counts as a double crochet
- Repeated instructions are indicated with *
Granny Square Notes
- Classic granny square corners (Rounds 1–5) use [3dc, ch2, 3dc] in the corner chain-2 space. Round 6 uses [2dc, ch2, 2dc] in the corner chain-2 space
- Blocking your squares before joining will make assembly easier and help achieve a neat finish
Border Notes
- Round 1 is worked into the double crochet stitches and skips the corner spaces where squares are joined
- Corner stitches at the four outer edges are worked as normal
- For Rounds 1–3, join yarn in the stitch before a corner space
- For Round 4, join yarn in the stitch after a corner space
- All border corners use [2dc, ch2, 2dc] in the chain-2 space
- The bobble stitch round (Round 4) is worked on the wrong side
Turn the blanket after Round 3
Turn back to the right side after Round 4
- In Round 5, double crochet stitches are worked into both the single crochet stitches and the top of the bobble stitches from the previous round
- Take care not to miss the stitch hidden behind each bobble stitch in Round 5
- Counting 10 stitches between each bobble will help keep your stitch count accurate
Purchase the easy-to-read print friendly PDF (ad free)
The PDF of this pattern includes everything you need:
- how to work the stitches
- how the pattern is worked
- pattern notes
- clear written instructions
- printable row counter
If you’re here for the Enchanted Autumn blog hop, welcome!
Hosted by Lisa at Green Fox Farms Designs, a new free crochet pattern is released for 24 hours every day from 5th–25th October 2026.
There’s a lovely mix of projects included in the hop, from cosy scarves and blankets to potholders, amigurumi and garlands, along with plenty of seasonal fun including pumpkins and trick-or-treat bags.
How it works:
A new pattern becomes available free each day, with the featured pattern changing at 6pm BST (12pm CDT). That means it’s worth popping back to the event page each day to see what’s new.
My featured day is 12th October 2026.
I have two PDFs for you to download directly to your device.
One PDF is the pattern.
One PDF is a photo tutorial for the flower granny square.
You need to download both separately.
To download the pattern, click the image directly below.

To download the photo tutorial, click here.
Have fun!
Blossom Cottage Granny Square Blanket Instructions (US terms)
Flower Granny Square
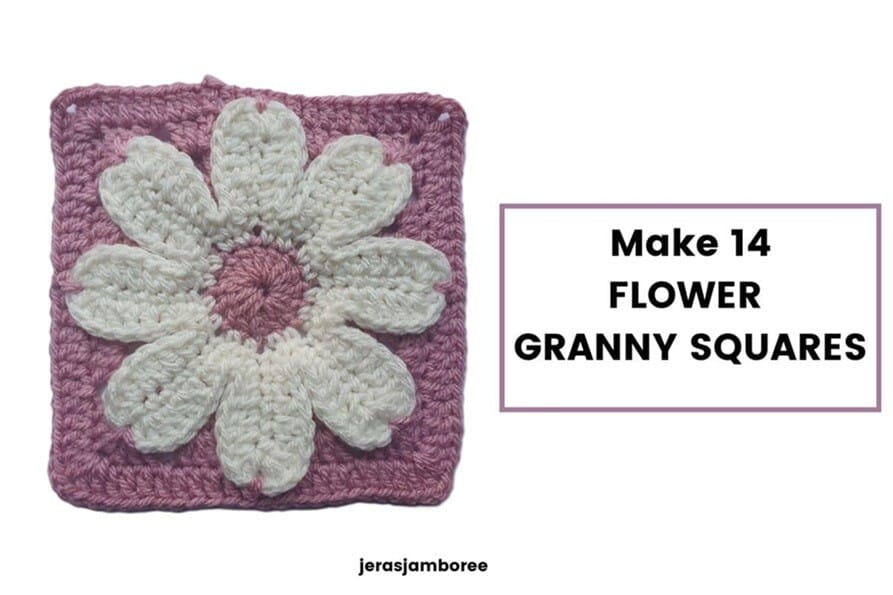
Make 14 squares
- 1 x Yarn B centre, Yarn C Petals, Yarn A outer
- 1 x Yarn B centre, Yarn A Petals, Yarn C outer
- 1 x Yarn A centre, Yarn C Petals, Yarn A outer
- 2 x Yarn C centre, Yarn A Petals, Yarn B outer
- 1 x Yarn A centre, Yarn B Petals, Yarn A outer
- 2 x Yarn B centre, Yarn C Petals, Yarn B outer
- 2 x Yarn A centre, Yarn C Petals, Yarn B outer
- 1 x Yarn C centre, Yarn B Petals, Yarn C outer
- 2 x Yarn C centre, Yarn A Petals, Yarn C outer
- 1 x Yarn C centre, Yarn B Petals, Yarn A outer
With a 5mm hook
Ch4, sl st to first ch to join, ch3
Round 1: 15dc into centre of ring, join with a sl st to the first st (16dc)
Fasten off and weave in ends
(creates the centre of the flower)
Change colour
Join yarn in any st
Round 2: *sc in next 2 sts, ch7, working back down ch, sc in 2nd ch from hook, sc in next 5 chs, * rep around, sl st through first sc of round
(sets up petals)
Continuing with same colour
Round 3: sc in next sc, working up petal, *sc in first st, hdc in next st, dc in next 3 sts, 3dc in last st, working back down petal, 3dc in next st, dc in next 3 sts, hdc in next st, sc in next st, sc in next st, * rep around, sl st through next st to join
Fasten off
(shapes petals)
Change colour
Place a slip knot on hook
Working on WS and using first sc of petals from round 3
Round 4: * insert hook through inner side of 2 adjoining petals, sc, ch4, * rep around, sl st through first sc of round
(makes a chain on the back of the flower to work the granny stitch in the following round)
Continuing with same colour
Working on RS around ch4 from prev round
Round 5: ch3, [2dc, ch1] around first ch4, [3dc, ch2, 3dc, ch1] around 2nd ch4, [3dc, ch1] around 3rd ch4, [3dc, ch2, 3dc, ch1] around 4th ch4, [3dc, ch1] around 5th ch4, [3dc, ch2, 3dc, ch1] around 6th ch, [3dc, ch1] around 7th ch, [3dc, ch2, 3dc, ch1] around 8th ch4, sl st to beg ch3 to join, sl st to ch-1 sp
(uses chains from previous round to work a granny stitch round)
Continuing with same colour
Round 6
Ch3, [2dc, ch1] in first ch1-sp, [3dc, ch1] in ea following ch-1 sp, [3dc, ch2, 3dc, ch1] in ea ch-2 corner sp around, sl st to beg ch3 to join, sl st to ch-1 sp
(Granny stitch round)
Continuing with same colour
Top of each petal is the space between posts of 2 top dc
Round 7: rep round 6 for edges but in ea ch-2 corner sp work [1dc, yarn over, insert hook through top st of petal and into ch-2 sp, yarn over, pull through to complete the dc, 1dc, ch2, 1dc in same corner sp, insert hook through same top st of petal and into ch-2 sp, yarn over, pull through to complete the dc, 1dc in same corner sp], sl st to beg ch3 to join, sl st to ch-1 sp
(secures top of 4 petals to corner spaces while working granny stitch)
Continuing with same colour
Top of each petal is the space between posts of 2 top dc
Round 8: ch3, dc in next 2 sts, *dc in ch1-sp, dc in next 3 sts, [3dc, ch2, 3dc] in corner sp, dc in next 3 sts, dc in ch1-sp, dc in next 3 sts, dc in ch1-sp, dc in next st, yarn over, insert hook in top st of petal and through dc, yarn over, pull through (dc made), dc in next st, dc in ch-1 sp, dc in next 3 sts, * rep around, join with sl st to beg ch3
Fasten off
(secures remaining petals to central 3dc group of granny stitch while working double crochet round)
Flower granny square complete
Circle in a Square
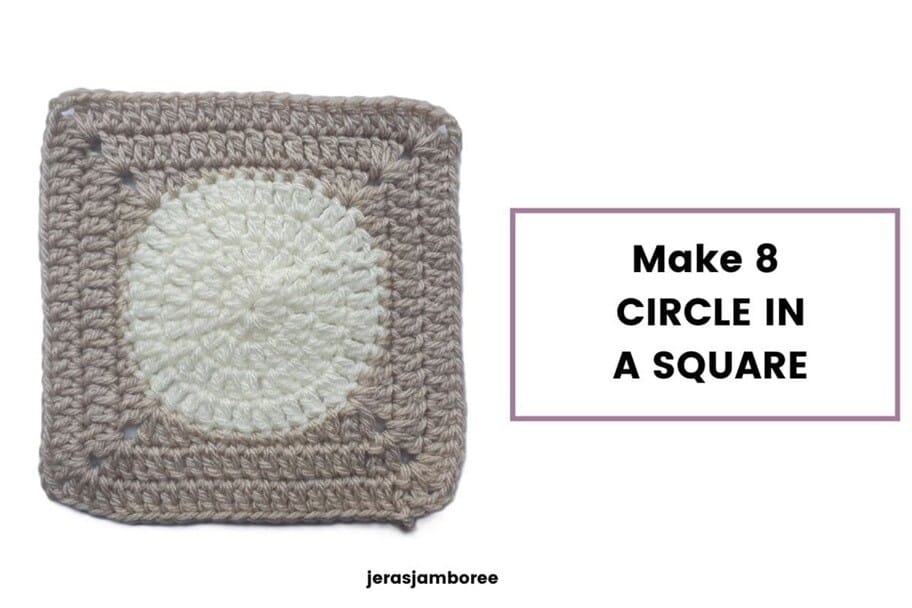
Make 8 squares
- 2 x Yarn C circle and Yarn A outer
- 3 x Yarn B circle and Yarn C outer
- 2 x Yarn A circle and Yarn B outer
- 1 x Yarn C centre and Yarn A outer
With a 5mm hook
Ch4, sl st in first st to join
Round 1: ch3, 9dc into centre of ring, sl st to first dc to join (10 dc)
Round 2: ch3, dc in same st, 2dc in ea st around, sl st to first st to join (20 dc)
Round 3: ch3, dc in same st, dc in next st, * 2dc in next st, dc in next st, * rep around, sl st in first st to join (30 dc)
Round 4: ch3, dc in same st, dc in next 2 sts, * 2dc in next st, dc in next 2 sts, * rep around, sl st in first st to join (40 dc)
(these rounds create the circle)
Change colour – join colour in any stitch
Round 5: ch3, [dc, ch2, 2dc] in same st, dc in next st, hdc in next st, sc in next 5 sts, hdc in next st, dc in next st, * [2dc, ch2, 2dc] in next st, dc in next st, hdc in next st, sc in next 5 sts, hdc in next st, dc in next st, * rep two more times, sl st in first st to join
(changes circle to a square)
Continuing with same colour
Round 6: sl st to ch2-sp, ch3, [dc, ch2, 2dc] in ch-2 sp, dc in ea st to next ch-2 sp, [2dc, ch2, 2dc] in ch-2 sp, dc in ea st to next ch-2 sp, * rep two more times, sl st to first st to join
Round 7: rep round 6
Circle in a square complete
Classic Granny Square
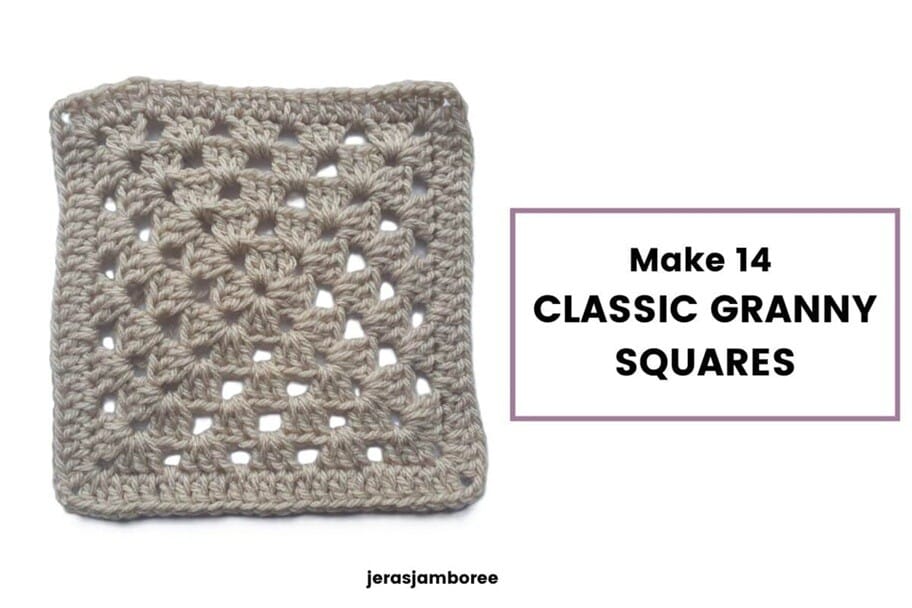
Make 14 squares
- 6 x Yarn A
- 3 x Yarn B
- 5 x Yarn C
With a 5mm hook
Ch4, sl st in first st to join
Round 1: ch3, 2dc, ch2, * [3dc, ch2], * rep 2 more times into centre of ring, sl st to first st to join
Round 2: sl st to ch-2 sp, ch3, [2dc, ch2, 3dc] in ch-2 sp, ch1, * [3dc, ch2, 3dc, ch1] in next ch-2 sp, * rep two more times, sl st to first st to join
Round 3: sl st to ch-2 sp, ch3, [2dc, ch2, 3dc] in ch-2 sp, ch1, *3dc in ch1-sp, ch1, [3dc ch2, 3dc, ch1] in ch-2 sp, ch1, * rep around, sl st to first st to join
Round 4: rep round 3 working 3dc in ea ch1-sp, ch1 and [3dc, ch2, 3dc, ch1] in ea ch-2 sp, sl st to first st to join
Round 5: rep round 3
Round 6: ch3, dc in ea st and ch-1 sp to corner ch-2 sp, *[2dc, ch2, 2dc] in ch-2 sp, dc in ea st and ch-1 sp to corner sp, * rep around, sl st to first st to join
Classic granny square complete
Assembly
Arrange your granny squares following the layout shown in the Design and Construction section.
Join the squares using the mattress stitch in the sequence shown in the diagram. This creates a neat, almost invisible seam.
You can use any joining method you prefer, but keep in mind that different joins will slightly change the overall look and texture of your blanket.
Border
Colour order:
- Round 1: Yarn B
- Round 2: Yarn C
- Round 3: Yarn A
- Round 4 (bobble round): Yarn B
- Round 5: Yarn A
- Round 6: Yarn C
With a 4mm hook
join yarn on RS in st before any edge ch-2 corner sp
Round 1: ch3, * [2dc, ch2, 2dc] in ch-2 corner sp, dc in ea st to edge corner sp, * rep around, sl st to first st to join
- Each side: 146 dc
- Corners: [2dc, ch2, 2dc]
Total:
- 584 dc
- 4 corner sps
Fasten off
Change colour
Round 2: rep round 1
- Each side: 150 dc
- Corners [2dc, ch2, 2dc]
Total
- 600 dc
- 4 corner sps [2dc, ch2, 2dc]
Fasten off
Change colour
Round 3: rep round 1
- Each side 154 dc
- Cornes [2dc, ch2, 2dc]
Total
- 616 dc
- 4 corner sps [2dc, ch2, 2dc]
Fasten off
TURN TO WORK ON WS Bobble St Round
Change colour
Join yarn in st after any corner sp
Round 4: ch1, **sc in 7 sts, 5-bob in next st, * sc in next 10 sts, 5-bob in next st, rep from * to last 7 sts before corner sp, sc in next 7 sts, [2sc, ch2, 2sc] in corner sp, rep from ** three more times, sl st to first st to join
- 576 sc
- 56 bobble stitches
- 4 corner spaces
Fasten off
TURN TO WORK ON RS
Change colour
Round 5: ch3, *dc to corner sp, [2dc, ch2, 2dc] in corner sp, * rep around, sl st to first st to join
- Each side: 162 dc
- Corner sps [2dc, ch2, 2dc]
Total
- 648 dc
- 4 corner sps [2dc, ch2, 2dc]
Change colour
Round 6: rep round 5
- Each side: 166 dc
- Corner sps [2dc, ch2, 2dc]
Total
- 664 dc
- 4 corner sps [2dc, ch2, 2dc]
Fasten off
Congratulations! Your granny square blanket is finished.
Copyright Notice
The pattern and photographs of this design are the property of Sharon Goodwin at Jera’s Jamboree. This pattern and design are subject to copyright and are for personal, non-commercial use only. You may not share, resell, alter or redistribute this pattern in part or in whole. You may, however, sell any finished items you make. If you would like to include this pattern in a roundup, you may take one photo and link back to this pattern.
Ready to Crochet Your Blossom Cottage Blanket?
My Blossom Cottage Granny Square Blanket is such a lovely project to work on — the mix of floral motifs and classic granny squares keeps things interesting, while the soft colour palette creates a cosy, cottage-inspired finish.
Whether you follow the colour placement in this pattern or choose your own palette, this is a design you can truly make your own.
Looking for More Granny Square Inspiration?
If you enjoyed making this blanket, you might also like:
- Flower Granny Square Patterns – explore more floral designs
- Lap Blanket Crochet Patterns – perfect for cosy projects
- Granny Square Projects – creative ways to use your squares
Join the Crochet Community
I’d love to see your version of the Blossom Cottage Blanket! You’re very welcome to join my Jera’s Jamboree Crochet Community on Facebook.
It’s a friendly space where you can share your makes, ask questions, and get inspired by other crocheters.
Save for Later on Pinterest
Save the image below to your favourite Pinterest board so you can come back to this pattern whenever you’re ready to start.