I’m excited to share with you my latest design for what has turned out to be, my favourite chunky cardigan! Cozy and stylish, this layering piece checks all the boxes for comfort and functionality. Perfect for wearing on spring days as a jacket or you can layer during cooler months.
Designed with an oversized fit, my Evie cardigan crochet pattern features a hood for added warmth, pockets to keep your hands warm, and a classic button closure.
Made with a soft chunky/bulky yarn, my cardigan works up surprisingly fast, and its length is fully customizable to suit your style.
I hope you love it as much as I do!

Keep scrolling for the free pattern below, or grab a convenient PDF version in my Etsy and Ravelry stores.
Don’t forget you can reach out in the Facebook group if you need help (not just from me but from other crocheters too). I’d love to see your finished makes.
Jump to: Materials | Measurements | Pattern Instructions
Why you’ll Love to Crochet my Chunky Cardigan
Skills Used
I consider this is easy to make however, to help you decide whether this is the right project for you, here’s the skills you need to work my chunky cardigan.
Crochet Stitches:
- Double crochet (dc) body – fronts, back, sleeves, hood, pockets
- Half double crochet (hdc) – button band/edging
- Single crochet (sc) – ribbed cuff
- Single crochet back loop only (scblo) – ribbed cuff
- Single crochet 2 together (sc2tog) – ribbed cuff
- Front Post Double Crochet (fpdc) / Back Post Double Crochet (bpdc) – pockets
Techniques:
- Decreasing for shaping fronts – working 2 double crochet together (dc2tog)
- Decreasing for shaping hood – skipping stitches and leaving stitches unworked
- Decreasing set up round for ribbed sleeve cuff – single crochet 2 together (sc2tog)
- Button hole – chaining and skipping stitches
- Sewing on buttons
Jera’s Jamboree receives payments for affiliate advertising. This is at no extra cost to you. As an Amazon Associate I earn from qualifying purchases. Please see my disclosure policy for more information.
Supplies and Materials
You will need:
- Chunky Yarn; 1076, (1143, 1214, 1290, 1372, 1424) yards
- 6mm / J-10 Crochet Hook
- Buttons (recommended 30mm diameter) X 4
- Stitch Markers
- Scissors
- Yarn Needle

Yarn Choices
I used Scheepjes Chunky Monkey in the colourway Chartreuse to work this crochet chunky cardigan.
Although branded as Aran weight, having checked the wraps per inch (wpi) it is chunky weight coming in at 7 wpi. Yarn is chunky or bulky at between 6 and 8 wpi, so this falls smack bang in the middle. I’ve also changed up the recommended hook size of 5mm to 6mm to reflect the wpi.
If you would like to use the same yarn as my pattern, Chunky Monkey is available in over 90 shades, lots of colours for you to choose from.
It is lovely and soft to work with and to wear!
You can machine wash on a Synthetic Wash cycle at 40°C and tumble dry on a Low Heat. It does wash up well and laid flat, dries quite quickly. This yarn can be tumble dried and ironed on a cool heat – I’ve not tried this yet.
Here’s more information about this bulky weight yarn:
| Fibre(s) | Acrylic |
| Format | Ball |
| Length (m) | 116 |
| Length (yds) | 127 |
| Ball Weight | 100g |
Yarn Substitutions
Substitute any chunky or bulky #5 weight yarn.
When you crochet your swatch for In the Limelight cardigan, pay attention to the drape and feel.
If you’re happy with your choice of substitution but your gauge doesn’t match mine, don’t worry, you can use my stitch gauge converter to adjust your stitch count.

Gauge
Using a 6mm / J-10 hook
12 stitches and 6 rows of double crochet = 10cm X 10cm
Glossary
Stitches
You will need to know how to work these stitches:
- single crochet (sc)
- single crochet back loop only (scblo)
- single crochet 2 together (sc2tog)
- half double crochet (hdc)
- double crochet (dc)
- front post double crochet (fpdc)
- back post double crochet (bpdc)
- slip stitch (sl st)
Abbreviations
- chain (ch)
- chain space (ch-sp)
- continued (contd)
- each (ea)
- left hand side (LHS)
- remaining (rem)
- repeat (rep)
- right hand side (RHS)
- right side (RS)
- skip (sk)
- stitch/es (st/s)
- wrong side (WS)
Measurements
These measurements follow the Craft Yarn Council guidelines.
Model is wearing a size medium and is just over 5’ in height.
| To Fit (inches) | Width approx. (inches) | Length (shoulder to hem) approx. (inches) | Total Yarn (yds) approx. |
| S 32 – 34 | 43 | 22 | 1076 |
| M 36 – 38 | 46 | 23 | 1143 |
| L 40 – 42 | 48 | 24 | 1214 |
| XL 44 – 46 | 52 | 25 | 1290 |
| 2X 48 – 50 | 55 | 26 | 1372 |
| 3X 52 – 54 | 58 | 26 | 1424 |
| Hood is the same measurement for all sizes: Total width approximately 18” X 15.5” length. Pockets are the same measurement for all sizes: approximately 8” wide X 6.5” deep. | |||

How the Chunky Cardigan Crochet Pattern is Worked
To see the stitches used and how the cardigan is shaped, see the ‘skills used’ section.
I’ve included the image below to help you visualise the process.
After this I have included more information about the numbered images.

- The fronts and back of the Evie chunky cardigan are worked first in one piece in rows. The back is worked to the armhole, then splits to work the first front followed by the back and finally the second front.
- Next, the shoulder seams are sewn. Working on the wrong side, the fronts are folded over the back and lined up. The seam is sewn along the top of the garment from armhole to neck. This is repeated on both sides.
- Working on the right side, the sleeves are worked directly into the armhole by joining the yarn underarm and working in rounds. The rounds are turned to keep the stitches the same as the body. The yarn isn’t fastened off at the last round as the pattern proceeds to work the ribbed cuff. This is repeated for both sleeves.
- The hood is worked directly onto the jacket in rows. To avoid a pointed hood, shaping is in the middle of the hood. The two separate sides are seamed together from the top edge.
- The button band/edging is worked next. Yarn is joined at the hem and worked around the fronts and hood in rows. Buttons are lined up with the button holes and sewn in place. Finally the pockets are worked separately in rows, lined up and sewn in place.
I have a few cardigans that use this same construction. You might like to check out these free patterns:
- Larissa Cardigan
- Clara Long Cardigan
- Amelia Short Sleeve Cardigan
- Carnation Kisses Lacy Cardigan
- Summer Cardigan
- Granny Stitch Hooded Cardigan
- Mini Bean Stitch Cardigan

Customizing your Cardigan
It’s easy to alter the length of your cardigan. To make yours longer, work more rows before the garment splits at the armhole. For a cropped cardigan, work less rows. Do not change the rows from the split to the shoulder because this will affect how comfortable your sleeve fits.
To remove the hood, you can skip those instructions and go straight to the edging. Instead of working around the hood, you’ll work around the back of the neck.
To remove the buttons, work the edging without the skipped stitches.
If you change the pattern, you will need more or less yarn than recommended.
My Pattern Notes
- This pattern is written using US crochet terms.
- Instructions for different sizes are written like this: S, (M, L, XL, 2X, 3X).
- Repeated instructions in a row are enclosed like this *instruction* For example: sc in next 2 sts, sc2tog, *sc in next 2 sts, sc2tog, *rep around. You will work a single crochet in the next 2 stitches followed by working 2 single crochet stitches together and repeat this around.
- Chain 1 does not count as a stitch.
- Chain 2 counts as a double crochet.
- Sleeves – make sure you work the same number of stitches in the first round for both sleeves.
- Hood – the space between stitch markers is the width of the hood.
- Buttonholes are made by chaining and skipping a stitch.
- Pockets – make sure you sew through every stitch of the pocket to the fabric to secure without gaps.
- Weave in ends as you go.
- Read the pattern through before you start.
- Using these pattern notes and how the cardigan is worked section will help you to be successful in your crocheting your garment.
Testimonials
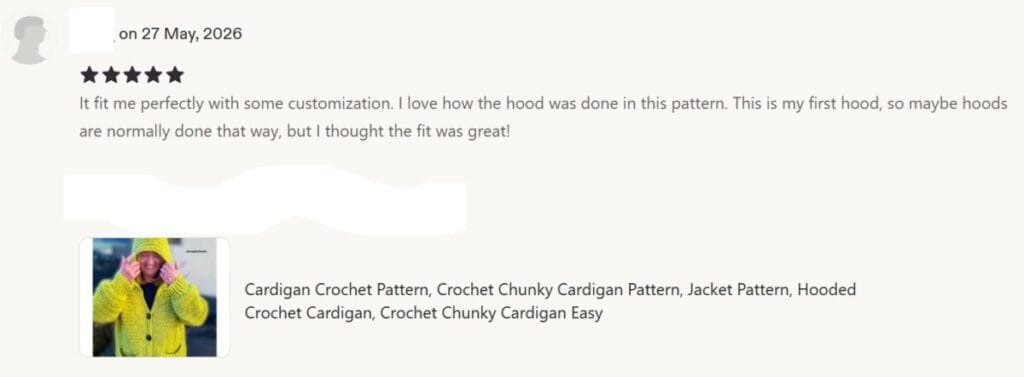
5 star Etsy review 27 May 2026: “It fit me perfectly with some customization. I love how the hood was done in this pattern. This is my first hood, so maybe hoods are normally done that way, but I thought the fit was great!”
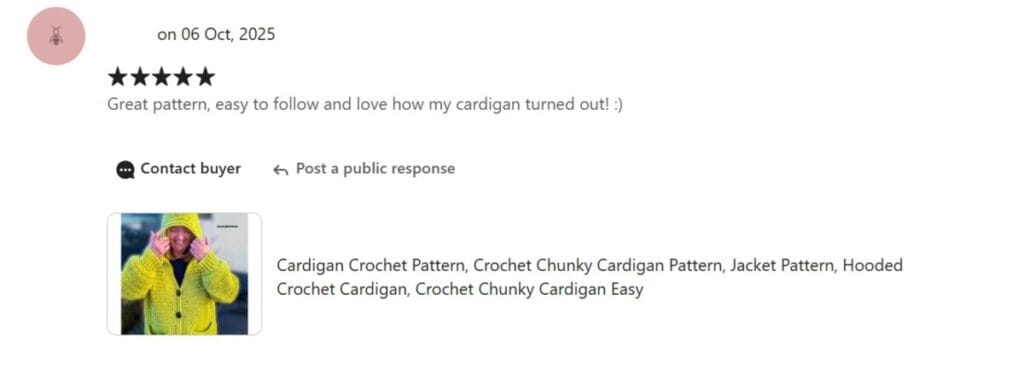
5 star Etsy review 6 Oct 2025 “Great pattern, easy to follow and love how my cardigan turned out! :)”
Purchase the easy-to-read print-friendly PDF (ad free)
The PDF of this cardigan pattern includes everything you need:
- how to work the stitches
- how the pattern is worked
- pattern notes
- clear written instructions
Chunky Cardigan Instructions US Crochet Terms
With a 6mm / J-10 hook
Body
Ch 110, (126, 142, 158, 174, 190)
Row 1 (RS): dc in 3rd ch from hook, dc in ea ch across, ch2, turn (108, 124, 140, 156, 172, 188 dc)
Row 2: dc in ea st across, ch2, turn
Row 3 – 25: rep row 2
*If you are customizing the length, work less than 25 rows for a cropped cardigan and more rows for a longer cardigan*
First Front
Row 26: dc2tog, dc in next 21, (25, 29, 33, 37, 41) sts, count 4 sts and place a st marker in the 4th st, ch2, turn, leaving rem sts unworked
Row 27: dc to last 3 sts, dc2tog, dc in last st, ch2, turn
Row 28: dc2tog, dc in ea st across, ch2, turn
Rep rows 27 and 28 a further 3, (3, 4, 4, 5, 5) times
Total rows 34, (34, 36, 36, 38, 38)
Row 35, (35, 37, 37, 39, 39): dc in ea st across
Fasten off leaving a long tail to sew shoulder seam
Back
With WS facing outwards, rejoin yarn in st after st marker, ch2
Row 26: dc in next 51, (59, 67, 75, 83, 91) sts, count 4 sts and place a st marker in the 4th st, ch3, turn, leaving rem sts unworked
Row 27: dc in ea st across, ch2, turn
Row 28 – 35, (35, 37, 37, 39, 39) rep row 27
Fasten off
Second Front
With WS facing outwards, rejoin yarn is st after st marker, ch2
Row 26: dc to last 3 sts, dc2tog, dc in last st, ch2, turn
Row 27: dc2tog, dc in ea st across, ch2, turn
Row 28: dc to last 3 sts, dc2tog, dc in last st, ch2, turn
Rep rows 27 and 28 a further 3, (3, 4, 4, 5, 5) times
Total rows 34, (34, 36, 36, 38, 38)
Row 35, (35, 37, 37, 39, 39): dc in ea st across
Fasten off leaving a long tail to sew shoulder seam
Shoulder Seams
Working on WS, place cardigan flat, fold fronts over back and line up.
Sew shoulder seam
Rep on other side
Fasten off
Sleeves
Working on RS, rejoin yarn with a sl st underarm, ch2
Round 1: dc evenly around armhole, join with a sl st, ch2, turn
Round 2: dc in ea st around, join with a sl st, ch2, turn
Round 3 – 20, (20, 21, 21, 22, 22) rep round 2
DO NOT FASTEN OFF
Ribbed Cuff
Set up round – cont from end of last round
Ch1, sc in next 2 sts, sc2tog, *sc in next 2 sts, sc2tog, *rep around
Ch10
Row 1: sc in 2nd ch from hook, sc to cuff edge, sl st in next 2 sts on cuff edge, turn
Row 2: scblo to last st, sc in last st, ch1, turn
Row 3: sc in 1st st, scblo in ea st to cuff edge, sl st in next 2 sts on cuff edge, turn
Rep rows 2 and 3 around cuff
Join cuff with sl st through 1 loop on start and end of round
Fasten off
Rep for other sleeve
Hood
If you are not crocheting the hood, skip these instructions and move on to the edging
Setting up Width of Hood
From the shoulder seam on both sides of the front count 5 rows down and place a st marker on the neck edge.
Rejoin yarn with a sl st at st marker on RHS, ch2
Row 1: dc evenly around to next st marker, ch2, turn
Remove st markers
Row 2: dc in ea st across, ch2, turn
Rep row 2 until hood measures 30.5cm/12”
Place st marker at centre st of last row
Shape First Side
Row 1: dc across to within 2 sts of centre st marker, turn, leave rem sts unworked, ch2
Row 2: dc in ea st across, ch2, turn
Row 3: dc in ea st across to within the last 2 sts, turn, leave rem sts unworked, ch2
Row 4: dc in ea st across
Fasten off
Shape Second Side
Sk 2 sts to left of centre marker and rejoin yarn
Row 1: dc in ea st across, ch2, turn
Row 2: dc in ea st across, turn
Row 3: sl st in first 3 sts, ch2, dc in ea st across, ch2, turn
Row 4: dc in ea st across
Fasten off
Assembling Hood
Working on WS, place shaped sides together and line up to match.
Sew seam along the top of the top edge down to the st marker
Fasten off
Button Placement
If you are not fastening your cardigan, skip these instructions and go straight to edging
Lay the cardigan flat
On the LHS (as worn) of the front edging space your buttons evenly from just above the hem to the start of the neck shaping.
Once you are happy with your button placement, use a st marker on the edge to mark where your button will be.
On the RHS (as worn) use a st marker in the corresponding row to mark where your buttonhole will be.
If you use the same size buttons as this pattern (30mm diameter) you can space your buttons 12 – 14 cm apart from the 4th row up from the hem to the neck shaping
Edging
If you are not adding buttons, follow instructions but leave out the chain and skipped stitch. If you have not added a hood, you will work around the back of the neck
Working on RS rejoin yarn with sl st at hem on RHS (as worn), ch1
Row 1: sc evenly from hem up RHS, around hood and back down LHS to hem, ch1, turn
Row 2: hdc in ea st to end, ch1, turn
Row 3 (buttonhole row): *hdc to st before 1st st marker, ch1, sk1, * rep to last st marker, hdc in ea st to hem on LHS, ch1, turn
Row 4: hdc in ea st and ch-sp to end
Fasten off
Line up each button on LHS (as worn) with st marker
Sew button to 2nd row from edge
Pockets
(make 2)
Ch24
Row 1 (RS): dc in 3rd ch from hook, dc in ea ch across, ch2, turn
Row 2: dc in ea st across, ch2, turn
Row 3 – 10: rep row 2
Row 11: *fpdc in next st, bpdc in next st, * rep to last st, dc in last st, ch2, turn
Row 12: rep row 11
Fasten off leaving a long enough tail to sew around 3 edges of pocket
Pocket Placement
With RS facing outwards
Experiment with the best place for your pockets. If you want to follow this pattern for pocket placements, line up 2 cm from front edging and 3rd row up from hem
Pin pockets in place
Sew side, bottom and side of pocket to fabric
Rep on the other side
Congratulations! Your chunky cardigan is finished.
Copyright Notice
The pattern and photographs of this design are the property of Sharon Goodwin at Jera’s Jamboree. This pattern and design are subject to copyright and are for personal, non-commercial use only. You may not share, resell, alter or redistribute this pattern in part or in whole. You may, however, sell any finished items you make. If you would like to include this pattern in a roundup, you may take one photo and link back to this pattern.
Save to Pinterest
No time now? Pin the image below to your favourite board for later.
