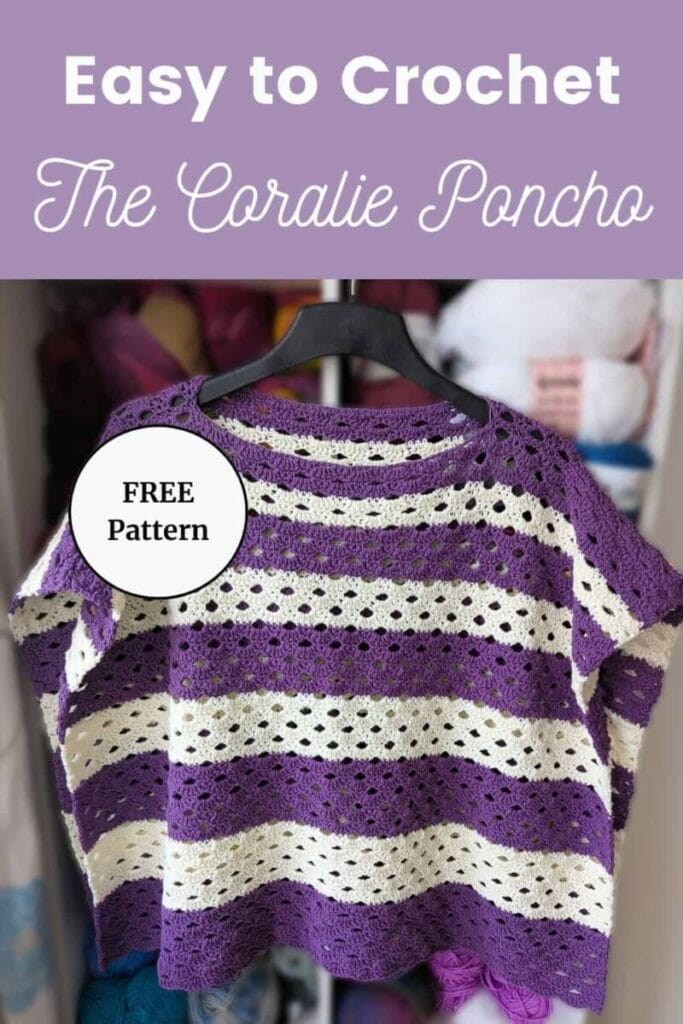
Crochet a lightweight poncho with graduated stripes and two styling options in this easy crochet poncho pattern.
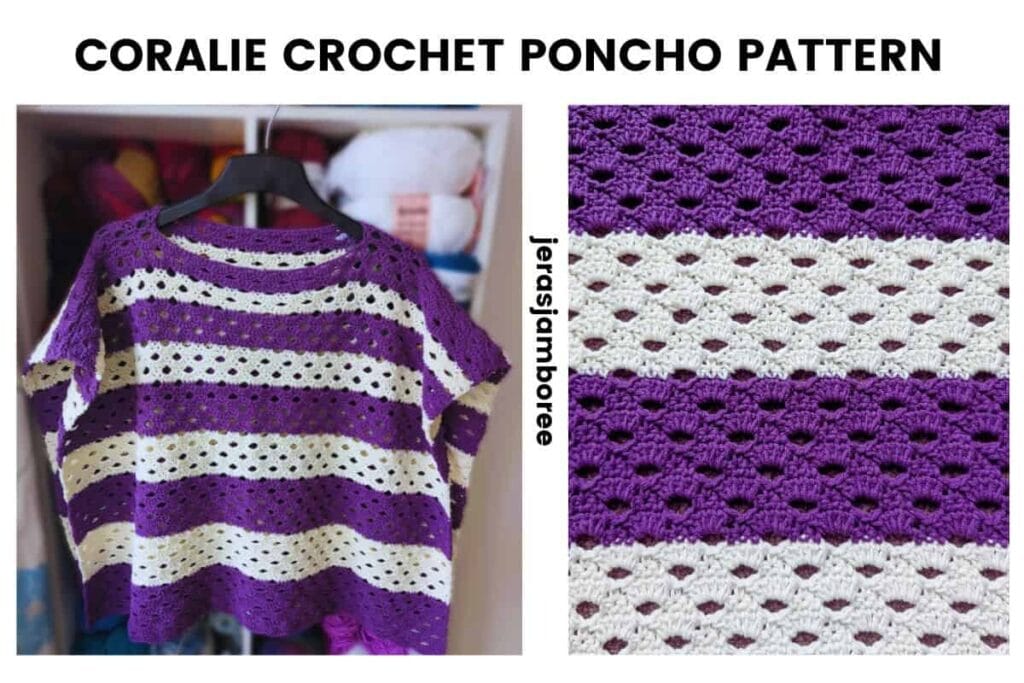
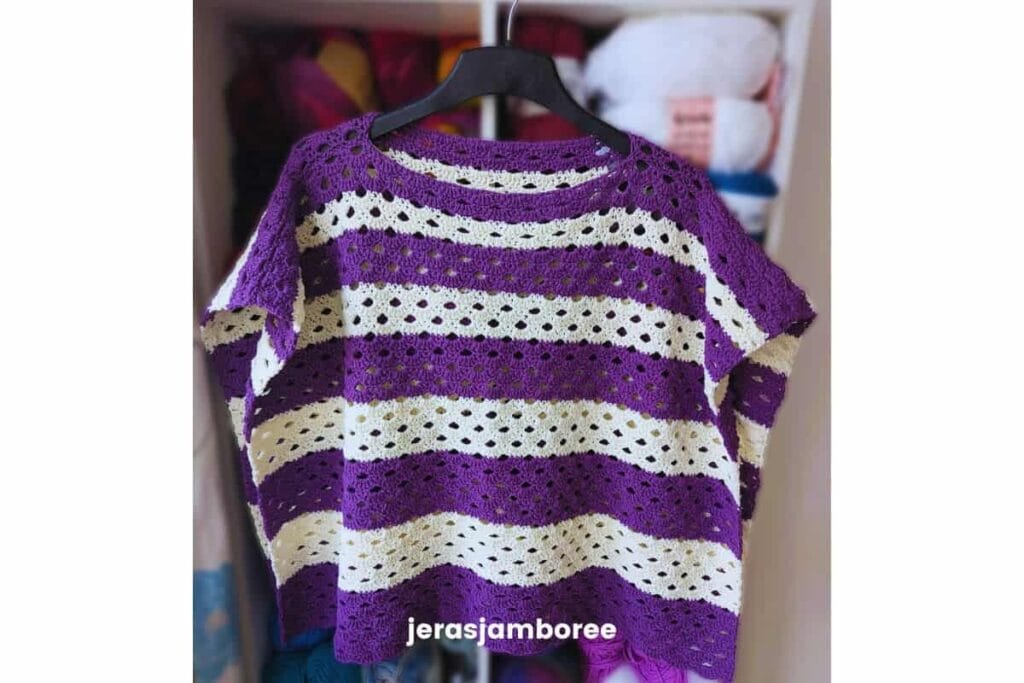
My Coralie Poncho is an easy crochet poncho pattern featuring graduated stripes worked in the Arcade stitch.
Lightweight and comfortable to wear, it’s designed as an extra layer for spring and summer when you want a little warmth without the bulk of a sweater or cardigan.
Made from two simple rectangles, Coralie is an enjoyable project for confident beginners and relaxing crochet for more experienced makers.
The repeating stitch pattern creates an airy fabric with beautiful drape, while the graduated stripes add visual interest and a modern look.
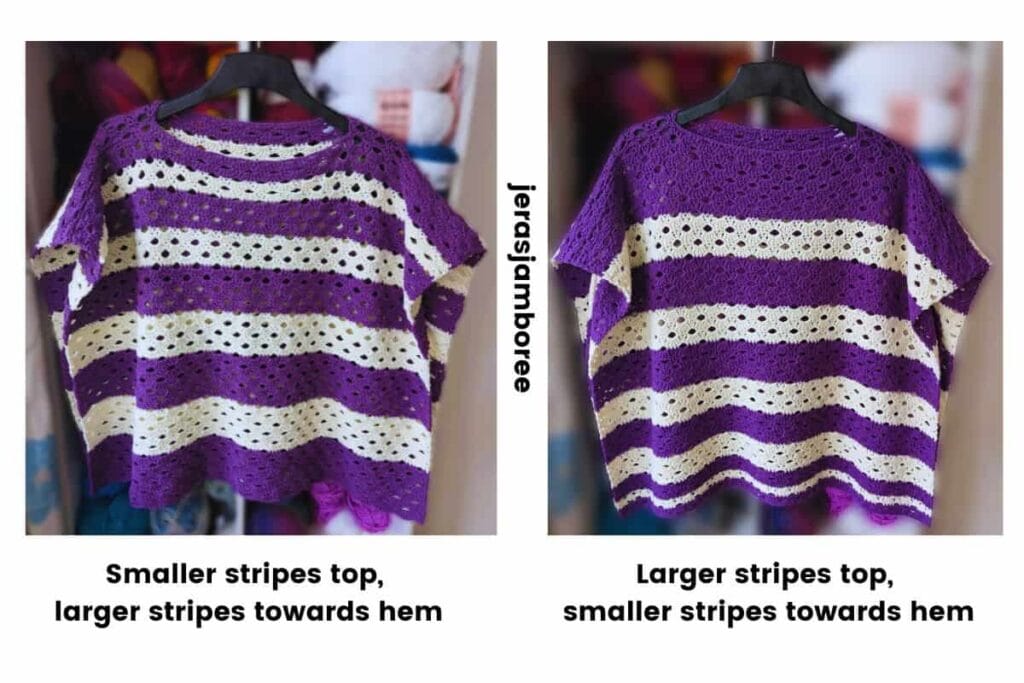
One of my favourite features of my design is the flexibility in how it can be assembled. You can position the narrower stripes at the neckline and the wider stripes towards the hem for a classic graduated effect, or reverse the panels so the wider stripes sit at the top and the narrower stripes at the bottom. Both options use exactly the same pattern but create a different look when worn.
The free pattern includes instructions for sizes S/M through 4X/5X, along with yarn estimates for both a two-colour version and a single-colour alternative.
Enjoy my crochet patterns and blog posts?
Add Jera’s Jamboree as a preferred source on Google, Just click below and tick the box to add me.

Below you’ll find everything you need to crochet the Coralie poncho including sizing, yarn details, gauge, and the full free pattern.
If you’d prefer a printable ad-free version, the PDF is also available in my Etsy and Ravelry shops. Thank you so much for supporting my work.
Jump to: Sizing | Materials | Pattern Instructions
Skill Level
Easy. The Coralie Poncho is worked using two simple rectangles and a four-row stitch repeat. There is no shaping, making this an enjoyable project for confident beginners and experienced crocheters.
Sizing
I’ve designed the Coralie Poncho as a lightweight layering piece with approximately 12 inches of positive ease.
The table below shows chest measurements, the circumference of the finished width and how much yarn you’ll need in the two colours for your size.
I’ve also included the total amount of yarn for one colour but I would recommend at least two colours (one neutral and one contrasting) to give more interest to your easy poncho.
I use the Craft Yarn Council’s guidance for sizing.
| To Fit Chest (inches) | Finished Size Width approx. (inches) | Yarn (yds) approx. Contrasting Colour | Yarn (yds) approx. Neutral Colour | Yarn (yds) approx. ONE COLOUR |
| S/M 32 – 38 | 50 | 750 | 600 | 1350 |
| L/XL 40 – 46 | 58 | 870 | 696 | 1566 |
| 2XL/3XL 48 – 54 | 66 | 990 | 792 | 1782 |
| 4XL/5XL 56 – 62 | 74 | 1100 | 888 | 1988 |
The length for all sizes is 22.5 inches.
Choosing Your Size
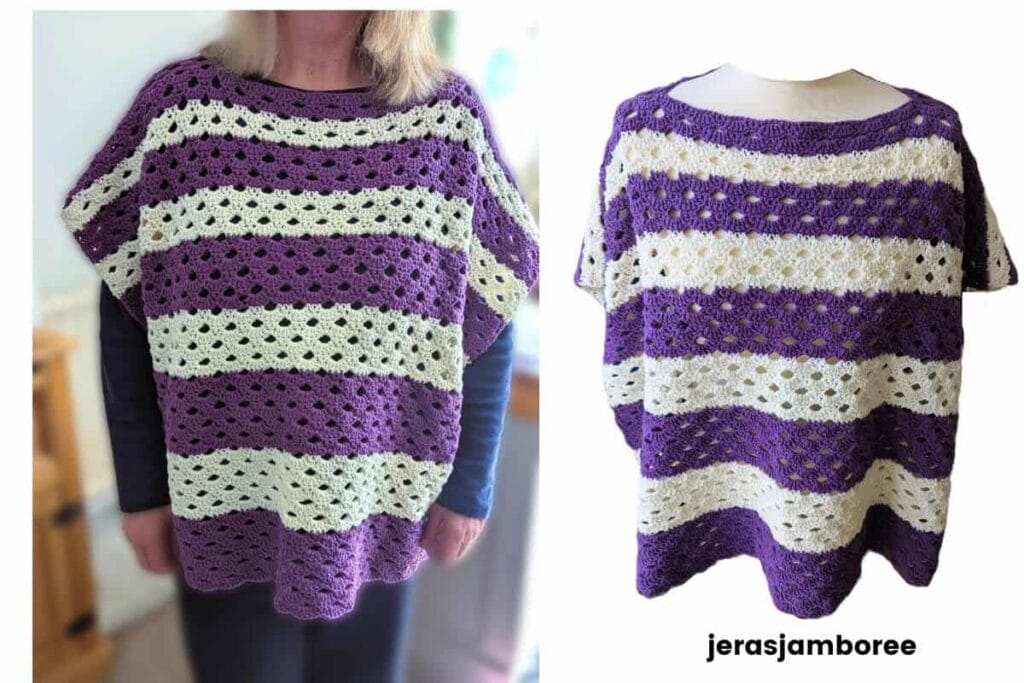
Unlike a traditional poncho, Coralie is intentionally not oversized or full width, making it a lightweight layering piece that’s comfortable to wear during spring and summer.
If you prefer a roomier fit or would like more coverage, you can size up. For example, sizing up one size group adds approximately 8 inches to the finished circumference.
You can also customise the width by adding stitches in multiples of 6 to the foundation chain. This will increase the width of each panel while maintaining the stitch pattern.
Jera’s Jamboree receives payments for affiliate advertising. This is at no extra cost to you. As an Amazon Associate I earn from qualifying purchases. Please see my disclosure policy for more information.
Materials
Contrasting Colour: 750, (870, 990, 1100) yds
Neutral Colour: 600, (696, 792, 888) yds
- 4mm crochet hook (I use Clover Amour hooks)
- Stitch markers
- Tape measure
- Scissors
- Yarn needle
Yarn Choices
I chose YarnArt Jeans in the colours Violet Purple (50) and Milk White (03) for my Coralie Poncho.
When I first came across this yarn, it was the purple shade that caught my eye. It was exactly the colour I had in mind for this design. What I didn’t realise at the time was that the YarnArt Jeans range includes more than 80 colours, making it easy to create your own colour combinations.
The yarn has a unique S-on-S ply construction, which helps prevent splitting and I found it gives it a smooth feel on the hook.
The blend of 55% cotton and 45% acrylic combines the breathability of cotton with the durability and easy-care qualities of acrylic. I particularly enjoy using this fibre blend for garments. It has more drape than many 100% cotton yarns, while still feeling lightweight and comfortable to wear.
I purchased my yarn from independent UK retailer Our Little Craft Co. If you’re considering using YarnArt Jeans and live outside the UK, it’s worth shopping around, as prices can vary considerably. Vilrita, based in Lithuania, also stocks the range and ships internationally. I have bought from this shop before (YarnArt Linen Soft used for my Meadowsong scarf). Shipping was £7 for 800g of DK.
Gauge is not critical for this project so you can substitute any Sport Weight (#2) yarn.
If you would like to achieve the same drape and fit as my sample and your gauge is out, you can easily adjust your stitches using my stitch gauge converter.
Gauge
With a 4mm hook
20 sts and 12 rows = 4″ x 4″ (10 cm x 10 cm) in pattern stitch, unblocked
Gauge is not critical.
Stitches and Abbreviations
- single crochet (sc)
- double crochet (dc)
Need a refresher? Part one of my stitch library has instructions.
For my UK crocheters, the table below is a conversion of basic crochet stitches from US to UK.
| US Crochet Terms | UK Crochet Terms |
|---|---|
| single crochet (sc) | double crochet (dc) |
| half double crochet (hdc) | half treble crochet (htr) |
| double crochet (dc) | treble crochet (tr) |
| treble (tr) | double treble (dtr) |
| double treble (dtr) | triple treble (trtr) |
I have used these common abbreviations in the Coralie poncho:
- between (bet)
- chain/s (ch/s)
- each (ea)
- remaining (rem)
- repeat (rep)
- Right Side (RS)
- skip (sk)
- space (sp)
- stitch (st)
- Wrong Side (WS)
How the Coralie Poncho is Worked
My Coralie Poncho is made from two identical rectangular panels worked from the bottom up. Once both panels are complete, they are placed together and seamed at the shoulders, leaving an opening for the neckline.
The simple shoulder seams create a relaxed boat-neck poncho that’s comfortable to wear over tops, dresses, and lightweight layers.
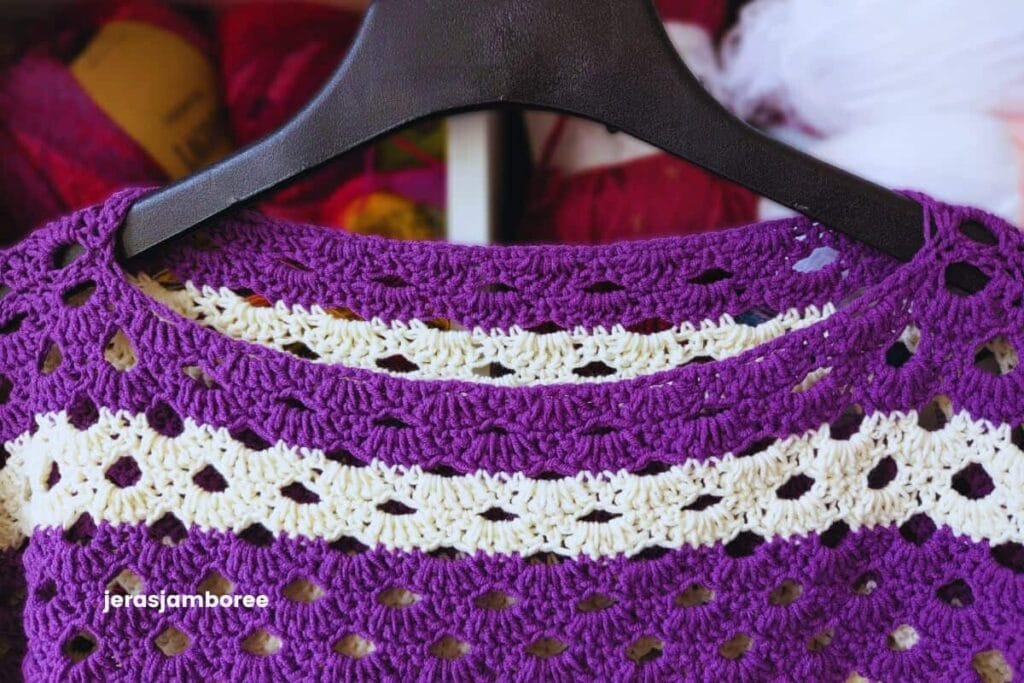
With no shaping and only minimal seaming, you can focus on the rhythm of the stitch pattern and colour changes.
Are you a beginner looking for easy projects? Take a look at my Sandrine cardigan, constructed with 5 rectangles and no shaping, I think you’ll love this one.
The Arcade stitch pattern is worked throughout using a simple 4-row repeat of chains, single crochet, and double crochet shells. The open stitch pattern creates a lightweight fabric with beautiful drape, making it ideal for spring and summer layering.
Graduated stripes create the distinctive look of the design, with the stripe widths increasing as you work.
One of the unique features of the Coralie Poncho is that you can choose how the stripes are positioned when assembling the garment. Wear the narrower stripes at the neckline and the wider stripes at the hem for the original graduated effect, or reverse the panels so the wider stripes sit at the top and the narrower stripes at the bottom. Both options use exactly the same pattern and construction.
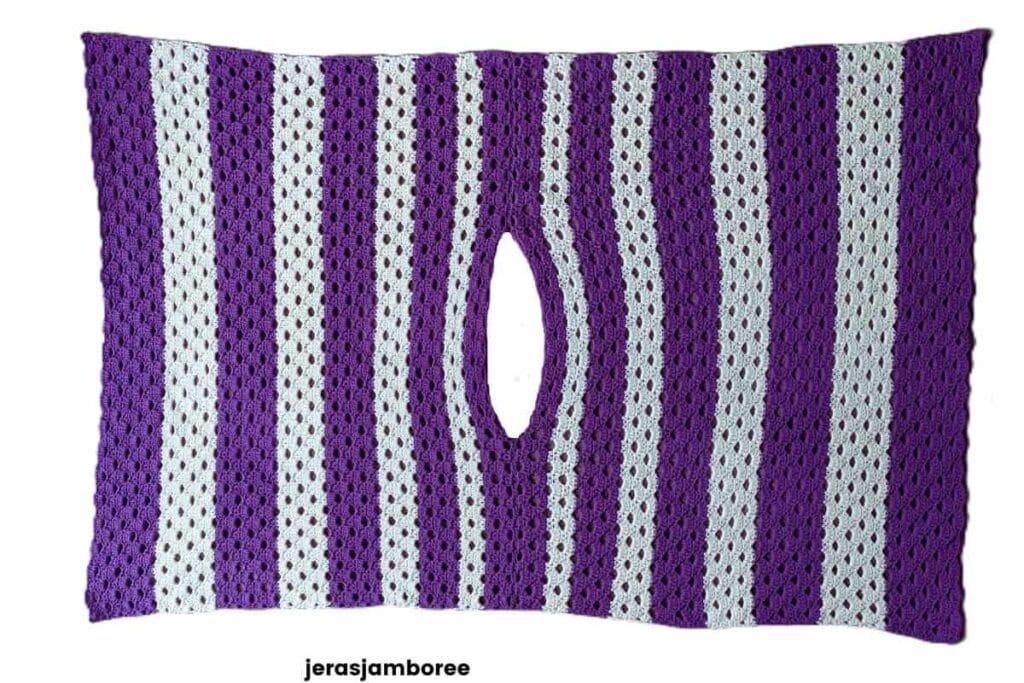
Colour changes are worked at the end of rows. The table below shows where to change between Yarn A and Yarn B to create the graduated stripe effect shown in the sample.
If you’re using different colours, simply substitute your chosen colours for Yarn A and Yarn B.
You can also use more than two colours while following the same stripe sequence.
| End of Row | Change To Yarn Colour |
| 4 | B |
| 8 | A |
| 14 | B |
| 20 | A |
| 28 | B |
| 36 | A |
| 46 | B |
| 56 | A |
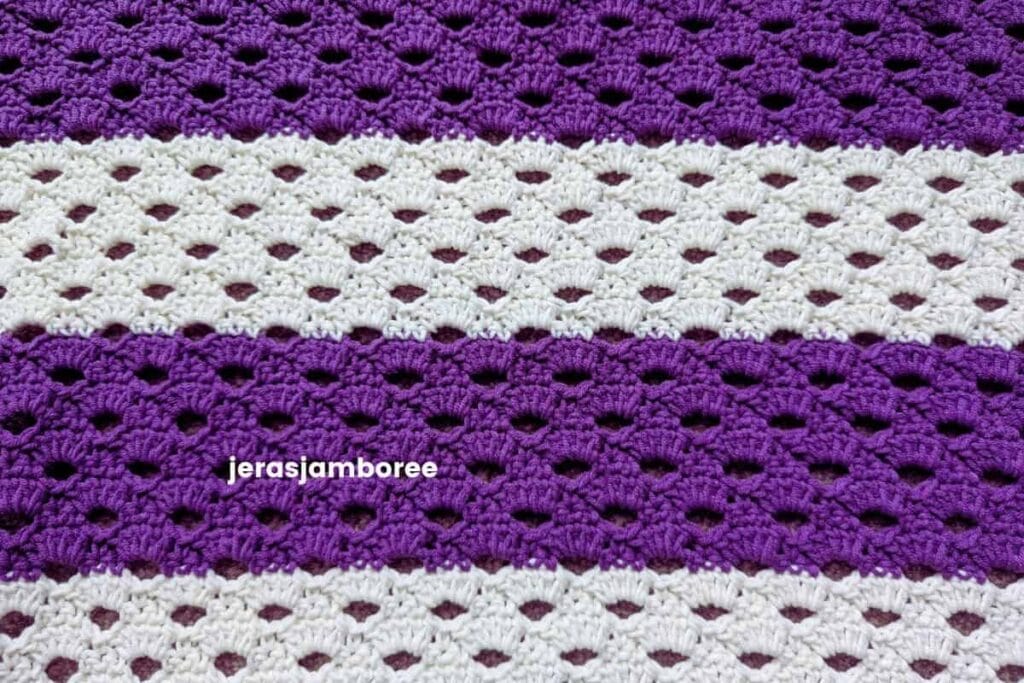
Options to Customise
My Coralie Poncho can be assembled in two different ways depending on which stripe effect you prefer.
Narrower Stripes at the Top
Positioning the narrower stripes at the neckline creates the original graduated effect, with the stripe widths increasing towards the hem. This draws the eye vertically and creates a balanced, flowing look.
- Softens the hips: Larger, bolder stripes at the bottom slow the eye down, grounding your look without adding visual clutter to your midsection.
Wider Stripes at the Top
Reversing the panels places the wider stripes at the neckline and the narrower stripes at the hem. This creates a different visual emphasis while using exactly the same pattern pieces and construction method.
- Broadens the shoulders: If you have a pear shape (narrower on top, curvier on the bottom), reversing the gradient works in your favour. Larger stripes on your top half will widen your shoulders and balance out your lower half.
Whichever option you choose, the fit, measurements, and yardage remain the same.
The image below shows the same poncho with the panels arranged in each orientation.
My Pattern Notes
- Pattern is written in English using US crochet terms.
- Multiples of 6 + 1.
- Instructions for sizes are written like this: S/M, (L/XL, 2X/3X, 4X/5X).
- Chain 1 does not count as a stitch.
- Chain 3 counts as a double crochet.
- Repeated instructions are shown between the symbol *. For instance for row 1: *ch3, sk 3 chs, 1sc in ea of next 3 chs, * rep to last 5 chs. You will chain 3, skip 3 chains, work a single crochet in the next 3 chains and repeat this to the last 5 chains.
- Yarn colour changes are not included within the written pattern instructions to allow for different colour combinations. Refer to the colour change table in the “How the Coralie Poncho is Worked” section for the sample stripe sequence.
- When creating the neckline, place stitch markers through both layers of fabric.
- To create a wider neckline, measure an equal distance to the left and right of the centre marker before placing the neckline markers.
- Weave in ends as you go to minimise finishing work.
- If substituting yarn or using additional colours, your yarn requirements may differ from those stated.
Get the Printable PDF Version
The PDF of this pattern includes everything you need:
- how to work the stitches
- how the pattern is worked
- pattern notes
- clear written instructions
- printable row counter

Coralie Poncho Pattern Instructions (US terms)
Make 2
With a 4mm hook
Ch 127, (145, 163, 187)
Row 1 (WS): sc in 2nd ch from hook, *ch3, sk 3 chs, 1sc in ea of next 3 chs, * rep to last 5 chs, ch3, sk 3 chs, 1sc in ea of last 2 chs, ch1, turn
Row 2 (RS): sk first sc, *sk 1 sc, 5dc in ch3-sp, sk 1 sc, sc in next st, (the center sc of 3), * rep ending 5dc in last ch3-sp, 1sc in last st, ch3, turn
Row 3: sk [1sc, 1dc], *sc in ea of next 3 dc, (the center 3 dc of 5), ch3, sk [1dc, 1sc,1 dc], * rep to last group, 1sc in ea of 3dc, ch2, sk 1 dc, 1dc in ch1, ch3, turn
Row 4: sk first sc, 2dc in ch2-sp, * sk 1 sc, 1sc in next sc (the center sc of 3), sk 1 sc, 5dc in ch3-sp, * rep ending 3dc under ch3, ch1, turn
Row 5: sk first dc, 1sc in next dc, *ch3, sk [1dc, 1sc, 1dc], 1sc in ea of next 3 dc (the center 3dc of 5), * rep ending 1sc in last dc, 1sc in third of ch3, ch1, turn
Rows 2 – 5 establish the pattern
Rows 6–68: rep Rows 2–5, ending with a Row 4 rep
Fasten off
Creating Neckline/Seaming Shoulders
With WS facing outwards, place one panel on top of the other, matching all edges
Find the centre st on the top edge and place a st marker through both layers
Measure 14 cm (5½ inches) to the right of the centre marker and place a second st marker through both layers
Measure 14 cm (5½ inches) to the left of the centre marker and place a third st marker through both layers
Remove the centre marker
The sp bet the rem st markers forms the neckline opening
For a wider neckline, place the neckline markers further from the centre point, ensuring both sides are measured equally
Sew the shoulder seam from each neckline marker to the outer edge of the poncho
Fasten off and weave in ends
Rep on other side
Congratulations! Your Coralie Poncho is finished and ready to be washed, blocked if desired, and enjoyed.
I hope you enjoy crocheting the Coralie Poncho as much as I enjoyed designing it. I love popping this one on when the temperature starts to drop in the evening.
The graduated stripes make this a relaxing project to work on, while the lightweight fabric creates a layer I know you’ll reach for throughout spring and summer.
Whether you choose the narrower stripes at the neckline or reverse the panels for a different look, Coralie is easy to customise and make your own with different colour combinations.
I’d love to know which version you choose — narrower stripes at the top or wider stripes at the top!
Copyright Notice
The pattern and photographs of this design are the property of Sharon Goodwin at Jera’s Jamboree. This pattern and design are subject to copyright and are for personal, non-commercial use only. You may not share, resell, alter or redistribute this pattern in part or in whole. You may, however, sell any finished items you make. If you would like to include this pattern in a roundup, you may take one photo and link back to this pattern.
Looking for more crochet poncho patterns? You might also enjoy my:
or browse my roundup collection of crochet poncho patterns for more inspiration.
I’d Love to See Your Coralie Poncho
If you make my pattern, I’d love to see your finished project! Join the Jera’s Jamboree Crochet Community on Facebook to share your photos and ask questions.
Planning to make the Coralie Poncho later? Save this easy crochet poncho pattern to your favourite Pinterest board so you can easily find it again when you’re ready to start crocheting.