My Selene crochet cardigan pattern is an easy project that uses a combination of stitches to create a unique and eye-catching open front design that you’ll wear again and again.
Crocheting a cardigan can be a fulfilling project that helps you improve your crocheting skills. My pattern involves practicing different stitches (crossed stitch, Iris stitch), shaping techniques (increases for the sleeves), and garment construction (seaming).
Pair it with a dress for a polished look, or with jeans and a tee for a more relaxed vibe.

The free crochet pattern is below with instructions for sizes XS to 5X in both UK crochet terms and US crochet terms.
Jump to: Sizing | Materials | Free Crochet Pattern UK Terms | Free Crochet Pattern US Terms
If you prefer to work offline, the PDF is available in my Etsy and Ravelry stores in US crochet terms only.
This sample is size medium and for reference model is 5’ 1”

Skill Level
Easy / Advanced Beginner
Sizing
Measurements follow guidance from the Craft Yarn Council.
This sample is size medium.
| Size | Chest (cm) | Length (cm) |
| XS | 99 | 63 |
| S | 109 | 64 |
| M | 119 | 65 |
| L | 129 | 65 |
| XL | 139 | 66 |
| 2X | 149 | 66 |
| 3X | 159 | 66 |
| 4X | 169 | 68 |
| 5X | 179 | 68 |
Materials
- DK yarn (recommended Sirdar Hayfield Sundance); 1400, (1400, 1750, 1750, 2100, 2100, 2450, 2450, 2800) yds
- 4mm crochet hook (front and back)
- 4.5mm crochet hook (sleeves)
- Tape measure
- Stitch markers
- Scissors
- Yarn needle
Yarn Choices
Sirdar Hayfield Sundance DK is an acrylic and cotton blend (50/50) that is lightweight and easy to care for being machine washable at 40 degrees.
The 100g ball has 320 meters / 350 yds making this great value for the cost. If you substitute the yarn, make sure you buy enough meters/yards.
This pattern uses the color 503 Very Vanilla.
| Ball Weight | 100g |
| Yarn Blend | 50% Acrylic 50% Cotton |
| Yarn Length | 320m/350y |
| Yarn Washing | Machine Wash 40 |
| Yarn Weight | Double Knitting |
You can substitute any DK yarn that meets gauge, If you substitute the yarn you may need more less than stated in the pattern.
Gauge
16 stitches and 9 rows on a 4mm hook = 10cm X 10cm
If you’re finding it hard to match your personal gauge with the pattern guage, use the stitch gauge converter to easily adjust your stitches.
Design Inspiration
I was browsing online and couldn’t find a design of cardigan I liked (happens to you too?). Nothing inspired me! so I decided to take a look through my stitch dictionary.
I wanted my design to have texture and more than one stitch but didn’t want it too complicated. I knew I wanted to use a shell stitch and to break it up with double crochet. I enjoy working with crossed stitches and wanted to work this into the pattern.
The shell I chose is the Iris stitch. It’s pretty and easy to work and blends really well with the crossed stitches. It also works great as a cuff on the sleeves!
Fortunately, I had the perfect yarn in my stash both in fiber (50/50 cotton and acrylic) and colour 🙂 A neutral-coloured cardigan is more versatile but don’t be limited by colour! A bright-coloured cardigan will add a pop of personality to an outfit.
The design is an open cardigan which works great for spring, summer and early autumn.

How the cardigan pattern is worked
This easy crochet cardigan is worked in a total of 7 pieces:
- Back
- Front (make 2)
- Sleeves (make 2)
- Ribbed edging (make 2)
Each piece is worked flat from the bottom up and seamed to join.
The stitch pattern for the front and back is a 7-row repeat; 2 rows Iris stitch (shell), 2 rows double crochet, 1 row crossed stitches, 2 rows double crochet.
If you enjoy working this stitch pattern, you might enjoy other projects in the Selene collection:
- my Selene sweater is a perfect first garment that you can wear all year.
- add an extra layer with my Selene triangle shawl.
- a relaxed, open-front wrap designed for layering — with the added bonus of a softly shaped hood for extra warmth.
- a lap blanket just the right size for keeping warm while reading, watching TV, or relaxing.


The sleeves are crocheted in double crochet with a cuff of Iris stitch (shell).
Increases are used for shaping the sleeves to ensure a comfortable fit.

The ribbed edging is worked separately and sewn on. This solves the problem of either working too many stitches (where the ribbing ruffles) or not enough (the ribbing stretches the cardigan out of shape).
This gives a structured finish to the front of the cardigan.

Assembly
Once all pieces are crocheted, seams are sewn in this order:
- ribbed edging onto the left and right front panels
- shoulder seams

- sleeves (sewn along the shoulder of both front and back then folding the sleeve and seaming to the wrist).

- side seams from underarm to hem.
To finish off, I worked one round of double single crochet around left front ribbing, back of neck and right front ribbing.
If you feel you’re not ready to use these skills yet, my Alice cardigan might be more suitable. Worked in one piece in granny stitch, it’s a beginner-friendly garment. Go take a look!
Stitches and Abbreviations
You will need to know how to work these stitches:
| UK Crochet Terms | US Crochet Terms |
| Double Crochet (dc) | Single Crochet (sc) |
| Treble Crochet (tr) | Double Crochet (dc) |
| Crossed Treble (Xtr) | Crossed Double (Xdc) |
| Front Loop Only (flo): work in the front loop of the stitch only | |
| Back Loop Only (blo): work in the back loop of the stitch only | |
- Ch = chain
- Ea = each
- St/s = stitch/es
- Sk = skip
- Rep = repeat
- Sp = space
- Incr = increase
- Rs = right side
My Cardigan Pattern Notes
- Size instructions are written like this: XS, (S, M, L, XL, 2X,
- 3X, 4X, 5X)
- Repeated instructions are written between this symbol *, for example *sk3, [2dc, ch1, 2dc] in next st, * rep to last4 sts – you will skip 3 stitches, work 2 double crochet, ch1, 2 double crochet in the next stitch and repeat this across to the last 4 stitches.
- chain 1 does not count as a stitch
- chain 2 (ribbed edging) does count as a stitch
- chain 3 counts as a stitch
- I work my turning chain at the end of a row to keep edges neat but if you’re used to chaining at the beginning of a row and want to continue, you can with no effect on the pattern
- Row 4 is worked into the chain spaces from the previous row
- Row 5 chain spaces are skipped
- Back, front and ribbed edging = 4mm hook
- Sleeves = 4.5mm hook
- sleeves increase by 2 stitches on a row where indicated by working into the base of ch3 (the turning chain) and 2 stitches in the last stitch of row
- the length instructions for front and back are to work to a measurement (in cm’s). Count the rows for the back to make sure you work the same rows for right front, left front and ribbed edging
- when sewing on the ribbed edging, make sure the ribbing is placed on the right edge – check to make sure it is not on the side seam
- sew in ends as you go
Testimonials

5 star Etsy review 17 Nov 2025: “Great pattern, easy to follow”
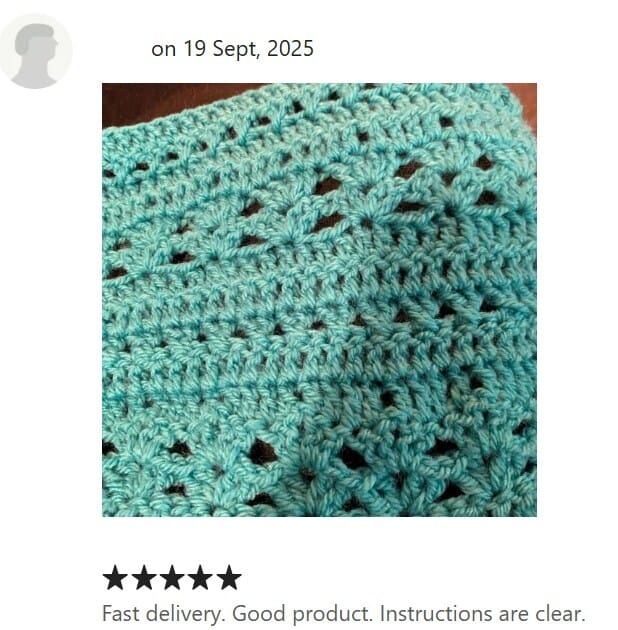
5 star Etsy review 19 September 2025: “Good product. Instructions are clear.”

Pinterest feedback “The pattern is so well written it’s simple to follow. This was my first sweater and I am in love with it!”

Purchase the easy-to-read print-friendly PDF (ad free)
The PDF of this cardigan pattern includes everything you need:
- how to work the stitches
- how the pattern is worked
- pattern notes
- clear written instructions
- printable row counter
Selene Crochet Cardigan Instructions UK Crochet Terminology
Back
With a 4mm hook
Ch 77, (85, 93, 101, 109, 117, 125, 133, 141)
Row 1 (RS): dc in 2nd ch from hook, dc across, ch3, turn (76, 84, 92, 100, 108, 116, 124, 132, 140 dc)
Row 2: tr in ea st across, ch3, turn
Row 3: tr in next st, sk1, [2tr, ch1, 2tr] in next st, *sk3, [2tr, ch1, 2tr] in next st, * rep to last 4 sts, sk2, tr in last 2 sts, ch3, turn
Row 4: tr in next st, [2tr, ch1, 2tr] in ea ch1-sp across to last 4 sts, sk2, tr in last 2 sts, ch3, turn
Row 5: tr in ea st, sk ch1-sps across, ch3, turn
Row 6: rep row 2
Row 7: Xtr to last st, tr in last st, ch3, turn
Row 8: rep row 2
Row 9: rep row 2
Rows 3 – 9 complete stitch pattern
Keeping continuity of pattern, work until back measures 63, (64, 65, 66, 66, 66, 68, 68) cm
Fasten off
Front (make 2)
With a 4mm hook
Ch 25, (29, 33, 37, 41, 45, 49, 53, 57)
Row 1: dc in 2nd ch from hook, dc across, ch3, turn (24, 28, 32, 36, 40, 44, 48, 52, 56 dc)
Rep instructions for back
Fasten off
Sleeves (make 2)
With a 4.5mm hook
Ch 30, (32, 36, 40, 48, 58, 64, 72, 76)
Row 1: dc in 2nd ch from hook, dc across, ch3, turn (29, 31, 35, 40, 47, 57, 63, 71, 75 dc)
Row 2: tr in ea st across, ch3, turn
Row 3: tr in next st, sk1, [2tr, ch1, 2tr] in next st, *sk3, [2tr, ch1, 2tr] in next st, * rep to last 2 sts, tr in last 2 sts, ch3, turn
Row 4: tr in next st, [2tr, ch1, 2tr] in ea ch1-sp across to last 2 sts, tr in last 2 sts, ch3, turn
Row 5 (incr): tr in base of ch3, tr in ea st, sk ch-sps across to last st, 2tr in last st, ch3 turn (31, 33, 37, 42, 49, 59, 65, 73, 77 tr)
Row 6: tr in ea st across, ch3, turn
Row 7 (incr): tr in base of ch3, tr in ea st across to last st, 2tr in last st, ch3, turn (33, 35, 39, 44, 51, 61, 67, 75, 79 tr)
Row 8: rep row 6
Row 9 (incr): rep row 7
Row 10: rep row 6
Row 11 (incr): rep row 7
Row 12: rep row 6
Row 13 (incr): rep row 7
Row 14 – 18: rep row 6
Row 19 (incr): rep row 7
Row 20 – 22: rep row 6
Row 23 (incr): rep row 7
Row 24: rep row 6
Row 25: (incr): rep row 7
Row 26: rep row 6
Row 27 (incr): rep row 7
Row 28: rep row 6
Row 29 (incr): rep row 7
Row 30: rep row 6
Row 31 (incr): rep row 7
Row 32: rep row 6
Row 33 (incr): rep row 7
Row 34 – 37, (38, 38, 39, 39, 40, 40, 42, 42): rep row 6
To change sleeve length, measure from underarm to wrist. Check sleeve length from row 34 and amend number of rows to preference.
Fasten off
Ribbed Edging (make 2)
With a 4mm hook
Ch 7
Row 1: dc in 2nd ch from hook, ch2, turn
Row 2: tr in ea st across, ch2, turn
Row 3: flo tr across to last st, tr in last st, ch2, turn
Row 4: blo tr across to last st, tr in last st, ch2, turn
Rep rows 3 and 4 until ribbed edging measures 63, (64, 65, 66, 66, 66, 68, 68) cm
Fasten off leaving a long tail for sewing to right and left front.
Assembly
With RS facing inwards:
- sew ribbed edging to front panels for right and left (see pattern notes for placement)
- sew shoulder seams
- line up sleeve – centre of sleeve to shoulder seam and pin in place, sew seam, fold sleeve in half and continue to sew seam closed to wrist
- sew side seams
Final round
With a 4mm hook
With RS facing outwards, rejoin yarn to front right, ch1, dc evenly up the front, along the back of the neck and down the left front
Fasten off and weave in ends.
Selene Crochet Cardigan Instructions US Crochet Terminology
Back
With a 4mm hook
Ch 77, (85, 93, 101, 109, 117, 125, 133, 141)
Row 1 (RS): sc in 2nd ch from hook, sc across, ch3, turn (76, 84, 92, 100, 108, 116, 124, 132, 140 sc)
Row 2: dc in ea st across, ch3, turn
Row 3: dc in next st, sk1, [2dc, ch1, 2dc] in next st, *sk3, [2dc, ch1, 2dc] in next st, * rep to last 4 sts, sk2, dc in last 2 sts, ch3, turn
Row 4: dc in next st, [2dc, ch1, 2dc] in ea ch1-sp across to last 4 sts, sk2, dc in last 2 sts, ch3, turn
Row 5: dc in ea st, sk ch1-sps across, ch3, turn
Row 6: rep row 2
Row 7: Xdc to last st, dc in last st, ch3, turn
Row 8: rep row 2
Row 9: rep row 2
Rows 3 – 9 complete pattern
Keeping continuity of pattern, work until back measures 63, (64, 65, 66, 66, 66, 68, 68) cm
Fasten off
Front (make 2)
With a 4mm hook
Ch 25, (29, 33, 37, 41, 45, 49, 53, 57)
Row 1: sc in 2nd ch from hook, sc across, ch3, turn (24, 28, 32, 36, 40, 44, 48, 52, 56 sc)
Rep instructions for back
Fasten off
Sleeves (make 2)
With a 4.5mm hook
Ch 30, (32, 36, 40, 48, 58, 64, 72, 76)
Row 1: sc in 2nd ch from hook, sc across, ch3, turn (29, 31, 35, 40, 47, 57, 63, 71, 75 sc)
Row 2: dc in ea st across, ch3, turn
Row 3: dc in next st, sk1, [2dc, ch1, 2dc] in next st, *sk3, [2dc, ch1, 2dc] in next st, * rep to last 2 sts, dc in last 2 sts, ch3, turn
Row 4: dc in next st, [2dc, ch1, 2dc] in ea ch1-sp across to last 2 sts, dc in last 2 sts, ch3, turn
Row 5 (incr): dc in base of ch3, dc in ea st, sk ch-sps across to last st, 2dc in last st, ch3 turn (31, 33, 37, 42, 49, 59, 65, 73, 77 dc)
Row 6: dc in ea st across, ch3, turn
Row 7 (incr): dc in base of ch3, dc in ea st across to last st, 2dc in last st, ch3, turn (33, 35, 39, 44, 51, 61, 67, 75, 79 dc)
Row 8: rep row 6
Row 9 (incr): rep row 7
Row 10: rep row 6
Row 11 (incr): rep row 7
Row 12: rep row 6
Row 13 (incr): rep row 7
Row 14 – 18: rep row 6
Row 19 (incr): rep row 7
Row 20 – 22: rep row 6
Row 23 (incr): rep row 7
Row 24: rep row 6
Row 25: (incr): rep row 7
Row 26: rep row 6
Row 27 (incr): rep row 7
Row 28: rep row 6
Row 29 (incr): rep row 7
Row 30: rep row 6
Row 31 (incr): rep row 7
Row 32: rep row 6
Row 33 (incr): rep row 7
Row 34 – 37, (38, 38, 39, 39, 40, 40, 42, 42): rep row 6
To change sleeve length, measure from underarm to wrist. Check sleeve length from row 34 and amend number of rows to preference.
Fasten off
Ribbed Edging (make 2)
With a 4mm hook
Ch 7
Row 1: sc in 2nd ch from hook, sc across, ch2, turn
Row 2: dc in ea st across, ch2, turn
Row 3: flo dc across to last st, dc in last st, ch2, turn
Row 4: blo dc across to last st, dc in last st, ch2, turn
Rep rows 3 and 4 until ribbed edging measures 63, (64, 65, 66, 66, 66, 68, 68) cm
Fasten off leaving a long tail for sewing to right and left front.
Assembly
With RS facing inwards:
- sew ribbed edging to front panels for right and left (see pattern notes for placement)
- sew shoulder seams
- line up sleeve – centre of sleeve to shoulder seam and pin in place, sew seam, fold sleeve in half and continue to sew seam closed to wrist
- sew side seams
Final round
With a 4mm hook
With RS facing outwards, rejoin yarn to front right front, ch1, sc evenly up front, along the back of the neck and down the left front
Fasten off and weave in ends.
Copyright Notice
The pattern and photographs of this design are the property of Sharon Goodwin at Jera’s Jamboree. This pattern and design are subject to copyright and are for personal, non-commercial use only. You may not share, resell, alter or redistribute this pattern in part or in whole. You may, however, sell any finished items you make. If you would like to include this pattern in a roundup, you may take one photo and link back to this pattern.
Happy crocheting!
Have you made this pattern? I would love to know how you get on. Leave a comment here, in the Facebook community, or if you found the pin on Pinterest, leave a comment on the pin.
You may also like
Looking for more crochet cardigan patterns? My Lightweight Short Sleeve Cardigan is perfect for spring and summer layering, while the Granny Stitch Hooded Cardigan adds a textured finish for cooler days.
You might also enjoy the Marlowe Cardigan, a lightweight wearable design created for effortless everyday styling.