With beautiful drape, textured crossed stitches and playful tassels, Mariselle makes a cosy wrap that’s easy to style in different ways.
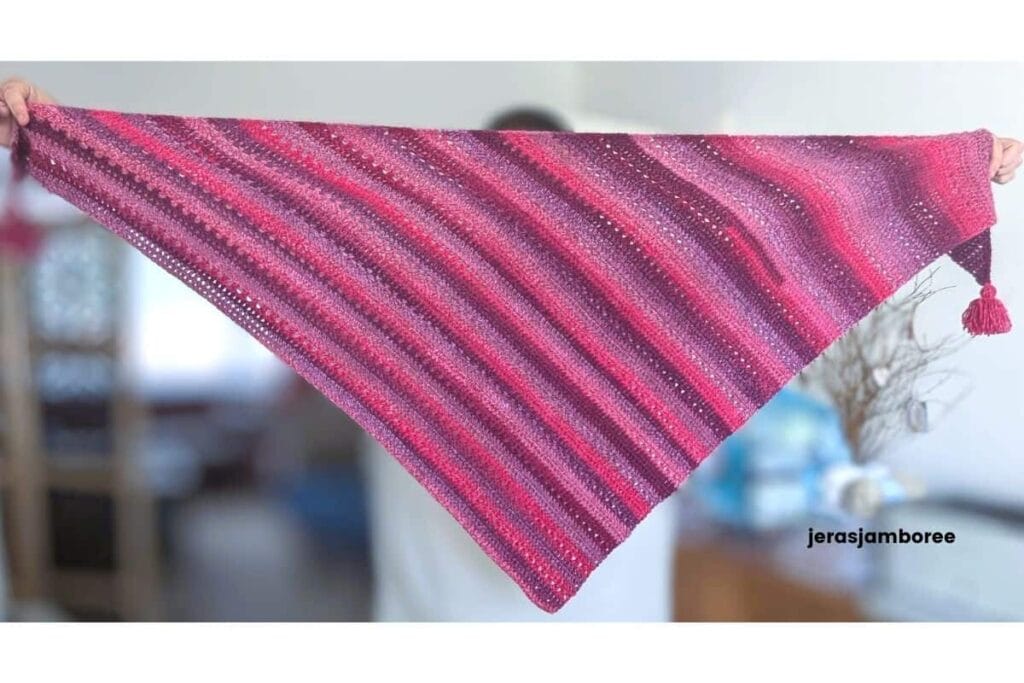
My Mariselle Shawl is an easy crochet shawl pattern worked on the bias that looks especially lovely in self-striping yarn.
Simple double crochet rows are broken up with crossed double crochet, adding texture and a change of rhythm as you crochet. Once the pattern is established, the repeat is easy to settle into as the shawl gradually grows from one corner.
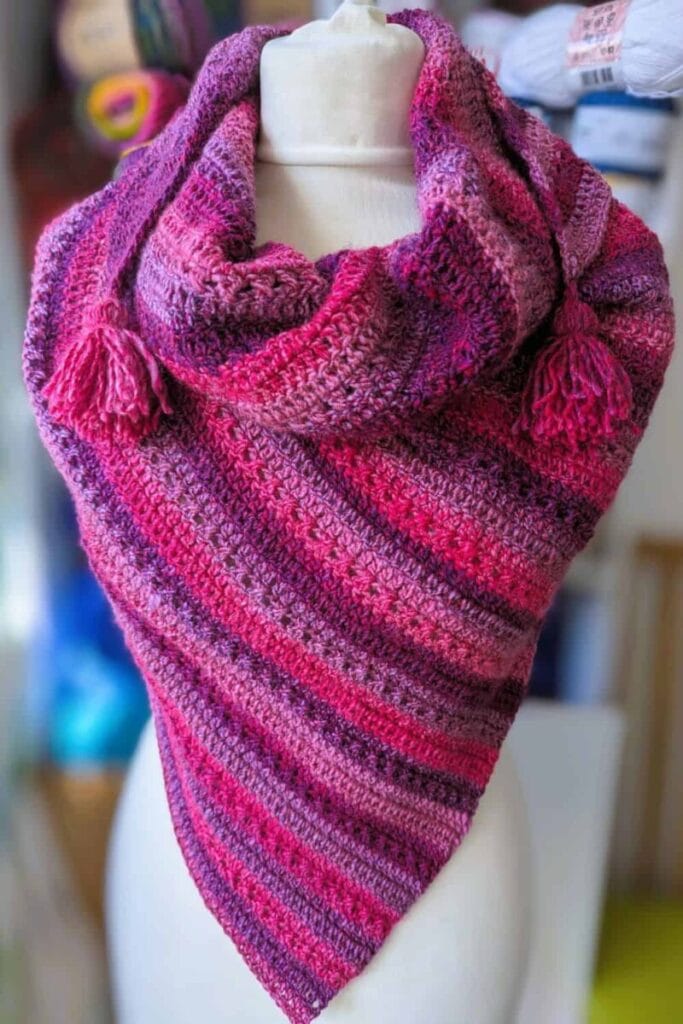
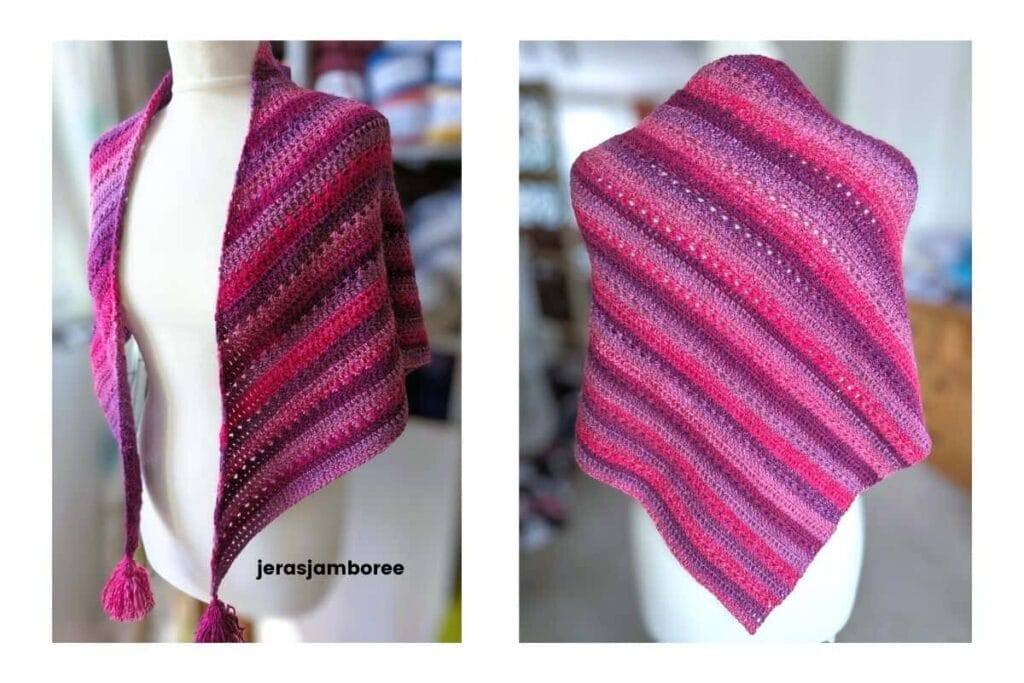
Finished with a tassel at each front point, Mariselle can be worn loosely around your shoulders or wrapped comfortably around your neck.
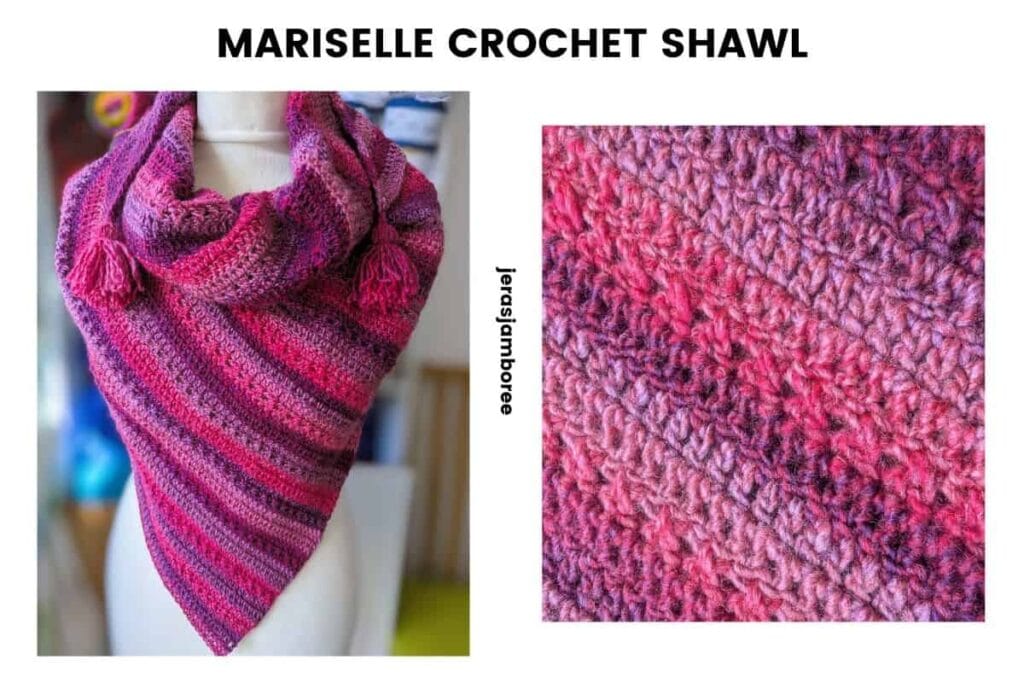
The free pattern below includes everything you need to make your own bias shawl, including materials, pattern notes and full written instructions.
If you prefer working offline, the ad-free printable PDF is available in my Etsy and Ravelry shops. Thank you for supporting my work.
Why You’ll Love to Crochet my Mariselle Shawl
- Easy four-row repeat – once established, three rows of double crochet alternate with one row of crossed double crochet.
- Perfect for self-striping yarn – working on the bias sends the colour changes diagonally across the shawl.
- Easy to customise – simply continue the established increases to make your shawl larger.
- Simple but interesting – crossed stitches add texture and break up the repetition.
Enjoy my crochet patterns and blog posts?
Add Jera’s Jamboree as a preferred source on Google, Just click below and tick the box to add me.

Jump to: Materials | Measurements | Crochet Pattern
Skill Level
Confident Beginner
You’ll need to be comfortable working increases at the beginning and end of rows and following stitch counts to keep the bias shaping on track.
Once the pattern is established, the shawl follows an easy four-row repeat of three double crochet rows and one crossed double crochet row.
Measurements
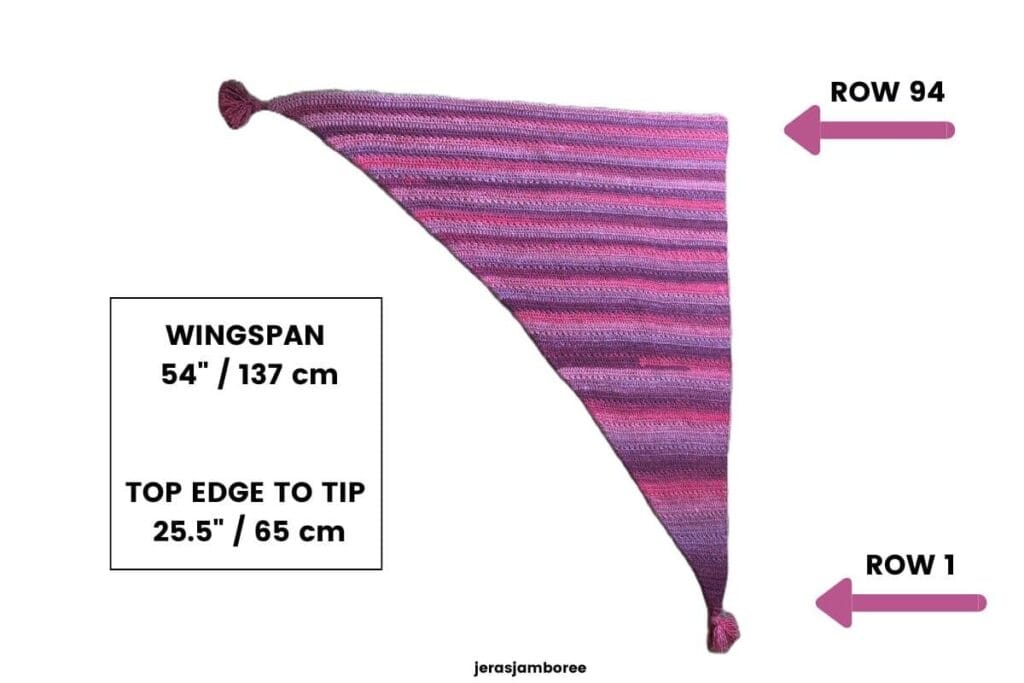
Wingspan approx. 54 inches / 137 cm
Top edge to tip approx. 25.5 inches / 65 cm
How to Customise the Size of your Shawl
To make your shawl larger, simply continue working the established four-row pattern repeat and increases until you reach your desired size.
After Row 94, your next row will be a crossed double crochet row, followed by three double crochet rows. Continue repeating these four rows, ending on a double crochet row.
Keep in mind that making yours larger will require additional yarn.
Jera’s Jamboree receives payments for affiliate advertising. This is at no extra cost to you. As an Amazon Associate I earn from qualifying purchases. Please see my disclosure policy for more information.
Materials
- DK (#3) yarn: approximately 744 yds / 680 m
- 4mm crochet hook (I use Clover Amour hooks)
- Scissors
- Yarn needle
- Piece of cardboard for making the tassels: approximately 4–5 inches wide × 3–4 inches long
The yarn needed for the tassels is included in the total yarn amount.
Yarn Choices
From my yarn shelf: Yes, I’m still working through my stash 🙂 The Yarnsmiths Lagoon DK in Giola Lagoon was left over from my Mindful Hands mosaic blanket.
I wanted to use a self-striping yarn for this project because the colour changes help to highlight the diagonal direction of the bias construction – and this yarn was perfect!
Yarnsmiths Lagoon DK is easy to care for and can be machine washed at 30°C. Although the care instructions say it can be tumble dried or ironed on a low setting, I haven’t tried either – I find drying mine on a clothes airer works perfectly well.
You can substitute another DK yarn for this project. Yarnsmiths Lagoon DK measures approximately 11 wraps per inch (WPI), placing it towards the thicker end of the DK range.
When substituting yarn, I recommend choosing one with a similar WPI and making a gauge swatch to check that you’re happy with the resulting fabric and drape.
Tip: If you’re unsure of the WPI of a yarn you’d like to use, try searching online for the yarn brand and name followed by “WPI” or “wraps per inch”. You’ll often find the information without needing to measure it yourself.
Gauge
Using a 4mm crochet hook:
16 stitches and 10 rows = 4 inches x 4 inches/ 10cm x 10cm
For your gauge swatch, work the 10 rows in the following stitch sequence:
- 3 rows double crochet
- 1 row crossed double crochet
- 3 rows double crochet
- 1 row crossed double crochet
- 2 rows double crochet
Gauge isn’t critical but I still recommend making a swatch, especially if you’re substituting the yarn. This will help you check both your gauge and whether you’re happy with the drape of your chosen yarn.
If your gauge is different from mine, it will affect the finished size and drape of your shawl, and you may need more or less yarn than stated.
Tip: You can easily adjust your stitch and row counts using my stitch gauge converter.
Stitches and Abbreviations
Stitches used:
- double crochet (dc)
- crossed double crochet (xdc)
If you need help working the crossed double crochet, you’ll find instructions in part one of my stitch library.
For my UK crocheters, the table below is a conversion of basic crochet stitches from US to UK.
| US Crochet Terms | UK Crochet Terms |
|---|---|
| single crochet (sc) | double crochet (dc) |
| half double crochet (hdc) | half treble crochet (htr) |
| double crochet (dc) | treble crochet (tr) |
| treble (tr) | double treble (dtr) |
| double treble (dtr) | triple treble (trtr) |
This pattern also uses these common abbreviations:
- chain (ch)
- stitch/es (st/s)
- Right Side (RS)
- Wrong Side (WS)
How the Shawl is Worked
My Mariselle Shawl is worked back and forth in rows, beginning at one corner and increasing in size as you crochet.
Rather than the rows running horizontally across the finished shawl, the increases create the bias shaping and give the fabric its distinctive diagonal direction.
Once the stitch pattern is established, you’ll repeat three rows of double crochet followed by one row of crossed double crochet. The crossed stitches add texture while still keeping the pattern easy to follow.
The shaping is created by increasing along one side of the shawl while keeping the opposite side straight. Because you turn your work at the end of each row, the increases will appear at the beginning of some rows and at the end of others.
On the double crochet rows, increases are made by working additional double crochet stitches at the beginning or end of the row as instructed.
On crossed double crochet rows, the final crossed double crochet is worked in the last 2 stitches of the row, then one more double crochet is worked in the last stitch to make the increase.
Crossed double crochet is one of my favourite ways to add texture without making a pattern complicated. I love how such a simple stitch can add interest to the fabric and break up repetitive rows. I’ve used it in everything from garments and shawls to blankets, hats and bags.
If you enjoy working crossed double crochet, you might also like:
Two tassels are added to the front corner points to finish the shawl.
Why I Chose to Work on the Bias
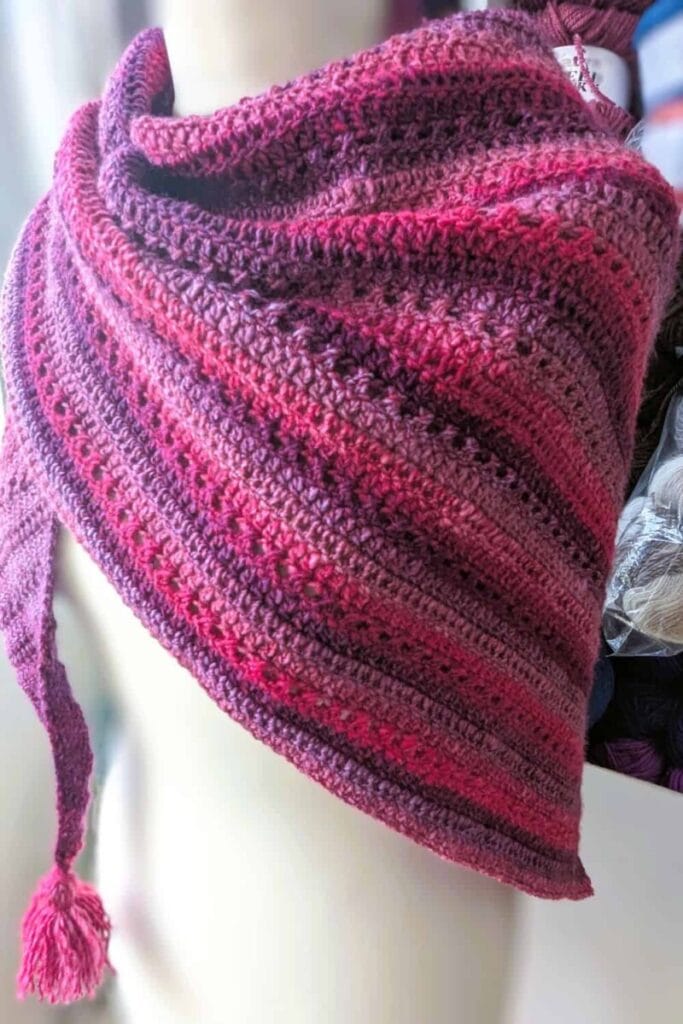
Working on the bias gives the shawl a little more stretch and creates a softer, more fluid drape than working the rows straight across.
I also love the way bias construction works with self-striping and gradient yarns. Instead of the colour changes forming horizontal stripes, they travel diagonally across the shawl, adding another element of interest to the finished fabric.
You don’t have to use a self-striping yarn though! a solid or tonal yarn would let the texture of the crossed double crochet rows take more of the spotlight.
My Pattern Notes
- This pattern is written in English using US crochet terms.
- The Mariselle Shawl is worked back and forth in rows on the bias.
- The chain 3 turning chain counts as a double crochet throughout.
- The 3 skipped chains in Row 1 count as a double crochet.
- On Row 11 and all following crossed double crochet rows, the final crossed double crochet is worked in the last 2 stitches of the row. One more double crochet is then worked in the last stitch to make the increase.
- Stitch counts are included for all 94 rows to help you keep your shaping on track.
- If you substitute the yarn, you may need more or less than the amount stated.
Get the easy-to-read print friendly PDF (ad free)
Prefer to crochet away from your screen? The ad-free PDF is designed to make it easy to follow the pattern wherever you like to crochet.
The PDF includes:
- stitch instructions
- an explanation of how the Mariselle Shawl is worked
- pattern notes
- clear written instructions for all 94 rows
- a printable row counter to help you keep track of your progress
Mariselle Shawl Pattern Instructions (US crochet terms)
Shawl
With a 4mm hook
Ch4
Row 1 (WS): 3dc in first ch, turn (4dc)
Row 2 (RS): ch3, dc in first st, dc in next 3 sts, turn (5dc)
Row 3: ch3, dc in next 3 sts, 2dc in last st, turn (6 dc)
Row 4: ch3, 2dc in first st, dc in next 5 sts, turn (8dc)
Row 5: ch3, dc in next 6 sts, 2dc in last st, turn (9dc)
Row 6: ch3, 2dc in first st, dc in next 8 sts, turn (11dc)
Row 7: ch3, dc in next 9 sts, 2dc in last st, turn (12 dc)
Row 8: ch3, 2dc in first st, dc in next 11 sts, turn (14 dc)
Row 9: ch3, dc in next 13 sts, 2dc in last st, turn (15 dc)
Row 10: ch3, 2dc in first st, dc in next 14 sts, turn (17 dc)
Row 11: ch3, xdc 8 times, dc in last st, turn (2 dc, 8 xdc)
Row 12: ch3, 2dc in first st, dc in next 17 sts, turn (20 dc)
Row 13: ch3, dc in next 18 sts, 2dc in last st, turn (21dc)
Row 14: ch3, 2dc in first st, dc in next 20 sts, turn (23 dc)
Row 15: ch3, xdc 11 times, dc in last st, turn (2 dc, 11 xdc)
Row 16: ch3, 2dc in first st, dc in next 23 sts, turn (26 dc)
Row 17: ch3, dc in next 24 sts, 2dc in last st, turn (27 dc)
Row 18: ch3, 2dc in first st, dc in next 26 sts, turn (29 dc)
Row 19: ch3, xdc 14 times, dc in last st, turn (2 dc, 14 xdc)
Row 20: ch3, 2dc in first st, dc in next 29 sts, turn (32 dc)
Row 21: ch3, dc in next 30 sts, 2dc in last st, turn (33 dc)
Row 22: ch3, 2dc in first st, dc in next 32 sts, turn (35 dc)
Row 23: ch3, xdc 17 times, dc in last st, turn (2 dc, 17 xdc)
Row 24: ch3, 2dc in first st, dc in next 35 sts, turn (38 dc)
Row 25: ch3, dc in next 36 sts, 2dc in last st, turn (39 dc)
Row 26: ch3, 2dc in first st, dc in next 38 sts, turn (41 dc)
Row 27: ch3, xdc 20 times, dc in last st, turn (2 dc, 20 xdc)
Row 28: ch3, 2dc in first st, dc in next 41 sts, turn (44 dc)
Row 29: ch3, dc in next 42 sts, 2dc in last st, turn (45 dc)
Row 30: ch3, 2dc in first st, dc in next 44 sts, turn (47 dc)
Row 31: ch3, xdc 23 times, dc in last st, turn (2 dc, 23 xdc)
Row 32: ch3, 2dc in first st, dc in next 47 sts, turn (50 dc)
Row 33: ch3, dc in next 48 sts, 2dc in last st, turn (51 dc)
Row 34: ch3, 2dc in first st, dc in next 50 sts, turn (53 dc)
Row 35: ch3, xdc 26 times, dc in last st, turn (2 dc, 26 xdc)
Row 36: ch3, 2dc in first st, dc in next 53 sts, turn (56 dc)
Row 37: ch3, dc in next 54 sts, 2dc in last st, turn (57 dc)
Row 38: ch3, 2dc in first st, dc in next 56 sts, turn (59 dc)
Row 39: ch3, xdc 29 times, dc in last st, turn (2 dc, 29 xdc)
Row 40: ch3, 2dc in first st, dc in next 59 sts, turn (62 dc)
Row 41: ch3, dc in next 60 sts, 2dc in last st, turn (63 dc)
Row 42: ch3, 2dc in first st, dc in next 62 sts, turn (65 dc)
Row 43: ch3, xdc 32 times, dc in last st, turn (2 dc, 32 xdc)
Row 44: ch3, 2dc in first st, dc in next 65 sts, turn (68 dc)
Row 45: ch3, dc in next 66 sts, 2dc in last st, turn (69 dc)
Row 46: ch3, 2dc in first st, dc in next 68 sts, turn (71 dc)
Row 47: ch3, xdc 35 times, dc in last st, turn (2 dc, 35 xdc)
Row 48: ch3, 2dc in first st, dc in next 71 sts, turn (74 dc)
Row 49: ch3, dc in next 72 sts, 2dc in last st, turn (75 dc)
Row 50: ch3, 2dc in first st, dc in next 74 sts, turn (77dc)
Row 51: ch3, xdc 38 times, dc in last st, turn (2 dc, 38 xdc)
Row 52: ch3, 2dc in first st, dc in next 77 sts, turn (80 dc)
Row 53: ch3, dc in next 78 sts, 2dc in last st, turn (81 dc)
Row 54: ch3, 2dc in first st, dc in next 80 sts, turn (83 dc)
Row 55: ch3, xdc 41 times, dc in last st, turn (2 dc, 41 xdc)
Row 56: ch3, 2dc in first st, dc in next 83 sts, turn (86 dc)
Row 57: ch3, dc in next 84 sts, 2dc in last st, turn (87 dc)
Row 58: ch3, 2dc in first st, dc in next 86 sts, turn (89 dc)
Row 59: ch3, xdc 44 times, dc in last st, turn (2 dc, 44 xdc)
Row 60: ch3, 2dc in first st, dc in next 89 sts, turn (92 dc)
Row 61: ch3, dc in next 90 sts, 2dc in last st, turn (93 dc)
Row 62: ch3, 2dc in first st, dc in next 92 sts, turn (95 dc)
Row 63: ch3, xdc 47 times, dc in last st, turn (2 dc, 47 xdc)
Row 64: ch3, 2dc in first st, dc in next 95 sts, turn (98 dc)
Row 65: ch3, dc in next 96 sts, 2 dc in last st, turn (99 dc)
Row 66: ch3, 2dc in first st, dc in next 98 sts, turn (101 dc)
Row 67: ch3, xdc 50 times, dc in last st, turn (2 dc, 50 xdc)
Row 68: ch3, 2dc in first st, dc in next 101 sts, turn (104 dc)
Row 69: ch3, dc in next 102 sts, 2dc in last st, turn (105 dc)
Row 70: ch3, 2dc in first st, dc in next 104 sts, turn (107 dc)
Row 71: ch3, xdc 53 times, dc in last st, turn (2 dc, 53 xdc)
Row 72: ch3, 2dc in first st, dc in next 107 sts, turn (110 dc)
Row 73: ch3, dc in next 108 sts, 2dc in last st, turn (111 dc)
Row 74: ch3, 2dc in first st, dc in next 110 sts, turn (113 dc)
Row 75: ch3, xdc 56 times, dc in last st, turn (2 dc, 56 xdc)
Row 76: ch3, 2dc in first st, dc in next 113 sts, turn (116 dc)
Row 77: ch3, dc in next 114 sts, 2dc in last st, turn (117 dc)
Row 78: ch3, 2dc in first st, dc in next 116 sts, turn (119 dc)
Row 79: ch3, xdc 59 times, dc in last st, turn (2 dc, 59 xdc)
Row 80: ch3, 2dc in first st, dc in next 119 sts, turn (122 dc)
Row 81: ch3, dc in next 120 sts, 2dc in last st, turn (123 dc)
Row 82: ch3, 2dc in first st, dc in next 122 sts, turn (125 dc)
Row 83: ch3, xdc 62 times, dc in last st, turn (2 dc, 62 xdc)
Row 84: ch3, 2dc in first st, dc in next 125 sts, turn (128 dc)
Row 85: ch3, dc in next 126 sts, 2dc in last st, turn (129 dc)
Row 86: ch3, 2dc in first st, dc in next 128 sts, turn (131 dc)
Row 87: ch3, xdc 65 times, dc in last st, turn (2 dc, 65 xdc)
Row 88: ch3, 2dc in first st, dc in next 131 sts, turn (134 dc)
Row 89: ch3, dc in next 132 sts, 2dc in last st, turn (135 dc)
Row 90: ch3, 2dc in first st, dc in next 134 sts, turn (137 dc)
Row 91: ch3, xdc 68 times, dc in last st, turn (2 dc, 68 xdc)
Row 92: ch3, 2dc in first st, dc in next 137 sts, turn (140 dc)
Row 93: ch3, dc in next 138 sts, 2dc in last st, turn (141 dc)
Row 94: ch3, 2dc in first st, dc in next 140 sts (143 dc)
Fasten off
Block your shawl to the finished measurements before attaching the tassels.
Tassels
(Make 2)
- Prepare the cardboard: Cut a piece of sturdy cardboard approximately 4–5 inches wide × 3–4 inches long. I used a piece measuring 4 inches × 3 inches.
- Wrap the yarn: Wrap the yarn around the length of the cardboard 30–50 times, depending on how full you’d like your tassel to be. I wrapped mine 50 times. Cut the yarn, leaving the wrapped loops on the cardboard.
- Secure the top: Cut approximately 8 inches of yarn and thread it under all the wrapped loops at the top edge of the cardboard. Tie securely with a double knot, leaving the ends long for attaching the tassel to the shawl.
- Remove the cardboard: Carefully slide the bundle of yarn off the cardboard.
- Create the neck: Cut a 10-inch length of yarn and wrap it tightly around the bundle approximately 0.5 inches below the top. Tie securely with a double knot.
- Cut and trim: Cut through all the loops at the bottom of the tassel, then trim the ends until they’re even. After trimming, my finished tassels measured approximately 2.75 inches long.
- Attach the tassel: Using the long ends from the top of the tassel, attach it securely to one of the front corner points of the shawl and weave in the ends.
Repeat to make and attach the second tassel.
Congratulations! Your Mariselle Shawl is finished and ready to wear.
Copyright Notice
The pattern and photographs of this design are the property of Sharon Goodwin at Jera’s Jamboree. This pattern and design are subject to copyright and are for personal, non-commercial use only. You may not share, resell, alter or redistribute this pattern in part or in whole. You may, however, sell any finished items you make. If you would like to include this pattern in a roundup, you may take one photo and link back to this pattern.
No time now? Save this project to your crochet board to come back to when you’re ready.
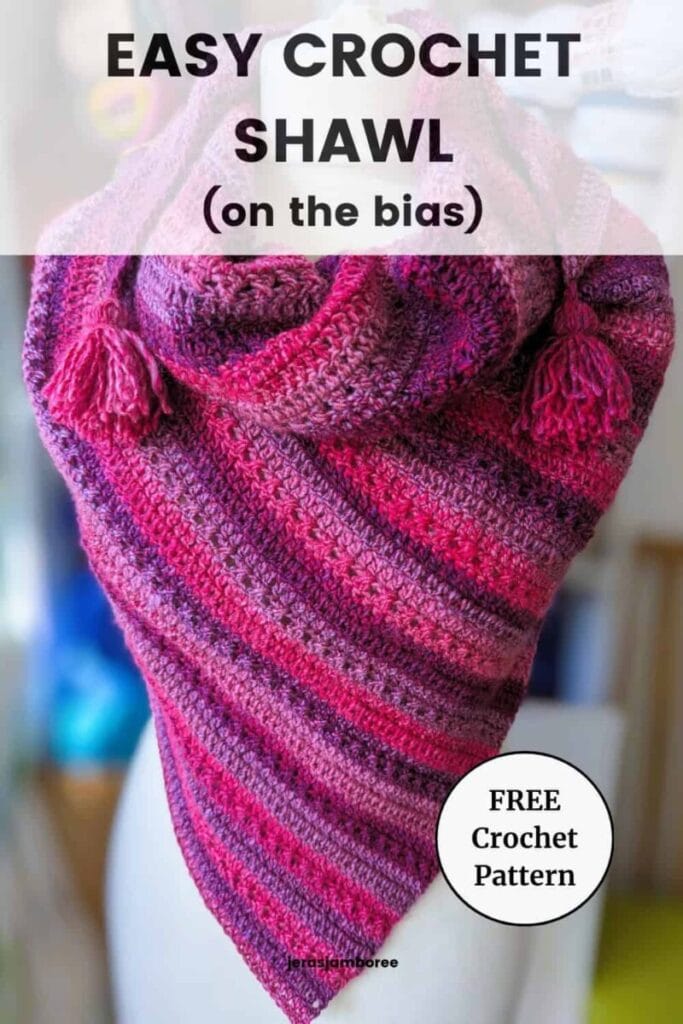
I hope you enjoy crocheting your own Mariselle Shawl. This pattern arrived out of nowhere, there was no planning, I just picked up my yarn and started to crochet. I loved designing it! The bias construction changes the way the colours travel across the fabric, and I’d love to see how this shawl looks in your chosen yarn.
If you need help, please reach out in my Jera’s Jamboree Facebook group.
If you’re looking for your next project, you can find more crochet shawl patterns here, with designs ranging from cosy wraps to lightweight shawls for warmer days.
Or, if you fancy trying a different style, my Selene Triangle Shawl uses an easy lace pattern to create a lightweight design that’s perfect for layering.

