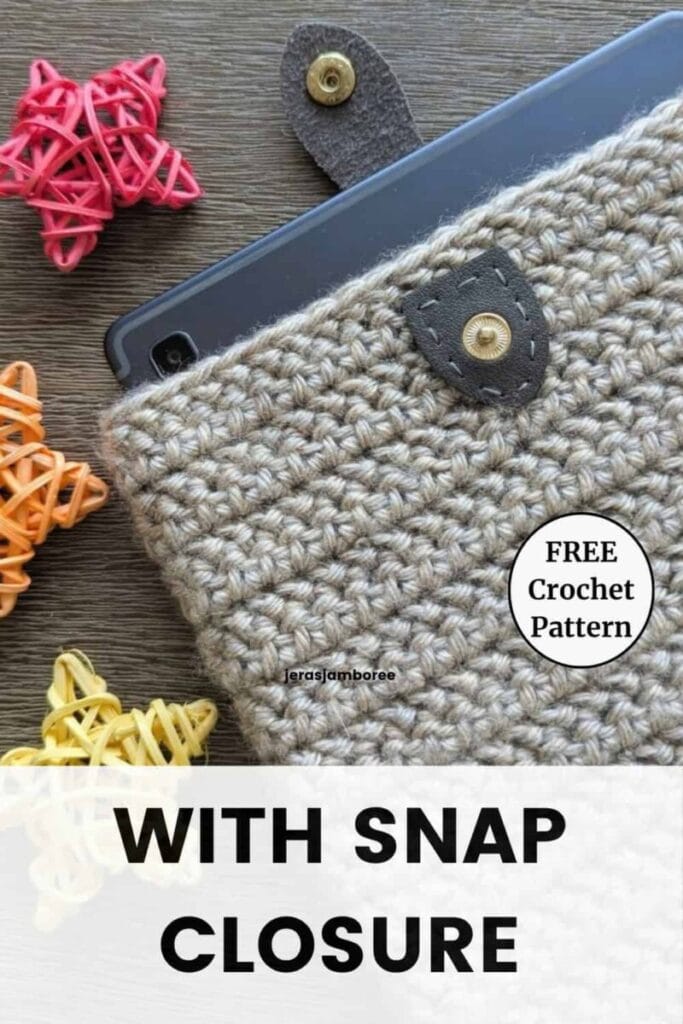
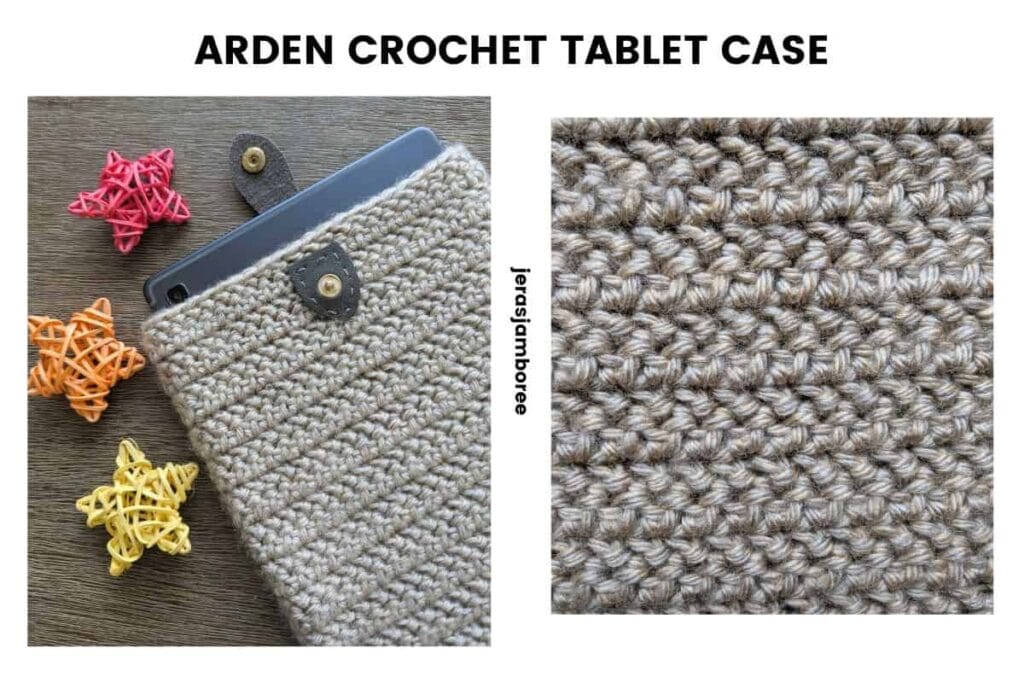
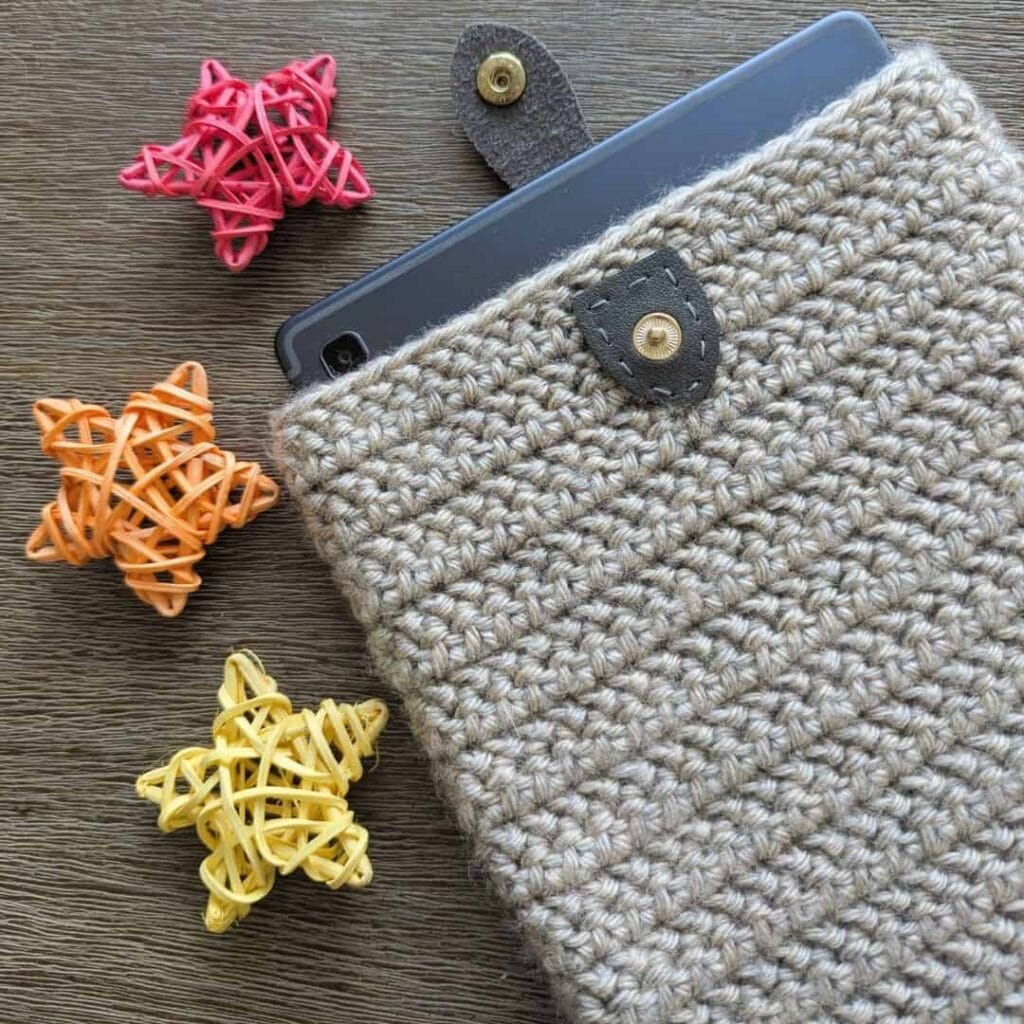
The Arden Tablet Sleeve is an easy crochet pattern featuring a textured herringbone stitch that creates a soft padded feel, finished with a secure snap closure.
My Arden tablet case is a quick and practical crochet project. It’s a great way to protect your device while adding a touch of handmade style.
It uses less than one skein of worsted weight yarn, making it a handy stash-busting project as well as a thoughtful handmade gift.
The herringbone half double crochet creates a lovely textured fabric and, combined with the worsted weight yarn, gives the case a soft padded feel.
A simple snap closure keeps your tablet securely inside and adds a smart finishing touch to the design.
Below you’ll find everything you need to crochet your own Arden tablet sleeve, including sizing and customisation tips, materials, gauge, and the full free crochet pattern.
If you prefer a printable, ad-free version, the PDF is also available in my Etsy and Ravelry shops. Your support helps me continue sharing free crochet patterns here on the blog. Thank you.
Enjoy my crochet patterns and blog posts?
Add Jera’s Jamboree as a preferred source on Google, Just click below and add me.
Jump to: Sizing | Materials | Free Crochet Pattern
Skill Level
Easy
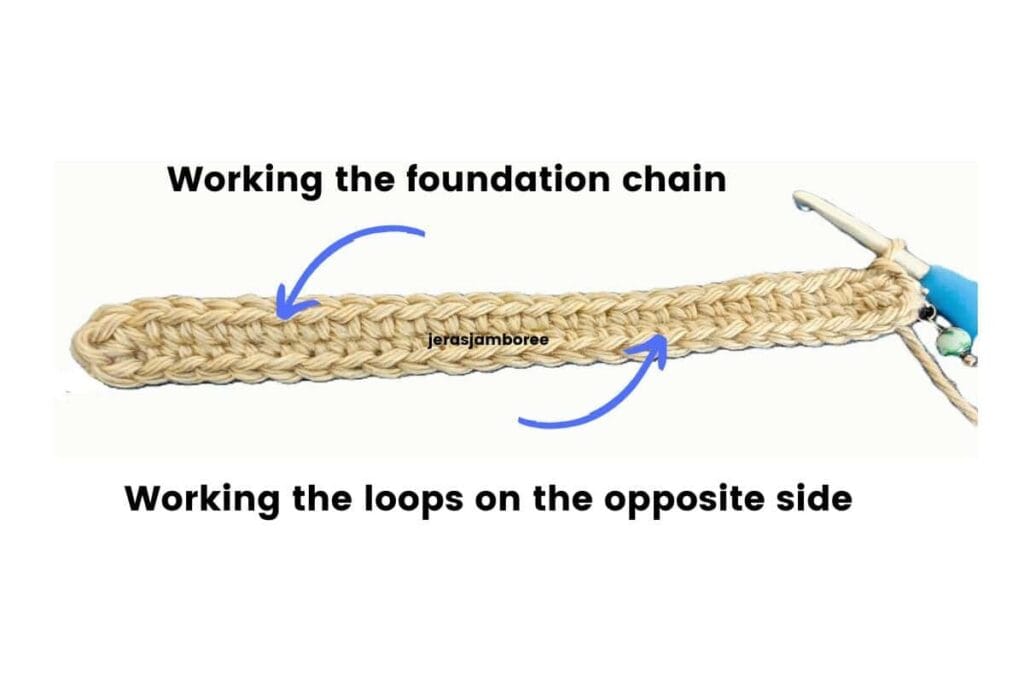
You’ll need to be comfortable working basic crochet stitches and working in the round. You’ll also work into both sides of the foundation chain to create the base of the sleeve – I’ve included a photo to help with this technique.
Join me for free on Substack for new pattern releases, crochet news and subscriber-only freebies.
Sizing
To fit: Tablet measuring approximately 7″ × 9.8″ (17.8 × 25 cm), including an 11-inch iPad (A16) measuring 7.07″ W × 9.79″ L × 0.28″ D.
Finished size: Approx. 7″ W × 10.5″ L (17.8 × 26.7 cm). The stitch pattern has enough stretch to accommodate the depth of the tablet.
Adjusting the Size
You can easily customise the sleeve to fit a different tablet. Measure the width, length and depth of your device before you begin. If you normally keep your tablet in a slim case and want to leave it on, take your measurements with the case fitted.
For a wider or narrower tablet: add or remove approximately 3 foundation chains for every 1″ (2.5 cm) you want to add or remove from the finished width.
To adjust the length, simply work more or fewer rounds of the body until the sleeve is long enough to reach the top of your device.
Tip: After completing the base round, place the bottom of your tablet inside your work to check the width before continuing. The base should fit comfortably around the device without being loose. It’s fine if you have to stretch it a little to fit.
Jera’s Jamboree receives payments for affiliate advertising. This is at no extra cost to you. As an Amazon Associate I earn from qualifying purchases. Please see my disclosure policy for more information.
Materials
- Worsted/Aran (#4 weight) yarn approx. 150 yd (137 m)
- 5mm crochet hook
I use Clover Amour hooks
- Snap closure – mine measures 11 × 2.5 cm (4.3 × 1″)
I used these Leather Snaps in dark grey
- Stitch Marker
- Tape Measure
- Scissors
- Yarn Needle (for weaving in ends)
- Sewing needle and matching thread (for attaching the snap closure)
Yarn Choices
I originally bought Lion Brand Heartland in Grand Canyon to make a large blanket for my eldest son. I’d started working on it when he moved to a much warmer home and decided he didn’t need quite so many blankets (and yes, I’d already gifted him three 🙂 ).
The yarn has been sitting on my shelf ever since, and I’ve been dipping into it for other projects. Even after making this project, I still have enough left for a lap blanket!
I love how soft and plush Heartland feels. For an acrylic yarn, it has a lovely luxurious feel to work with and gives the finished project great stitch definition. It’s also easy to care for as it’s machine washable and can be tumble dried on a low heat setting.
If you’re substituting the yarn, I recommend using a worsted/Aran (#4 weight) yarn with a similar thickness to Heartland, which has approximately 8 wraps per inch (WPI). A yarn with some substance works particularly well for Arden as, together with the herringbone half double crochet, it creates the soft, substantial fabric I wanted for the sleeve.
Colour choice is entirely up to you. For the best stitch definition, I recommend a solid or subtly tonal colour for Arden. This allows the texture of the herringbone half double crochet to stand out and gives the finished sleeve a clean, polished look.
This is a great project for using that single skein of worsted weight yarn you’ve been saving in your stash!
Gauge
Using a 5mm hook
14 sts and 13 rounds = 4″ × 4″ (10 × 10 cm) in herringbone half double crochet
If your gauge is different from mine, you can use my stitch gauge converter to help adjust the number of stitches.
Stitches and Abbreviations
Arden uses the following stitches:
Herringbone Half Double Crochet (hhdc):
Yarn over, insert hook into the indicated stitch and pull up a loop (3 loops on hook). Pull the first loop on the hook through the second loop, similar to working a slip stitch (2 loops remaining on hook). Yarn over and pull through both remaining loops. Herringbone half double crochet made.
Basic Stitches:
- Single Crochet (sc)
- Slip Stitch (sl st)
If you need a refresher on how to work these stitches, you’ll find instructions in my crochet stitch library, along with other projects that use them.
For my UK crocheters, the table below is a conversion of basic crochet stitches from US to UK.
| US Crochet Terms | UK Crochet Terms |
|---|---|
| single crochet (sc) | double crochet (dc) |
| half double crochet (hdc) | half treble crochet (htr) |
| double crochet (dc) | treble crochet (tr) |
| treble (tr) | double treble (dtr) |
| double treble (dtr) | triple treble (trtr) |
This project also uses these common abbreviations:
- chain (ch)
- each (ea)
- repeat (rep)
Design and Construction
This project is worked from the bottom up in joined, turned rounds.
The base begins with a foundation chain. Single crochet stitches are worked along the chain before turning the work to crochet into the remaining loops on the opposite side. This creates the closed base of the sleeve without any seaming.
The body is then worked in herringbone half double crochet, continuing in joined, turned rounds to create the textured fabric.
Tip: Place a stitch marker in the first stitch of each round to make it easier to see where to join at the end of the round.
Tab Closure
I chose a snap closure to help keep the tablet secure inside the sleeve. I also love how the leather-look tab adds interest and gives the finished design a smart, polished look.
The snap closure I used has pre-punched holes, which makes it easy to sew in place with a sewing needle and matching thread. I’ll do almost anything to avoid sewing, but I found this closure quick and straightforward to attach – and I’d definitely use one again on other projects!
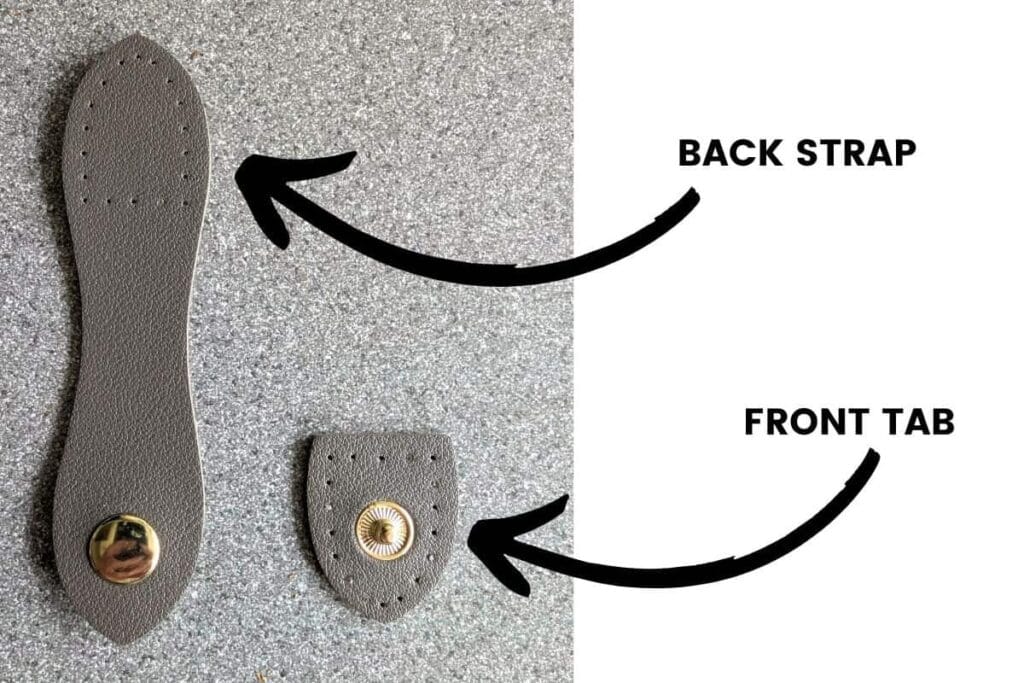
If you prefer not to use a snap closure, you could crochet a chain loop and sew it securely to the back of the sleeve, then add a button to the front for fastening.
My Pattern Notes
- Instructions are written in US crochet terms.
- Chain 2 does not count as a stitch.
- All rounds are joined with a slip stitch to the first stitch of the round, then turned before beginning the next round.
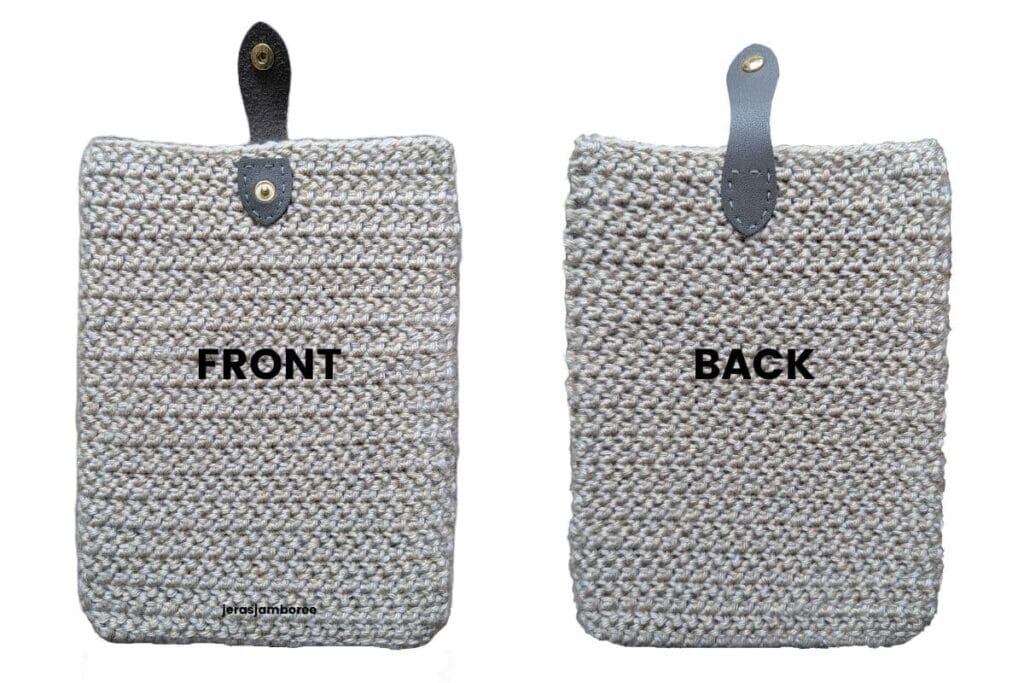
- Herringbone half double crochet is reversible. Before attaching the snap closure, choose which side of the fabric you prefer as the outside of your sleeve.
- I recommend adding a closure to help keep your tablet or device secure inside the sleeve.
- The snap closure instructions are written for the style of closure used on my sample.
- If you substitute the yarn, you may need more or less than the amount stated in the pattern.
Purchase the easy-to-read print friendly PDF (ad free)
The PDF of my Arden Tablet Sleeve pattern includes:
- stitch instructions
- design and construction notes
- sizing and customisation guidance
- clear written instructions
- helpful photos
- printable row counter
Buy on Etsy | Buy on Ravelry
Arden Tablet Sleeve Instructions (US terms)
With a 5mm hook
Ch 22
Base of iPad/Tablet Sleeve
Round 1: Sc in 2nd ch from hook, sc in ea ch across to last ch, 3 sc in last ch. Turn to work along the opposite side of the foundation chain. Sc in ea remaining loop across to the last loop, 3 sc in last loop. Join with sl st to first sc, ch 2, turn. (45 sc)
Body of Sleeve
Round 2: hhdc in ea stitch around, join with sl st to first hhdc, ch2, turn (45 hhdc)
Round 3 – 34: rep row 1
Fasten off
Weave in ends
Attaching the Snap Closure (see image in Design and Construction)
Fasten the two parts of the snap closure together.
Position the smaller tab centrally on the front of the tablet sleeve, with the longer strap passing over the top edge of the sleeve and down the centre of the back.
Adjust the position until you are happy with how the closure sits. Place a stitch marker through the middle hole in the smaller tab and the crochet fabric to hold it in position.
Open the snap carefully, making sure the smaller tab stays in place. Using a needle and matching yarn, sew the smaller tab securely to the front of the sleeve through the pre-punched holes.
Fasten the snap again and check that the longer strap is centred and lies smoothly over the top of the sleeve. Place a marker through one of the holes in the rounded end of the longer strap and the crochet fabric on the back to mark its position.
Open the snap and sew the rounded end of the Back Strap securely to the back of the sleeve through the pre-punched holes. Fasten off securely.
Tip: Keep the snap fastened while positioning the two pieces. This makes it easier to centre the closure and ensures the two halves of the snap line up correctly before sewing.
Congratulations! Your tablet sleeve is finished.
Copyright Notice
The pattern and photographs of this design are the property of Sharon Goodwin at Jera’s Jamboree. This pattern and design are subject to copyright and are for personal, non-commercial use only. You may not share, resell, alter or redistribute this pattern in part or in whole. You may, however, sell any finished items you make. If you would like to include this pattern in a roundup, you may take one photo and link back to this pattern.
I hope you enjoy making your Arden Tablet Sleeve! It’s a quick and practical project that works just as well for gifting as it does for protecting your own device.
If you enjoy quick, useful crochet projects, you might also like my free Lennox Book Sleeve, another practical way to add a handmade touch to something you use every day.
And if you’re looking for more handmade gift inspiration, you’ll find plenty of ideas in my roundup of quick and easy crochet gifts for beginners.
I’d love to see your finished Arden! If you share your tablet sleeve on social media, don’t forget to tag me so I can see what you’ve made. We’d love to see your finished sleeves in the Facebook community too.
No time now? Save the pin below to your favourite crochet board for later.