Made from just six oversized granny squares, my Aveline Cocoon Cardigan is an easy crochet shrug with clever construction and beautiful drape.
My Aveline cardigan combines the timeless appeal of granny squares with an easy-to-make cocoon silhouette. Made from just six oversized granny squares, it’s a relaxing project with minimal seaming that creates a lightweight layer with a soft, fluid drape.
The simple construction makes it an enjoyable project for confident beginners who want to try making their first cardigan without tackling complicated shaping, while experienced crocheters will enjoy the relaxing rhythm of making the oversized granny squares.
Whether you’re looking for a shrug to throw over a dress or an extra layer for cooler evenings, Aveline is comfortable to wear and easy to style with your everyday wardrobe.
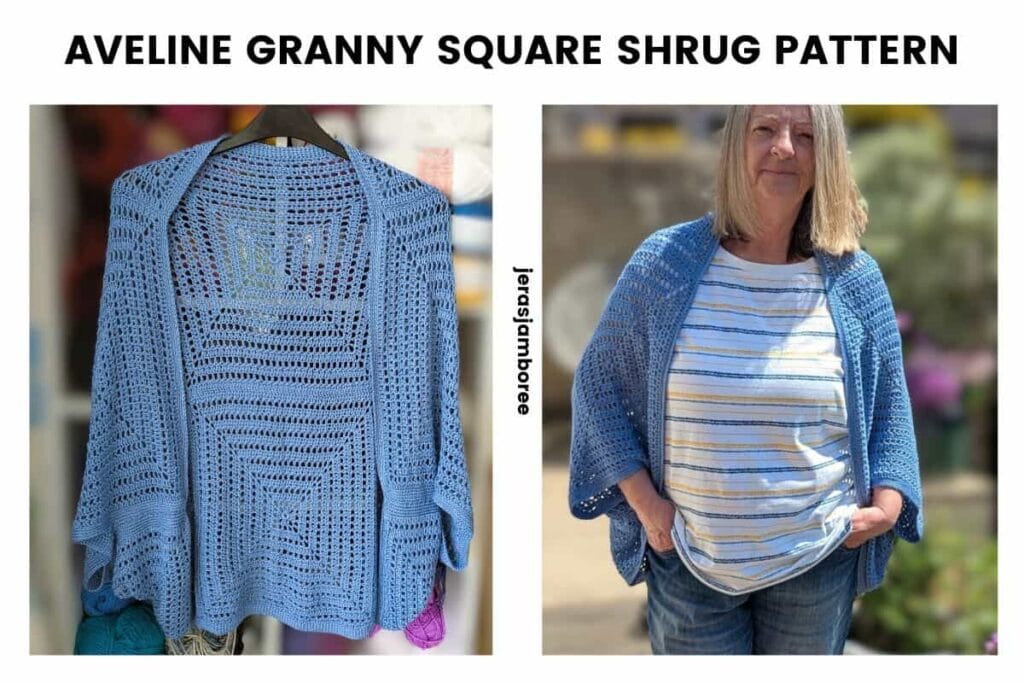
The free granny square shrug crochet pattern is below, including sizing, materials, gauge, assembly diagrams and full written instructions. If you’d prefer a printable ad-free version, the PDF is also available in my Etsy and Ravelry shops. Thank you so much for supporting my work.
Enjoy my crochet patterns and blog posts?
Add Jera’s Jamboree as a preferred source on Google, Just click below and tick the box to add me.

Jump to: Materials | Sizing | Free Crochet Pattern
Why You’ll Love my Aveline Cocoon Cardigan
- Made from just 6 oversized granny squares
- Easy construction with minimal seaming
- Relaxed cocoon fit with beautiful drape
- Perfect lightweight layer for spring and summer
- Free written pattern with an ad-free printable PDF available
Skill Level
Easy
My Aveline Cocoon Cardigan is suitable for confident beginners and intermediate crocheters. If you’re comfortable working double crochet stitches, chain spaces and joining granny squares, you’ll find this an enjoyable garment project.
The construction is straightforward. You’ll crochet six oversized granny squares, join them to form a rectangle, fold the fabric in half and sew two simple side seams before adding the edging.
Sizing
The table below shows the finished size of each cardigan, the granny square size needed, the number of squares required and the approximate yarn quantity.
Choose the size that best matches your preferred fit and check the finished measurements before you begin.
| Size | Squares Across | Squares Down | Square Size approx. | Finished Size | Yarn approx. yards |
| XS/S/M 32 – 36 | 3 | 2 | 11.5 | 34.5” (W) x 23” (L) | 856 |
| L/XL/2XL 40 – 48 | 3 | 2 | 13.5” | 40.5” (W) x 27” (L) | 1180 |
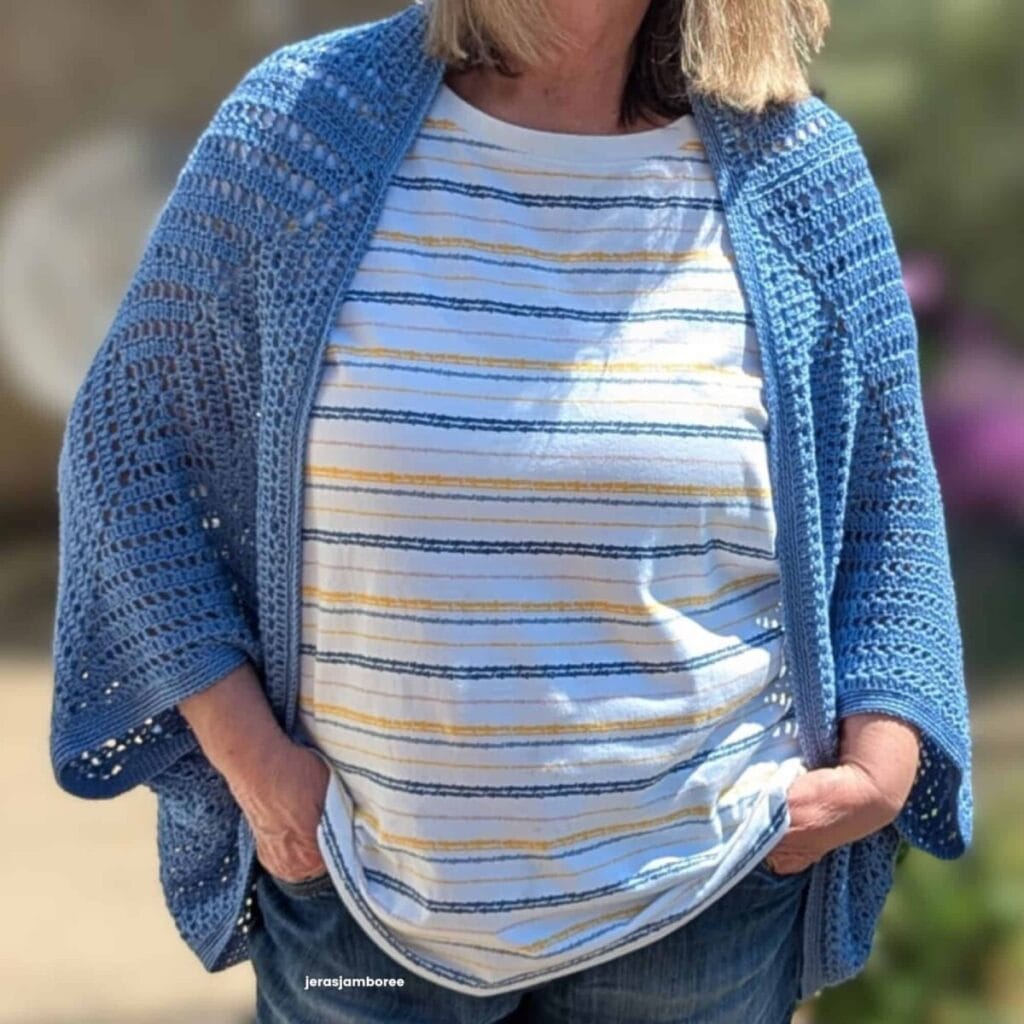
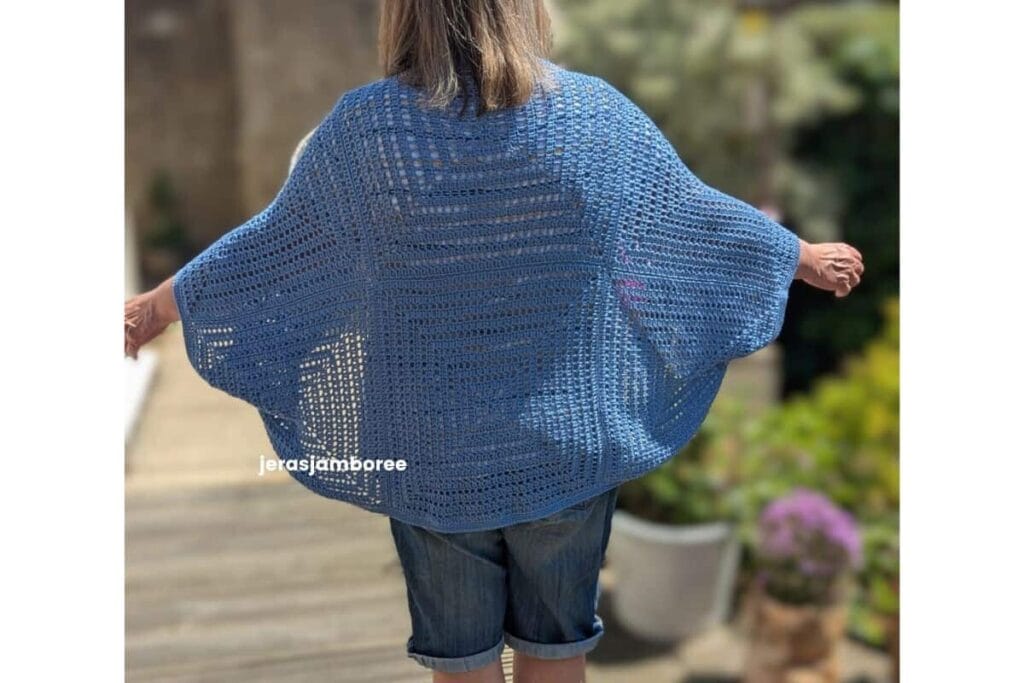
For reference, I have a 40-inch bust and I’m wearing the L/XL/2XL shown in the photo below. The bamboo yarn gives the fabric a lovely amount of stretch and drape, so I can comfortably pull the front edges together if I want a little more coverage.
Jera’s Jamboree receives payments for affiliate advertising. This is at no extra cost to you. As an Amazon Associate I earn from qualifying purchases. Please see my disclosure policy for more information.
Materials
- DK #3 weight yarn; 856, (1180) yds
- 4mm Hook (I use Clover Amour hooks)
- Dressmaker Pins (for aligning and sewing the granny squares)
- 2 Stitch Markers
- Scissors
- Yarn Needle
Yarn Choices
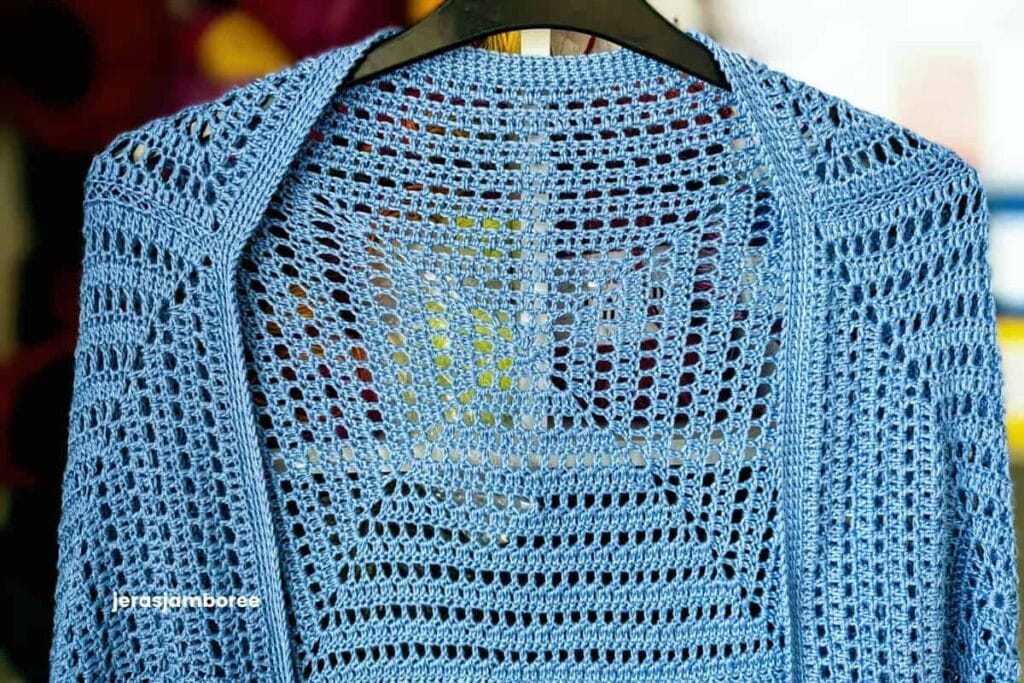
I used Papatya Bamboo DK for my sample. This granny square design had already been on my list to make and, when I spotted this yarn at its launch price on The Knitting Network, it felt like the perfect match.
If you’ve ever worn bamboo socks, you’ll know just how incredibly soft bamboo fibre feels!
It’s smooth to work with, produces excellent stitch definition and gives the finished cardigan a beautiful fluid drape.
One thing to keep in mind is that bamboo has a tendency to relax and stretch over time. I recommend washing your cardigan at 30°C and, where possible, drying it flat to help maintain its shape.
Papatya Bamboo DK has 11–13 wraps per inch (WPI), placing it comfortably within the DK weight category.
You can substitute another DK (#3) yarn if you prefer. For the best drape, I’d recommend a yarn with some softness or fibre blend rather than a heavier cotton.
Top Tip: Choosing a yarn with good drape will help your finished cardigan hang beautifully and enhance the relaxed cocoon shape.
Gauge
With a 4mm hook: 5 rounds = 4” x 4” / 10cm x 10cm
For the most accurate fit, I recommend blocking one completed granny square before measuring it. Bamboo yarn relaxes after washing, so checking your blocked square against the measurements in the Sizing table before crocheting the remaining five squares will help ensure your finished cardigan is the correct size.
If your blocked square is smaller than the measurement in the Sizing table, try increasing your hook size. If it’s larger, try a smaller hook.
You can also adjust the finished square size by working fewer or more rounds than stated for your chosen size, but always finish on a Round 3 repeat to maintain the correct edging.
Stitches and Abbreviations
My Aveline shrug uses these stitches:
- Single crochet back loop only (scblo) – edging
- double crochet (dc)
- slip stitch (sl st)
If you need a refresher for these stitches, you’ll find instructions in part one of my stitch library.
For my UK crocheters, the table below is a conversion of basic crochet stitches from US to UK.
| US Crochet Terms | UK Crochet Terms |
|---|---|
| single crochet (sc) | double crochet (dc) |
| half double crochet (hdc) | half treble crochet (htr) |
| double crochet (dc) | treble crochet (tr) |
| treble (tr) | double treble (dtr) |
| double treble (dtr) | triple treble (trtr) |
The following abbreviations are used throughout the pattern:
- beginning (beg)
- chain/s (ch/s)
- each (ea)
- repeat (rep)
- Right Side (RS)
- stitch (st)
- skip (sk)
- space/s (sp/s)
How the Aveline Cocoon Cardigan Is Constructed
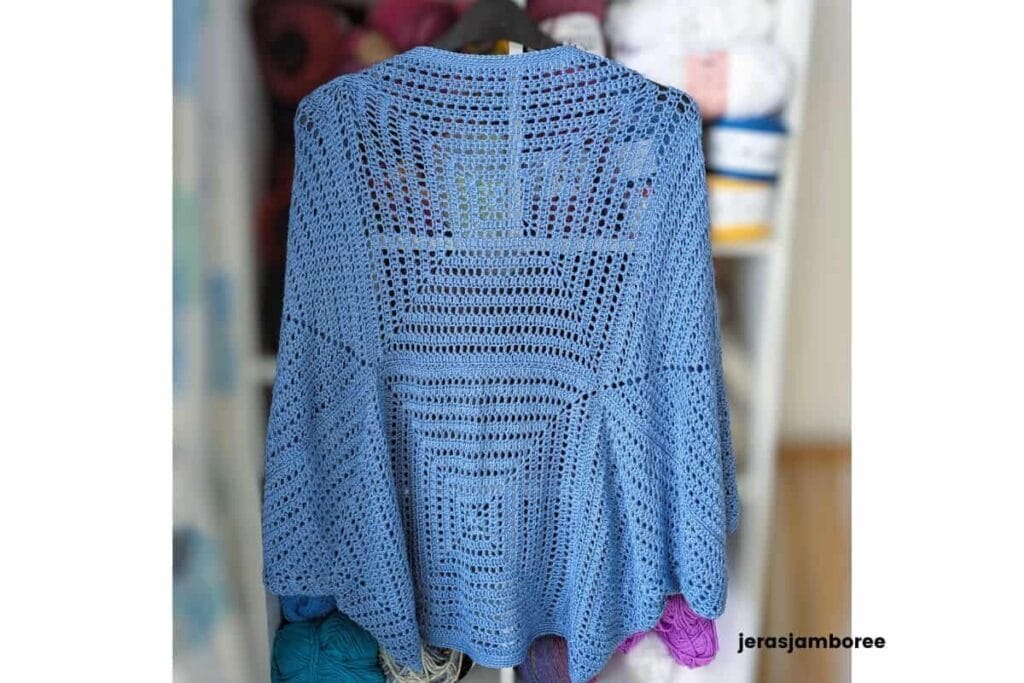
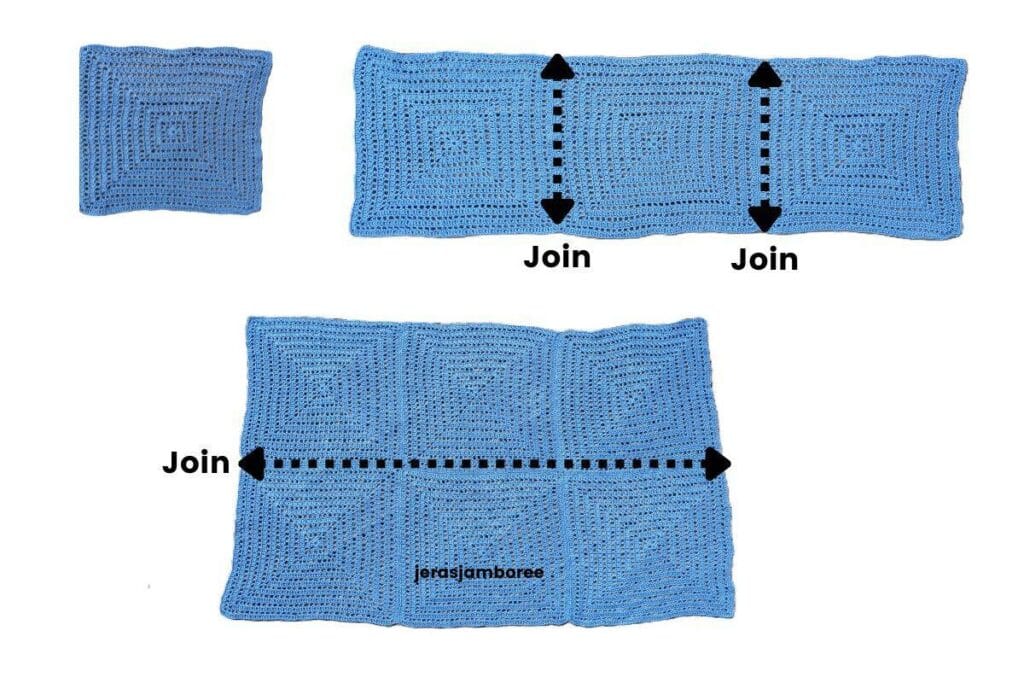
The Aveline Cocoon Cardigan is constructed from six oversized granny squares joined to create a rectangle.
A simple back-loop edging finishes the cardigan with a neat, polished look.
The diagram below shows how the six granny squares are joined to create the rectangle.
Assembly
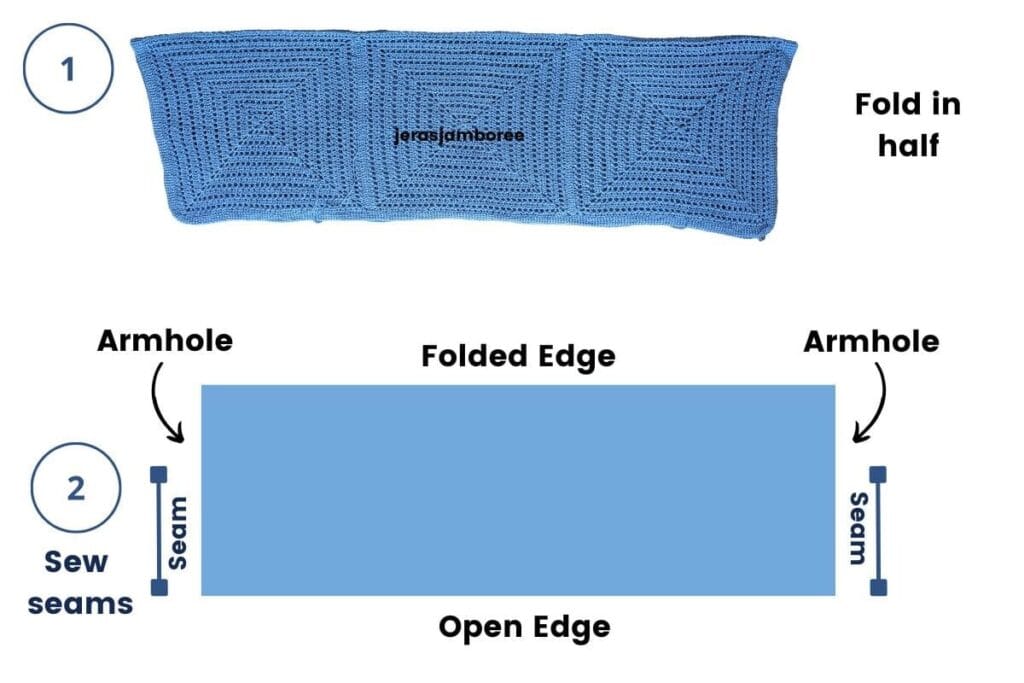
- Once the granny squares have been joined, fold the rectangle in half with the right sides facing together.
- Measure the armhole opening on each side, place a stitch marker, then sew from the stitch marker to the open edge as shown below.
My Pattern Notes
Before you begin, here are a few notes that will help you get the best results from your Aveline Cocoon Cardigan.
- Pattern is written in English using US crochet terms
- Size instructions are written like this: XS/S/M, (L/XL/2XL)
- Chain 3 counts as a double crochet.
- Chain 4 counts as a double crochet, chain 1.
- Granny squares have been joined using an invisible seam. You can use any joining method you prefer.
- When working the first edging round, crochet into the back loop of the chains as well as the stitches to create a neat finish around the cardigan.
- Weave in ends as you go.
Get the Easy-to-Read Print Friendly PDF (ad-free)
Prefer to crochet without the ads? The printable PDF includes everything you need to make the Aveline Cocoon Cardigan in one convenient document.
- Granny square instructions
- Construction and assembly diagrams
- Pattern notes
- Clear written instructions
- Printable row/round counter

Aveline Crochet Shrug Instructions (US crochet terms)
Make 6 squares
With a 4mm hook
Ch 5, join with sl st in the first ch to form a ring
Working into the centre of the ring
Round 1: Ch3, 2 dc in ring, *ch3, 3dc in ring, *rep two more times, ch 3, join with sl st to beg ch 3
- Each side 3dc
- Total 12 dc, 4 ch-3 sps
Fasten off
Rejoin yarn in any ch-3 sp
Round 2: ch4, *dc in next dc, ch 1, sk 1 st, dc in next dc, ch 1, [dc, ch3, dc] in ch-3 sp, ch 1* rep two more times, dc in next dc, ch 1, sk 1 st, dc in next dc, ch 1, [dc, ch3] in ch-3 sp, join with sl st to third ch in ch4
- Each side 4dc, 3 ch-1 sp
- Total 16 dc, 12 ch-1 sp, 4 ch-3 sps
Round 3: ch 3, *dc in ch-1 sp, dc in dc * rep to corner, [2dc, ch3, 2dc] in ch-3 corner sp, dc in ea dc and ch-1 sp until corner, *rep two more times, [2dc, ch3, 2dc] in ch-3 sp, join with sl st to ch-3, sl st to ch3 sp
- Each side 11 dc
- Total 44 dc, 4 ch-3 sps
Fasten off
Rejoin yarn in any ch3-sp
Round 4: ch4, *dc in next dc, ch 1, sk 1 st; rep until you reach last dc before corner sp, dc in last dc, ch 1, [dc, ch3, dc) in ch-3 space, ch1,* repeat two more times, dc in next dc, ch 1, sk 1 st; rep until you reach last dc before corner, dc in last dc, ch 1, [dc, ch 3] in corner sp, join with sl st to third ch in beg-ch4.
- Each side 8 dc, 7 ch-1 sp
- Total 32 dc, 28 ch-1 sps, 4 ch-3 sps
Round 5: rep round 3
- Each side 19 dc
- Total 76 dc, 4 ch-3 sps
Round 6: rep round 4
- Each side 12 dc, 11 ch-1 sps
- Total 48 dc, 44 ch-1 sps, 4 ch-3 sps
Round 7: rep round 3
- Each side 27 dc
- Total 108 dc, 4 ch-3 sps
Round 8: rep round 4
- Each side 16 dc, 15 ch-1 sps
- Total 64 dc, 60 ch-1 sps, 4 ch-3 sps
Round 9: rep round 3
- Each side 35 dc
- Total 140 dc, 4 ch-3 sps
Round 10: rep round 4
- Each side 20 dc, 19 ch-1 sps
- Total 80 dc, 76 ch-1 sps, 4 ch-3 sps
Round 11: rep round 3
- Each side 43 dc
- Total 172 dc, 4 ch-3 sps
Round 12: rep round 4
- Each side 24 dc, 23 ch-1 sps
- Total 96 dc, 92 ch-1 sps, 4 ch-3 sps
Round 13: rep round 3
- Each side 51 dc
- Total 204 dc, 4 ch-3 sps
Size XS/S/M Fasten off – go to joining the squares
Round 14: rep round 4
- Each side 28 dc, 27 ch-1 sps
- Total 112 dc, 108 ch-1 sps, 4 ch-3 sps
Round 15: rep round 3
- Each side 59 dc
- Total 236 dc, 4 ch-3 sps
Round 16: rep round 4
- Each side 32 dc, 31 ch-1 sps
- Total 128 dc, 124 ch-1 sps, 4 ch-3 sps
Round 17: rep round 3
- Each side 67 dc
- Total 268 dc, 4 ch-3 sps
L/XL/2XL Fasten off
Joining the Squares
Arrange the six granny squares into three squares across and two squares down, then join them to create one rectangle as shown in the construction diagram.
Using an invisible seam is the preferred joining method (working under the back loops only so that the front loops pull together to create a tidy ridge on the right side and hide the seam underneath).
You can join squares with any method of your choice.
Edging
For an edging finish that includes the sleeve opening
Rejoin yarn on RS in the first st after any corner sp
Round 1: ch1, sc in first st, scblo in ea st and ch around, join with sl st to first sc
Round 2: ch1, sc in first st, scblo in ea st around, join with sl st to first sc
Round 3 and 4: rep round 2
Fasten off
For an edging that excludes the sleeve opening
Working in rows
Rejoin yarn on RS at top of rectangle
Row 1: ch1, sc in first st, scblo in ea st and ch, ch1, turn
Row 2: ch1, sc in first st, scblo in ea st, ch1, turn
Row 3 and 4: rep row 2
Fasten off
Rep for bottom of rectangle
Assembly
with RS facing inwards, fold fabric in half widthways
With the fold at the top, measure 8” on the edge from the fold and place a st marker. Sew the seam on the edge from the st marker down to the bottom of the fabric
Fasten off
Rep on other side
Turn your shrug right side out
Congratulations! You’ve finished your shrug.
Copyright Notice
The pattern and photographs of this design are the property of Sharon Goodwin at Jera’s Jamboree. This pattern and design are subject to copyright and are for personal, non-commercial use only. You may not share, resell, alter or redistribute this pattern in part or in whole. You may, however, sell any finished items you make. If you would like to include this pattern in a roundup, you may take one photo and link back to this pattern.
Save this Granny Square Shrug Crochet Pattern
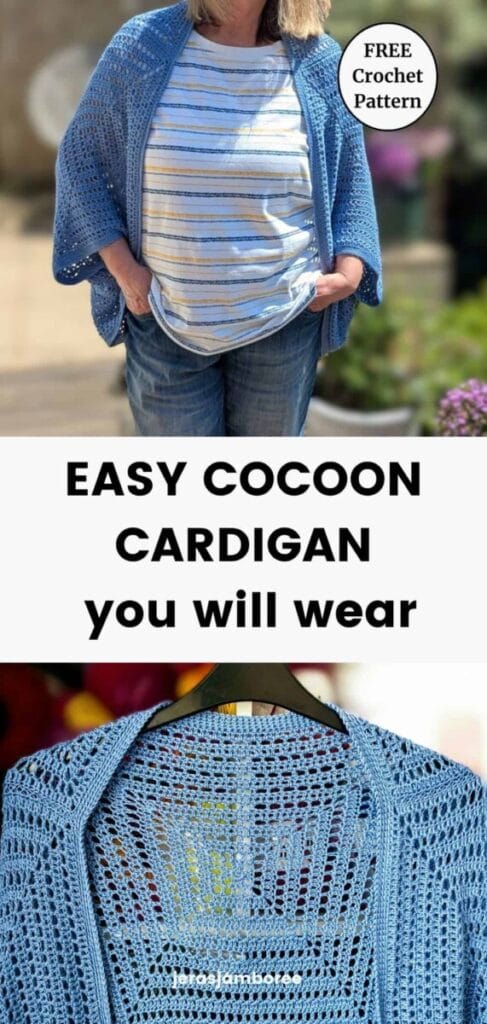
Love this pattern? Save the pin below to your favourite Pinterest crochet board so you can easily find the Aveline Cocoon Cardigan whenever you’re ready to make it.
Enjoyed Making the Aveline Cocoon Cardigan?
If you’re looking for another lightweight layer or more granny square inspiration, I have more designs for you to explore.
- Countess of Diamonds Crochet Shrug – another easy layering piece with a different stitch pattern.
- Easy Cocoon Cardigan Crochet Pattern – if you enjoy relaxed, draped cardigans, this is another great project to try.
- Granny Square Cardigan Patterns – discover more granny square cardigan inspiration from a variety of designers.
- Crochet Cardigan Patterns – browse my complete collection of free cardigan patterns.
I’d love to see your finished Aveline Cocoon Cardigan! Share it with us in the Jera’s Jamboree Crochet Community on Facebook so that we can admire your beautiful work.
