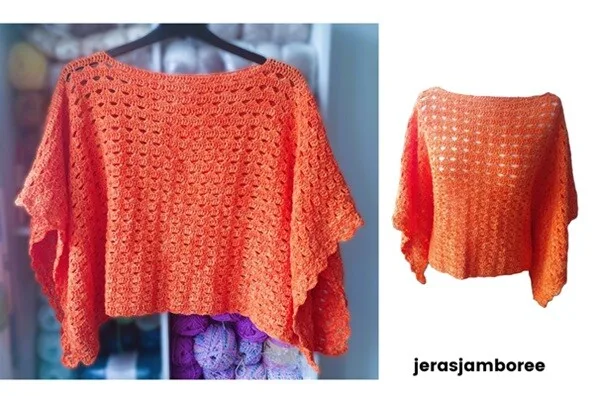
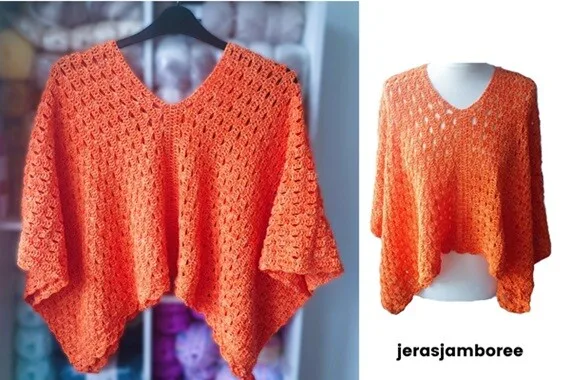
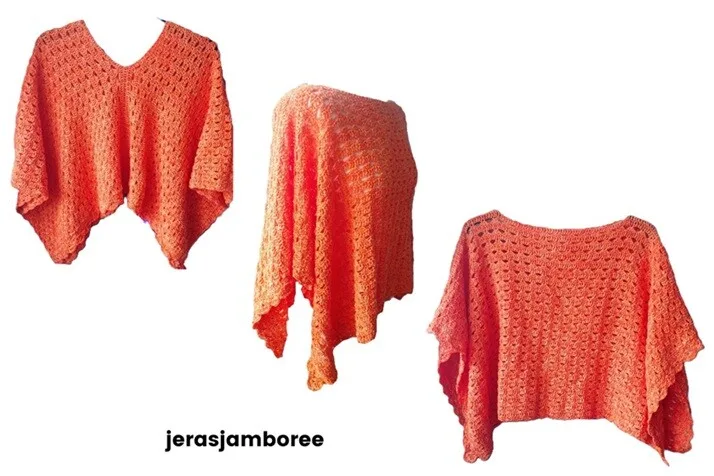
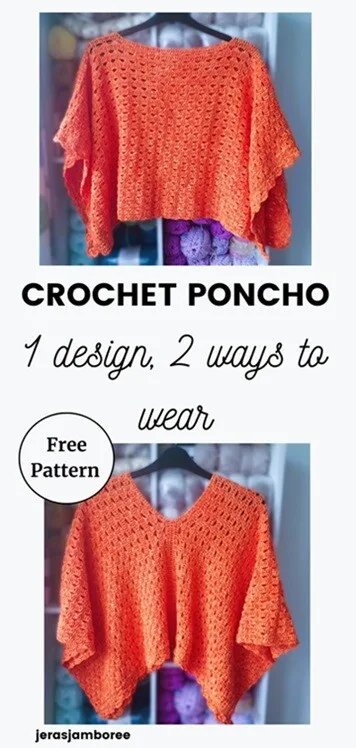
I’m excited to share with you my latest crochet poncho which I’ve designed to be worn two ways. Style the poncho as a V-neck and you’ll showcase the edging at the asymmetrical hem, or you can wear yours as a boat neck where the edging adds an airy, decorative touch to the sides.
Worked in one piece with no seaming, my Fiona poncho is beginner friendly. The simple two-row repeat creates a flowing stitch pattern inspired by gentle waves and the seashore, making it an ideal summer wardrobe essential. Plus, with one-size-fits-all and instructions for customizing the length, you can easily tailor it to suit your style.

Below you’ll find the crochet poncho free pattern with instructions written in US crochet terms. You can also upgrade to an ad free PDF in my Etsy and Ravelry stores.
Don’t forget if you need help you can always reach out in the Facebook group. We’d love to see your finished poncho!
Why you’ll Love to Crochet my Poncho
Level
I’ve rated this pattern as beginner friendly. There is no shaping. You need to have experience of working single crochet and double crochet. It would be helpful for you to know what the post of a stitch is to work the shell stitch for the edging (see glossary).
Jera’s Jamboree receives payments for affiliate advertising. This is at no extra cost to you. As an Amazon Associate I earn from qualifying purchases. Please see my disclosure policy for more information.
Supplies and Materials
- 4mm / G-6 Crochet Hook
- 4ply cotton (sport weight); 1388 yds
- Tape Measure
- Stitch Markers
- Scissors
- Yarn Needle
Yarn Choices
I chose 4ply for this poncho design because I wanted a soft and elegant drape. The 100% cotton gives breathability, perfect to use on projects that will be worn in the warmer weather!
I used Scheepjes Sunkissed in the colourway Beach Hut Orange. The fact that this yarn is produced using recycled waste water was a bonus!
It was so soft to work with and so far, has washed up well on a 30 degrees delicates machine wash.
The recommended hook size for this yarn is 3mm. I’ve used a larger hook to open up the stitches.
You can substitute any 4ply yarn. Although the gauge isn’t critical for the Fiona poncho, if you want to achieve the same drape and size and your gauge doesn’t match mine, you can easily adjust your stitches using the stitch gauge converter.
Gauge
With a 4mm hook, 19 stitches and 11 rows = 10cm X 10cm
Glossary
Stitches
The post of a stitch is the vertical part which gives the stitch its height.
- Double crochet (dc)
- Single crochet (sc)
- Slip Stitch (sl st)
For my UK crocheters, the table below is a conversion of basic crochet stitches from US to UK.
| US Crochet Terms | UK Crochet Terms |
|---|---|
| single crochet (sc) | double crochet (dc) |
| half double crochet (hdc) | half treble crochet (htr) |
| double crochet (dc) | treble crochet (tr) |
| treble (tr) | double treble (dtr) |
| double treble (dtr) | triple treble (trtr) |
Abbreviations
- Between (bet)
- Chain/s (ch/s)
- Chain Space (ch-sp)
- Continue (cont)
- Each (ea)
- Previous (prev)
- Repeat (rep)
- Right Side (RS)
- Skip (sk)
- Space (sp)
- Stitch/es (st/s)
- Wrong Side (WS)

Measurements
One Size Fits All
Note: the sizes below are the width of EACH PANEL so for front and back, times this by 2 for sizing. For instance, 2 x 38 inches = 76 inches. For comparison, size 5X is to fit 60–62 inches.
Before blocking, each panel measures approximately:
| Poncho Style | Width (inches each panel) | Length (inches each panel) | Total Yarn |
| Worn V-Neck | 38 | 19.75 | 373g Scheepjes Sunkissed Substituting yarn = 1388 yds / 1269 meters |
| Worn Boat Neck | 36 | 18 |
How the Crochet Poncho Pattern is Worked
This easy crochet poncho is worked in one piece (no seaming required) in a two-row repeat. A row of double crochet alternates with a row of skipping 4 stitches and working 5 double crochets in the next stitch.
These two rows together give a stunning wave and seashore look. Fab for a summer aesthetic!
- The back panel is crocheted first in rows.
- The front panel is then worked directly onto the back panel, starting on the wrong side at the beginning edge of row 1 (see image below).

- Chains and skipped stitches are used to create the neckline with the chains worked as part of the pattern in the next row.
- The two-row repeat continues to match the length of the back panel.
- The edging is worked in 5 rows along the hem when the poncho is folded as a V-neck on both front and back.
I’ve used a shell stitch variation for the edging which is achieved by working a single crochet, skipping 2 stitches, in the next stitch working 2 double crochets, chain 1, 2 double crochets, chain 1, 2 double crochets and skipping 2 stitches (multiples of 5).
This edging gives a fabulous finish. If you wear your poncho as a boat neck, the edging is along the sides and if you decide to wear it as a v-neck, the edging is along the hem. Both ways look great.
Pattern Notes
- Pattern is written in US crochet terms.
- Stitch pattern for panels and edging is multiples of 5.
- Chain 2 counts as a double crochet.
- Edging chain 3 counts as a double crochet.
- Row 1 – working in one loop only for back panel makes it easier to work the stitches for the front panel.
- Repeats are written like this * repeat * for instance, *sk 4 sts, 5dc in next st, * rep to last 5 sts, you will skip 4 stitches, work 5 double crochets in the next stitch and repeat this across to the last 5 stitches.
- V-Neck: Increase or decrease the length of your poncho by adding or subtracting stitches in multiples of 5.
- Boat Neck: Increase or decrease the length of your poncho by adding more or less rows, ending with a row 2 repeat.
- To reduce the neckline, count less stitches between stitch markers when setting up. Keep in mind that cotton doesn’t have stretch in the fibres.
- Weave in ends as you go.
- If you alter this poncho pattern in any way, it is likely you will need to adjust how much yarn you need.
Testimonials
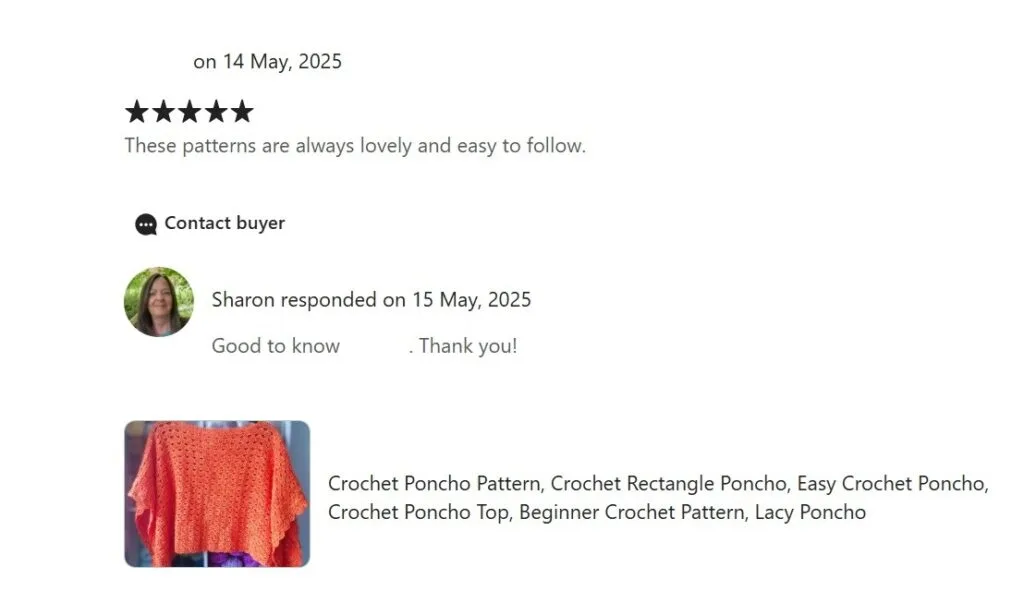
5 star Etsy review dated 14 May 2025. “These patterns are always lovely and easy to follow.”
Purchase the easy-to-read print-friendly PDF (ad free)
The PDF of this poncho pattern includes everything you need:
- how to work the stitches
- how the pattern is worked
- pattern notes
- clear written instructions
- printable row counter
Crochet Poncho Instructions US Crochet Terms
Back Panel Instructions
With a 4mm hook
Ch 167
Row 1: dc in 3rd ch from hook, dc in ea ch across, ch2, turn (165 dc)
Row 2 (RS): 2dc in base of ch2 from end of prev row, *sk 4 sts, 5dc in next st, * rep to last 5 sts, sk4 sts, 3dc in last st, ch2, turn
Row 3: dc in ea st across, ch2, turn
Rep rows 2 and 3 for a total of 46 rows
Fasten off
Now working on WS row 1
Setting up neckline
Working on the WS and counting sts along row 1
Identify the middle st and place a st marker
Count 25 sts to the left and place a st marker
Count 25 sts to the right and place a st marker
Remove the middle st marker
The sp bet st markers is the neckline
Cont working on the WS
Rejoin yarn at first st at the start of row 1
Neckline/Shoulder Row: dc in ea st until you reach the 1st st marker, dc in the same st as the st marker, ch51, sk 51 sts, dc to end, ch2, turn
Try on your poncho to make sure you’re happy with the neckline.
Front Panel Instructions
Cont working in pattern to match back panel, working into chs for next row
Row 1: dc in ea st across, ch2, turn
Row 2 – 46: rep rows 2 and 3 of back panel
Fasten off
Edging
Fold the poncho so the neckline is styled as a V-neck and working on RS, rejoin yarn with a sl st at hem on RHS
Row 1: sc 140 sts evenly along hem, ch1, turn
Row 2: sc in ea st across, ch3, turn
Row 3: [dc, ch1, 2dc] in same st as ch3, sk 2 sts, *sc in next st, sk 2 sts, [2dc, ch1, 2dc, ch1, 2dc] in next st, sk 2 sts, * rep across to last 3 sts, sk 2 sts, [2dc, ch1, 2dc] in last st, ch1, turn
Row 4: sc in 1st st, *ch3, [dc, ch1, dc] in sc from prev row, ch3, sc bet posts of 3rd and 4th st from prev row, * rep to last shell, ch3, sc in last st, ch1, turn
Row 5: sc in 1st st, *[2dc, ch1, 2dc, ch1, 2dc] in ch-sp from prev row, sc in next sc, * rep across ending sc in last st
Fasten off
Rep on other side
Congratulations! Your crochet poncho is finished and ready to be blocked.
Copyright Notice
The pattern and photographs of this design are the property of Sharon Goodwin at Jera’s Jamboree. This pattern and design are subject to copyright and are for personal, non-commercial use only. You may not share, resell, alter or redistribute this pattern in part or in whole. You may, however, sell any finished items you make. If you would like to include this pattern in a roundup, you may take one photo and link back to this pattern.
Save to Pinterest
No time now? Save the pin below to your favourite board to go back to when you have more time.
This poncho looks gorgeous! I am just wondering, as a plus sized lady, is there any way to make the poncho wider? Thanks for sharing this awesome pattern!
Thank you Desiree!
The size is for each panel so for instance, if you styled the poncho as a boat neck, the total is 76 inches and styling as a V-neck, 72 inches (each panel X 2). As comparison, size 5X is to fit 60–62 inches.
If you wanted to make yours wider than 72/76 inches, for every 4 inches you would need an extra 19 stitches to the starting chain. The stitch pattern is in multiples of 5 so you would need to round it up to 20 stitches. 4 extra inches in width = 20 extra stitches. 8 inches in width = 40 extra stitches.
I hope this helps and makes sense? Thanks for reaching out ~ Shaz
Shaz,
Thank you! I wasn’t thinking of it being the width for each panel. That makes sense. 🙂
Desiree
… if you were thinking that, others probably are too. I’ll see what I can do to make it clearer. Thank you 🙂