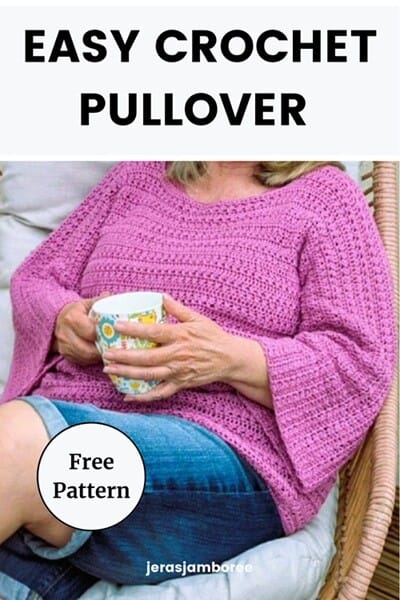
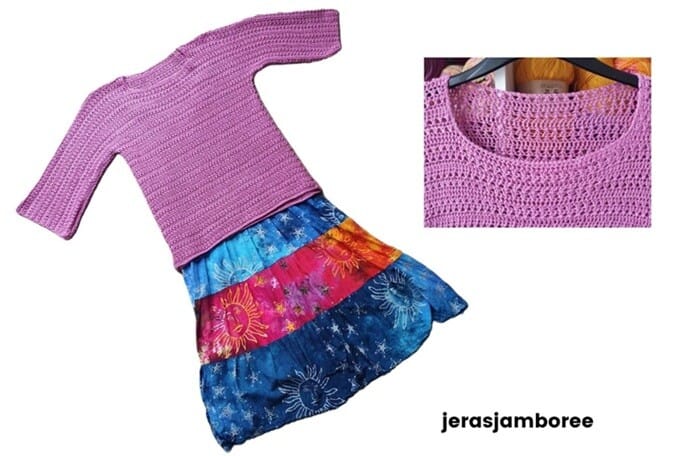
New to garment making, or just looking for a satisfying project? The Elodie Pullover is a relaxed and easy crochet pattern that’s perfect for layering. You’ll love the soft drape and simple texture of my crochet pull over sweater.
It’s worked all in one piece, so there are no shoulder seams to fiddle with or sleeves to set in — just simple side and sleeve seams to finish. With this straightforward construction I’ve kept things beginner-friendly while still giving you a wearable, stylish result.
The free pattern is below and includes sizes S to 3XL, written in US crochet terms. Prefer an ad-free printable version? It’s also available as a PDF in my Etsy and Ravelry stores.
My design gives a gentle oversized fit without being bulky. The simple stitch repeat means you can relax into the rhythm, and with no shaping to worry about, it’s a project you can truly enjoy from start to finish.
Have you made my Elodie Pullover? I’d love to know how you got on! Was it your first easy crochet pullover sweater, or are you a seasoned garment maker? Leave a comment and let me know — or come share your project in the Jera’s Jamboree Crochet Community on Facebook.
Jump to: Materials | Sizing | Free Crochet Pattern
Skill Level
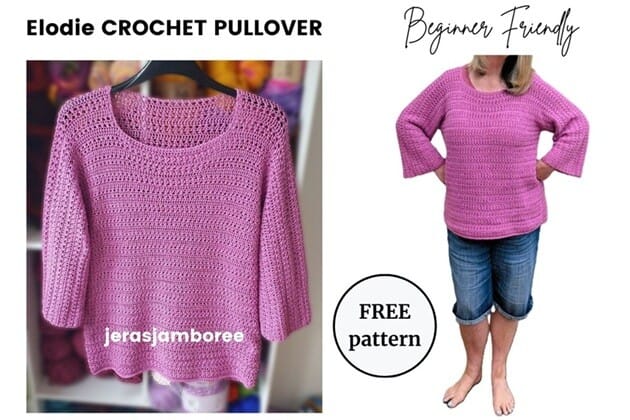
Easy / Beginner Friendly – the Elodie pullover is worked in one piece with no shaping.
Sizing
- How to decide which size is right for you?
This pullover is oversized. If you prefer a closer fit, check the finished size width in the table below. Would you feel comfortable wearing a size smaller? As an example, your size is 36 inch chest and the width size in this pattern for the smaller size is 38 inches. Is 2 inches movement in the jumper enough for you to feel comfortable wearing it? Then follow the instructions for the smaller size.
For suggestions on how to customise, I’ve included information for length and sleeves in the section how the pattern is worked.
I use the Craft Yarn Council measurements as guidance.
| To Fit Chest (inches) | Finished Size Width approx. (inches) | Length (shoulder to hem) approx. (inches) | Total Yarn (yds) approx. |
| S 32 – 34 | 38 | 23.5 | 1562 |
| M 36 – 38 | 42 | 24 | 1748 |
| L 40 – 42 | 46 | 24.5 | 1951 |
| XL 44 – 46 | 50 | 25 | 2150 |
| 2XL 48 – 50 | 54 | 25.5 | 2367 |
| 3XL 52 – 54 | 58 | 26 | 2578 |
Jera’s Jamboree receives payments for affiliate advertising. This is at no extra cost to you. As an Amazon Associate I earn from qualifying purchases. Please see my disclosure policy for more information.
Materials
- Twister Solid (Hobbii) Sport weight #2 (5 ply); 1562, (1748, 1951, 2150, 2367, 2578) yards
- 4mm Crochet Hook – body, sleeves and neck edging (I use Clover Amour hooks)
- 4.5mm Crochet Hook (foundation chain, row 1, hem edging)
- Stitch Marker (Etsy have a huge choice of stitch markers)
- Tape Measure
- Scissors
- Yarn needle
Yarn Choices
I chose Twister Solid from Hobbii because I wanted my garment to be lightweight and easy to wash. After reading the reviews, I thought this would be a great match!
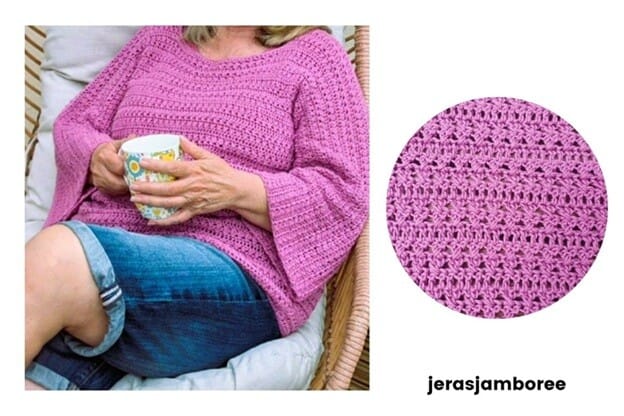
This is the first time I’ve used Twister and I love the stitch definition – it’s brilliant! The crochet pullover is light and airy and very comfortable to wear. It’s now on my favourites list 🙂
With an amazing choice of 50 colours, I’m sure there will be a shade to suit your own preferences.
This yarn is an *S-on-S plied sport weight (#2) yarn. Made from 55% cotton and 45% acrylic, Twister is durable, the colour won’t fade and maybe best of all, this blend of fibres means your makes can be machine washed. Perfect!
*If you’re curious about what S-on-S plied means, the yarn is constructed by first twisting individual yarn strands (singles) with an S-twist (left-hand twist), and then plying multiple of these S-twisted singles together with another S-twist. This creates a yarn with a final S-twist, but unlike traditional yarns, it uses an S-twist for both the single and the ply.
Yarns with a close match and that fall within the same gauge as Twister Solid include:
Gauge
19 stitches and 13 rows with a 4mm hook = 10cm X 10cm
13 rows = 5 rows of double crochet and 8 rows of Crossed Double Crochet
If your gauge from your swatch doesn’t meet mine, you can easily adjust your stitches using my stitch gauge converter.
Stitches and Abbreviations
You will need to be able to work these crochet stitches:
- Crossed Double Crochet (Xdc): Skip a stitch, 1dc into next stitch, 1dc into skipped stitch working in front of the dc just made.
- Single Crochet (sc)
- Double crochet (dc)
- Slip Stitch (sl st)
I have used these common abbreviations in the pattern:
- Chain (ch)
- Continuity (cont)
- Each (ea)
- Pattern (patt)
- Remaining (rem)
- Right Side (RS)
- Stitch/es (st/s)
- Wrong Side (WS)
How to Crochet the Elodie Pullover
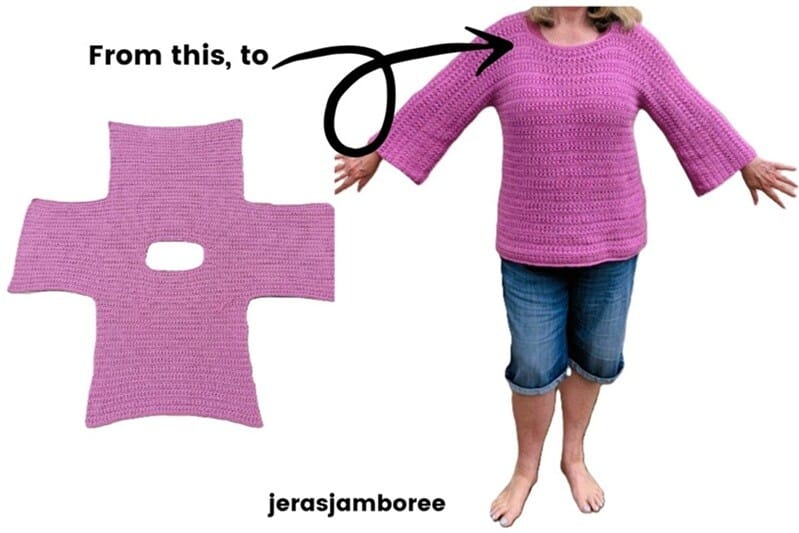
The Elodie pullover is crocheted in rows in one piece. A seam is sewn for the sides and sleeves. To finish off, a round of single crochet is worked for the hem and the neckline edging.
I’ve used a simple pattern repeat of two crossed double crochet rows and one double crochet row. These three rows alternate throughout the jumper. This gives a fab texture!
The numbered image below shows the process. I’ve also explained more after the image.
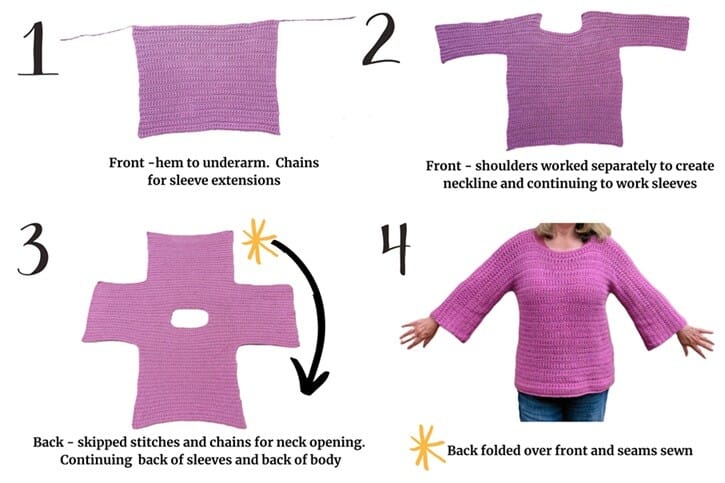
The numbered list below corresponds to the numbers in the image above:
- The front is worked first from the hem to underarm. Chains are made either side for the sleeve extensions which are then worked in to continue working the sleeves and the body.
- Stitch markers are used to separate the shoulders and to create the neckline. First one shoulder is worked before rejoining the yarn to work the second shoulder. The sleeves are also worked as part of each shoulder.
- Chains are made for the same number of stitches skipped for the neckline. Yarn is rejoined to work the back of the sweater and the back of the sleeves. The same number of rows worked for the front of the sleeves is worked on the back. To decrease the number of stitches to continue working the body, slip stitches are made at the start of the row and stitches left unworked at the end of the same row.
- Working on the wrong side, the back is folded over the front for seaming. A long seam is made from the hem and along the underside of the sleeve. This is repeated on the other side.
Finally, the hem and neckline edging are crocheted.
How to Customise Your Easy Crochet Pullover
- The length from the hem to the underarm can be easily customised. For a shorter length sweater, work less row repeats to the sleeve extensions. For example, a waist length garment you will need to work a total of 33 rows before continuing with the sleeve extension instructions. For a longer length sweater, work more repeats to your desired length. Remember, if you change the length while working the front, you will also need to change the length for the back.
- Measurements for the sleeves are from underarm along the length of your arm. The sleeves in my pattern are three-quarter length. If you prefer bracelet length, when the pattern chains for the sleeve extensions, you will need to add to the chains in multiples of 2 to your preferred length. If you would like short sleeves, you will need to chain less in multiples of 2. Be aware that the chain length that starts the new row will need 2 extra stitches as you will be working into the 4th chain from the hook. Don’t forget to change the other sleeve too (less 2 stitches)!
My Pattern Notes
Using these notes alongside the construction details and pattern instructions will help you enjoy the process and finish with a pullover sweater you’re proud to wear.
- Pattern is written in English using US Crochet Terms for sizes S through to 3XL
- Stitch pattern is in multiples of 2
- Instructions for different sizes are written like this: S, (M, L, XL, 2XL, 3XL).
- Chain 1 does not count as a stitch.
- Chain 2 counts as a stitch.
- Weave in ends as you go.
Purchase the easy-to-read print-friendly PDF (ad free)
The PDF of this pattern includes everything you need:
- how to work the stitches
- how the pattern is worked
- pattern notes
- clear written instructions
- printable row counter
Elodie Pullover Sweater Instructions (US crochet terms)
Front
With a 4.5mm hook
Ch 92, (102, 112, 120, 130, 140)
Row 1 (RS): dc in 4th ch from hook, dc in back bumps of ea ch across, ch2, turn (90, 100, 110, 118, 128, 138 dc)
Change to 4mm hook
Row 2: Xdc to last st, dc in last st, ch2, turn
Row 3: rep row 2
Row 4: dc in ea st across, ch2, turn
Rows 2 – 4 form patt
Rows 5 – 42: rep rows 2 – 4 DO NOT turn at end of row 42
Sleeve Extension Chains
At end of row 42, ch 62, (62, 66, 66, 68, 68)
Fasten off
Rejoin yarn at beg of row 42, ch 60, (60, 64, 64, 66, 66)
Fasten off
Turn work and rejoin yarn at start of row
Continuing Front
Row 43: dc in 4th ch from hook, dc in ea ch and st across, ch2, turn (210, 220, 238, 246, 260, 270 dc)
Row 44 – 55, (58, 61, 64, 67, 70): rep rows 2 – 4. At end of last row ch2, turn
First Shoulder
Row 56, (59, 62, 65, 68, 71): Xdc in next 86, (91, 100, 104, 111, 116) sts, count 36 sts and place a st marker in the next st, ch2, turn leaving rem sts unworked (87, 92, 101, 105, 112, 117 Xdc)
Keeping cont of patt, work 6 more rows
Fasten off
Second Shoulder
Rejoin yarn at st marker
Row 56, (59, 62, 65, 68, 71): Xdc in ea st across, ch2, turn (87, 92, 101, 105, 112, 117 Xdc)
Keeping cont of patt, work 6 more rows
Fasten off
Preparation for Back
Rejoin yarn at neck edge of first shoulder, ch 36, join with sl st to neck edge of second shoulder.
Fasten off
Turn work
Back
Rejoin yarn at start of last row, ch2
Work in ea st and ch across neck for the first row, keeping cont of patt work a total of 20, (23, 26, 29, 32, 35) rows (210, 220, 238, 246, 260, 270 sts)
Decreasing to Finish Sleeve Section
Next row: sl st a total of 61, (61, 65, 65, 65, 67, 67) sts, ch2 (counts as a st), keeping cont of patt, work 89, (99, 109, 117, 127, 137) sts, ch2, turn leaving rem sts unworked
Continuing Body at Back
Keeping cont of patt work 42 rows
Fasten off leaving a long tail to sew seam
Assembly
Fold back over front with WS facing outwards, line up seams from hem to underarm and underarm to sleeve cuff.
Sew seam.
Rep on other side
Hem Edging
Working on RS and using 4.5mm hook
Rejoin yarn at side seam on hem
Ch1, sc evenly around hem
Join with sl st
Fasten off
Neckline Edging
Working on RS, using 4mm hook
Rejoin yarn at shoulder neck edge
Ch1, sc evenly around front and back of neck edge
Join with sl st
Fasten off
Congratulations! Your pullover is ready to be washed and dried flat.
Copyright Notice
The pattern and photographs of this design are the property of Sharon Goodwin at Jera’s Jamboree. This pattern and design are subject to copyright and are for personal, non-commercial use only. You may not share, resell, alter or redistribute this pattern in part or in whole. You may, however, sell any finished items you make. If you would like to include this pattern in a roundup, you may take one photo and link back to this pattern.
Don’t forget to pin this easy pullover sweater so you can come back to it anytime.