Dust off your imagination and let it soar by making your own outdoor fairy garden.
Jera’s Jamboree receives payments for affiliate advertising. This is at no extra cost to you. As an Amazon Associate I earn from qualifying purchases. Please see my disclosure policy for more information.
Fairy gardens are just what they sound like; miniature gardens that include fairy figurines, plants, and statues.
A great thing about creating a fairy garden is that you can do as much or as little as you want.
From the container you choose to which fairies you include; the garden is entirely up to you and your imagination.
This is a really fun and unique gardening project that is perfect for beginners. They’re easy to put together and allow you to be as creative as you want.
Make it a fun family activity, creating stories with your children or grandchildren as you are building your fairy garden and you’ll also be building lasting memories. It can be a wonderful way to spend time together.
What you need to consider as part of planning your DIY fairy garden
Choosing a Theme
A good way to start creating a fairy garden is to choose a theme.
You can go with a traditional fairy garden theme, or get a little more imaginative.
For example, you might have a house by the ocean and want to go with a coastal fairy garden theme. This might include small, blue marbles and rocks to create water, real sand and seashells, and little fairies decorated in their swimsuits.
Some other fairy garden themes include:
- Farm
- Carnival
- County fair
- Enchanted Forest
- Playground
- Camping
- Zen
- Woodland
Selecting the Right Scale
You also want to choose the right scale for your outdoor fairy garden.
It is a good idea to make sure your fairy garden plants and accessories match that scale.
For example, if your fairy is 4 inches tall, the house obviously needs to be larger than that.
This is important since different houses, flowers, plants, fairy figurines and furniture will all fit different scaling.

How to build an outdoor fairy garden
Step 1: Choose a container for your outdoor fairy garden
Now that you have started with the first few important steps, you can further plan your fairy garden.
Once you know the theme and scale, it is a lot easier to choose the right container.
This is going to be the basis for your entire fairy garden, so it is an essential decision to make.
It will determine the type of fairy garden you have, how much space there is for accessories and plants, and where would be a good location.
Some good containers to choose for your fairy garden include pots, bird baths, tree stumps, and right in the ground. Here is more information about each of these types of containers.
Pots
One of the best types of containers to use for fairy gardens are pots.
You can go with just about any size, shape, or material of pot you like.
You can get a more authentic look by choosing an old clay pot, since it really adds a look of history to the fairy garden.
Pots are good because it gives you as much space as you need for the fairy garden, but also provides holes at the bottom for proper drainage.
Try to choose a clay pot since they tend to last a long time and can handle a lot of weather elements. These are very durable, so you can fill them with soil and plants of your choice without causing too much weight or stress on the pots.
Visit your local garden store or search online for a pot of your choice.
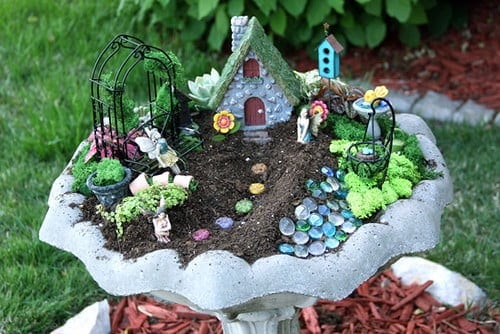
Bird baths
If you want to get a little more creative, you can go with a bird bath for your outdoor fairy garden.
This is an ideal choice if you want to put the fairy garden out in the middle of your garden as if in a natural landscape, instead of placing it on your patio or balcony.
It will already be standing up, so you don’t need to worry about placing it on a table or tree stump.
Bird baths are usually strong enough to handle as much as you need for the soil, plants, and figurines. It also adds a more unique look for your new fairy garden.
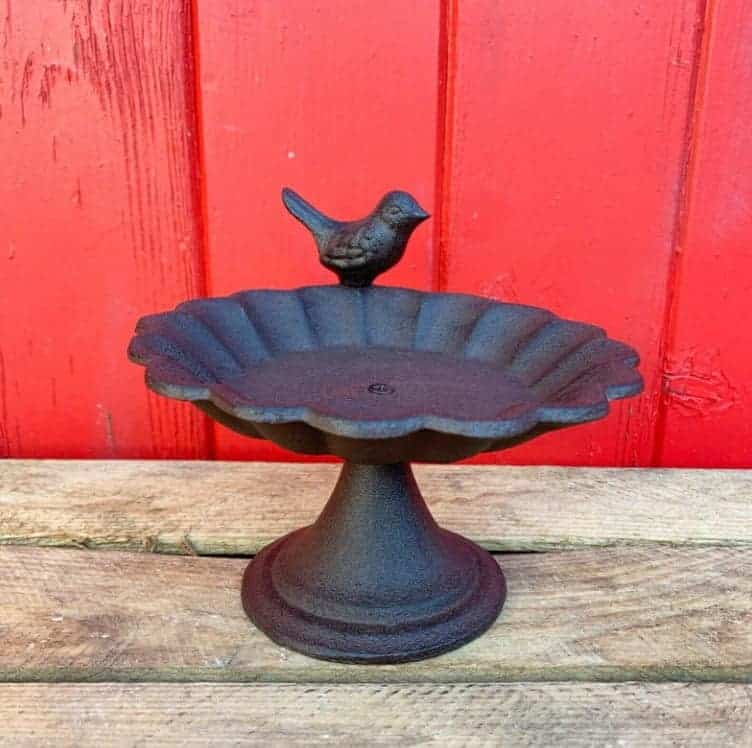
Consider a decorative bird bath that might show the signs of aging as it will often be more affordable.
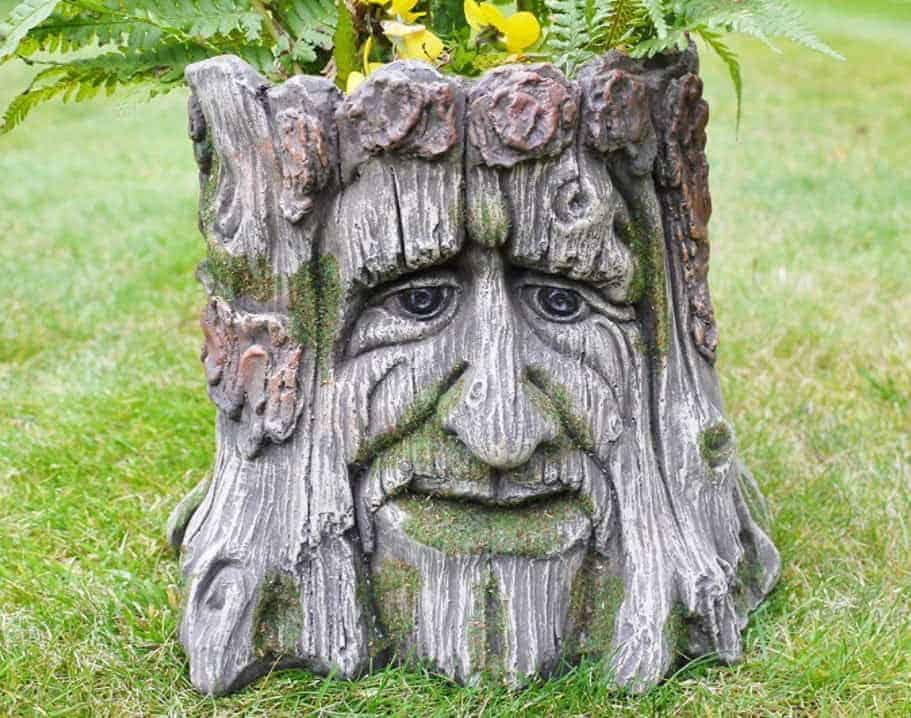
Tree stumps
Do you have a tree stump in your garden that you’re not sure what to do with? Why not turn it into a fairy garden!
This is a great way to make use of a tree stump after cutting down a tree.
It will be extra durable since it is still in the ground, and prevents you from having to worry about stump grinding or another way to remove the stump.
You will need to dig a hole in the centre of the stump so you can make room for the different fairy garden plants and fairy accessories you want to include.
Another benefit is that tree stumps tend to be large in diameter, which gives you a lot of space to let the creative juices start flowing.
Alternatively, you can have fun shopping around.
Resin tree stump planters look great!
In the ground
If you want your fairy garden to actually be in the ground, you can definitely make this happen!
Instead of a container, you are actually planting it into the ground.
You will use a small area of land where you want to add the fairy figurines, accessories, plants, and flowers.
You can also use a shallow container for the area, but not actually have it in the ground where pests can find it.
Step 2: Select the right soil and plants for your outdoor fairy garden
You’ve selected a theme, know what scale you want to work with, and have also chosen the container to use.
The next step in building your fairy garden is to select your soil and fairy garden plants.
This should be done before adding your fairies and other accessories as it is going to take up the most space.
Once everything is planted, you know how much room is left for your accessories.
Choose soil with organic matter
Since you want the fairy garden to appear as natural as possible, the soil isn’t just going to be any generic plant soil.
You should choose one that has a lot of organic matter, since it will look more like how you imagine a real fairy oasis to be.
Instead of just a uniform colour of soil, it should have dark and light parts with plenty of bits of plants and other organic matter.
This will not only look natural in the fairy garden, but it will keep your fairy garden plants nice and healthy.
Include real plants and trees
With a fairy garden, you don’t want to use fake foliage, otherwise it isn’t much of a garden!
Use real plants and trees, all in mini versions.
If you want to keep the fairy garden indoors or in a covered patio or sunroom, some good fairy garden plants are:
- False cypress
- Parlour palm
- Norfolk pine
- English boxwood
- Small succulents
For outdoor fairy gardens, the following fairy garden plants are ideal for your fairy garden:
- Ivy
- Wooly thyme
- Aloe succulents
- Primrose
- Mini roses
- Blue spruce
- Licorice plant
- Oregano
- White star creeper
- Baby’s tears
- Boxwood topiaries
In the end, you can choose any types of plants you want, as long as they are easy to care for and they are small enough to fit in your chosen container.
Step 3: Start adding fairies and decorations
Now comes the fun part! At this point in creating a fairy garden, you are already finished with the plants. It is finally time to add your fairies and decorations!
Let your imagination guide you in the right direction, considering the theme you are going with.
Remember, you don’t need a unique theme to have a beautiful fairy garden.
A traditional fairy garden is still tons of fun!
Add the big accessories first
It is a good idea to start with the larger accessories first, such as a fairy house, fence around the outside of the garden, or some furniture items. You might want to add some outdoor picnic furniture, an arbour, or little chairs and table made of twigs.
Try to choose accessories that look like something fairies would make if they were real, not something generic made of wood.
Try not to use furniture items for dollhouses, as it looks too perfect and modern. You really want it all to be fitting for an outdoor space.
Start adding decorations
Going down in size, you will then reach the accessories that are a little smaller.
Once the house is in place, you will be able to start adding decorations like stones scattered around the garden, acorns, or dried flowers and leaves.
You can find little figurines of mushrooms for a traditional fairy garden, or little umbrellas if you are going with the coastal theme.
You can create your own little garden within a garden with a small shelf that has small ceramic pots and topiaries.
Some items that work really well with fairy gardens include:
- Marbles and stones
- Lolly sticks
- Twigs
- Dried flowers and leaves
- Dried herbs
- Wire and steel
- Copper
- Gemstones
- Pine needles
- Gravel
- Moss
Set up your fairies last
Your fairies should be the last thing you add.
You won’t really know where to place them until the garden, house, furniture, and decorations have found their rightful place.
In addition to the fairies, you can also add small woodland creatures, birds, and other friends for the fairies.
Tips
While you may be more than ready to get your fairy garden started, it helps to know just a little bit more.
Here are some easy and helpful tips that will give you the fairy garden you want!
Add the house near the back. When you first start setting up the garden with accessories, you will be starting with large items, such as the house. While it can sometimes be difficult coming up with a good layout, a good rule of thumb is to place the house first. Put it near the centre-back of the container to get started with your layout.
Use pebbles or marbles for paths. Having a path or two in the fairy garden really brings it up a level. You can make paths with just about any material you find, those flat marbles and pebbles are ideal. You can get these in a lot of different colours, from cool blue and purple, to natural shades like yellow, green and brown.
 “Fairy Gardening Pathways” by Chiot’s Run is licensed under CC BY-NC 2.0
![]()
![]()
![]()
Create a pond. A fun feature to have in the fairy garden is a pond. This is a great place to have a fairy standing, overlooking it. You can use any type of blue or green materials you find, from pieces of glass to marbles, stones, and even plastic beads. Alternatively, fairy ponds are available to buy.
We love these magical fairy ponds on Etsy

Use moss for natural landscape. In addition to the plants you will have chosen for your natural landscape, you can improve it by adding some moss. Take some scissors to cut the moss into small pieces, the scatter it around the garden, such as going around the fairy house, in front of mushrooms, or in front of the fence.
 “Fairy garden 1” by MaryLouiseEklund is licensed under CC BY-NC-SA 2.0
![]()
![]()
![]()
![]()
Free fairy garden colouring page
Julie over at Sum of Their Stories has designed a gorgeous fairy garden colouring page which you can download for free.
Click here to visit her blog and download.
Following the steps and tips will help you to have a beautiful and creative outdoor fairy garden that everyone will enjoy.