I’m sharing today how you can use the Japenese art of folding squares of paper into shapes to make your own origami bookmark.
A book lover can never have enough bookmarks!
Once you have mastered the paper folding technique, you will be making a bookmark in a minute or less.
Jera’s Jamboree receives payments for affiliate advertising. This is at no extra cost to you. As an Amazon Associate I earn from qualifying purchases. As a Cratejoy affiliate I earn if you click on a link and shop from my link. Please see my disclosure policy for more information.
The benefits of a making an origami bookmark
- You only need paper and your hands.
- It isn’t expensive and you can make it as personal as you want to, stamping it with your own creativity.
- The bookmark doesn’t take up a lot of room and it will firmly keep your place, even when you put it in your bag.
- When you’re reading, you can place them on any surface as they lay flat (I often put mine on the arm of the sofa and I know it will likely stay there).
- Children feel proud of things that they’ve made and it might boost a waning interest in reading.
- You could have all sorts of fun doodling and decorating if you decide to make your own bookmark. Make it a family time to make and decorate.
- Giving a book as a gift? Handmade bookmarks give it that special touch.
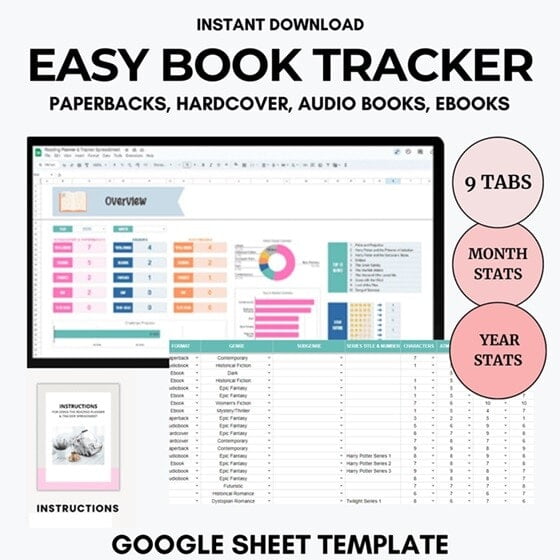
Track of your Book Stats up to 2030 and Beyond
With its easy-to-use layout and user-friendly design, this Google Sheet Template will help you organize and keep track of your reading.
This spreadsheet holds all the information you’ll need in one place for paperbacks, hardbacks, eBooks and audiobooks. As well as the usual stats of Title, Author, Date Published and reading progress, this book review template has data and ratings for the following:
- series title and number
- characters
- atmosphere
- writing
- plot
- pacing
- world building
- enjoyment
- grading / star rating
Download your copy today and keep a record to transform your love of books into an organized and enriching experience.
Equipment
The paper doesn’t have to be a specific type of paper as any will work, however the heavier the paper the more solid and long lasting it will be.
I use paper crafting paper which is heavyweight 160-200GSM, acid and lignin free.
Colourful origami paper would also be ideal to use.
Instructions
Step 1
You will need a square piece of paper ideally sized 15cm x 15cm

Step 2
Make sure you have it placed in a diamond shape to work the folds.

Step 3
Fold the bottom corner to the top corner.

Step 4
Take the bottom right corner to the top corner of the triangle.

Step 5
Take the bottom left corner to the top corner of the triangle.

Step 6
Open it up again and bring the top point to the centre at the bottom.

Step 7
Take the right side bottom corner towards the top of the triangle.

Step 8
Tuck it behind the fold you have just made.

Step 9
Repeat on the left side.

Your finished bookmark should look like this.

Whether you want to add to your own bookmark collection or thinking of giving as a token of thanks, have a go and make your own origami bookmark.
